AWS Provider Configuration
The AWS provider configuration gives you the option to authenticate through OIDC, IAM Roles, or access keys as well as options for each authentication method:
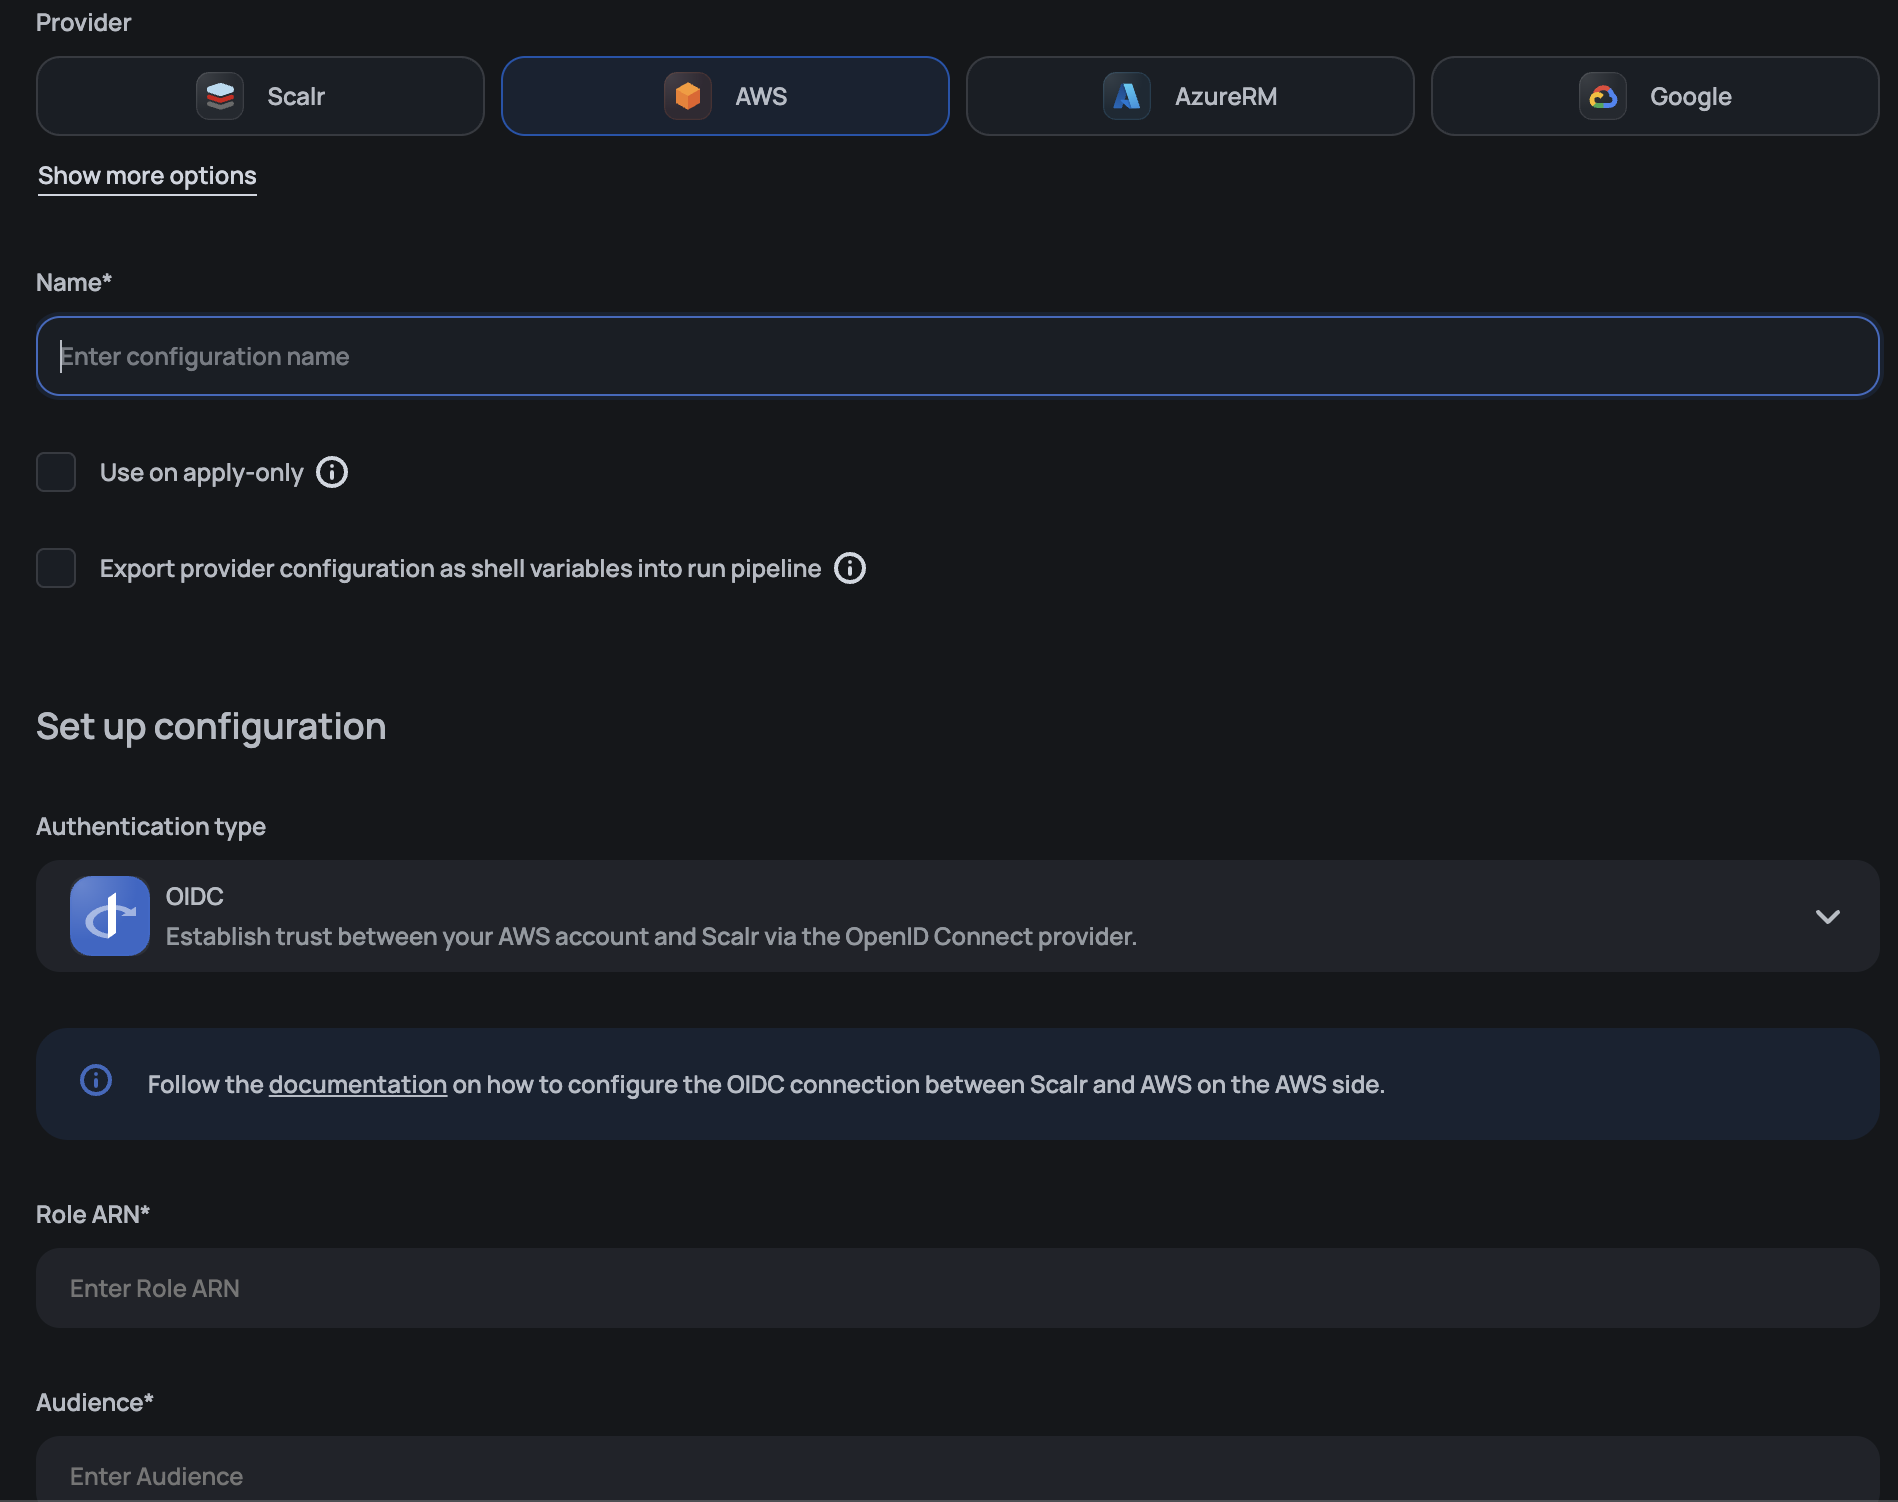
The configuration can be set up in the UI, below you will find examples of how to do this with the Scalr provider.
Plan vs Apply Credentials
The "Use on apply-only" option restricts the configuration to the apply phase. By linking separate provider configurations to a workspace, you can enforce credential separation between plan and apply. For example, using read-only credentials during plan and write credentials only during apply. This supports a least-privilege security model, reducing the risk of unintended changes or misuse of privileges.
Export Provider Configurations
In the provider configurations page, you will see the option to "Export provider configurations as shell variables into the run pipeline." There are a few use cases when this option should be checked for AWS:
- If you are using the AWS CLI in a Terraform workspace and want to authorize both the CLI and Terraform providers using a single mechanism, you can create a unified authorization approach.
- If you do not want to rely on Scalr to assume temporary credentials for provisioning infrastructure in AWS, you can create a single role that will be assumed instead. These temporary credentials can then be used to assume other hardcoded roles in the source code.
- If you have multiple AWS Terraform provider blocks in the source code, but they require only a single credential set.
The limitation of using this option is that only one configuration can be used in the workspace.
OIDC
The OIDC authentication method will create temporary access keys for each run, which removes the need to store static credentials in Scalr. Unlike the IAM role method, it doesn't require trusting the Scalr-managed AWS account or an internal IAM user. The only thing you have to trust is the Scalr identity provider.
Also, it gives you the ability to configure in AWS trust policy which workspaces or environments are allowed to consume temporary keys based on their names.
AWS steps
Create the identity provider
As a first step, register Scalr as the identity provider in AWS. While adding the new provider you need to:
- Select the provider type: OIDC.
- Enter the provider URL: https://scalr.io (this must be an exact match).
- Click on the "Get thumbprint" button to verify the thumbprint.
- Set the Audience name. While creating it you can only set a single audience, but after the provider is created, you can add additional audiences to the list. Later, this audience will be used while creating a provider configuration in Scalr.
After the role is created, an additional assertion can be added to limit which environments can use the role. Follow these steps to add the assertion:
- Open the
Trust Relationshipstab in the IAM role dashboard and click theEdit trust policybutton - Then in the condition section, add the following snippet:
"StringLike": {
  "scalr.io:sub": "account:<account-name>:environment:<environment-names-prefix>:workspace:<workspace-names-prefix>-prefix>"
}
Replace the <account-name>, <environment-names-prefix>, and <workspace-names-prefix> with the actual names of the account, environment, and workspaces that will use the temporary credentials. Wildcards * are supported.
Here's a full example of the trust policy:
{
	"Version": "2012-10-17",
	"Statement": [
		{
			"Effect": "Allow",
			"Principal": {
				"Federated": "arn:aws:iam::1111111111:oidc-provider/scalr.io"
			},
			"Action": "sts:AssumeRoleWithWebIdentity",
			"Condition": {
				"StringEquals": {
					"scalr.io:aud": "my-awesome-audience"
				},
				"StringLike": {
					"scalr.io:sub": [
            "account:mycorp:environment:development-*:workspace:*",
            "account:mycorp:environment:qa-*:workspace:*",
          ]
				}
			}
		}
	]
}
Follow the documentation on how to complete the steps above using different interfaces (console, aws CLI, or API).
Create an IAM role
The next step is to create a new role and trust the created identity provider in the role's trust policies. To create the IAM role that allows creating temporary keys using OIDC, follow these steps:
- Select Trusted entity type: Web identity.
- Select the Identity provider: scalr.io
- Select the Audience from the list you configured in the previous step.
- Then assign the required permissions set and complete the role creation.
Follow the documentation on how to configure the IAM role with the OIDC trusted entity type.
Scalr steps
After the IAM role is created in AWS, navigate to the Account scope > Provider configurations. You can either create a new provider configuration or update an existing one. Please follow these steps to register an OIDC-trusted role in Scalr:
- Select the Authentication type: OIDC
- Enter the IAM role ARN of the created role.
- Enter the Audience you selected during the role creation.
After the provider configuration is created, share it with the environments and link it to workspaces.
Provider example
resource "scalr_provider_configuration" "aws-oidc" {
  name                   = "aws_oidc_example"
  account_id             = "acc-sscctbisjk12345"
  export_shell_variables = false
  environments           = ["*"]
  aws {
    credentials_type = "oidc"
    role_arn         = "arn:aws:iam::11111111111:role/test-oidc"
    audience         = "my-awesome-audience"
  }
}
Service Trusted Entities
Service-trusted entities give you the ability to add roles with AWS service trusts. In this case, a role is added to a Scalr agent and no credentials are needed in Scalr at all. This allows using different roles for different workspaces on a single server used for the agent. This will not require wide permissions assigned to the VM instance profile.
For example:
resource "scalr_provider_configuration" "aws" {
  name                   = "aws_service_example"
  account_id             = "acc-sscctbisjk12345"
  export_shell_variables = false
  environments           = ["*"]
  aws {
    account_type         = "regular"
    credentials_type     = "role_delegation"
    trusted_entity_type  = "aws_service"
    role_arn             = "arn:aws:iam::670025221234:role/service_agent"
  }
}
Credential Source
When an AWS provider configuration uses a Service trusted entity type, Scalr needs to obtain an initial set of AWS credentials before it can assume the configured role. The source of those initial credentials depends on where the Scalr agent is running — for example, an EC2 instance exposes credentials through the instance metadata service, while an ECS task exposes them through a container credentials endpoint.
The credential_source setting lets you choose which AWS credential provider the agent uses for this initial step, so the same Scalr agent deployment pattern works whether you run it on EC2, ECS, or another supported runtime.
Supported Values
| Value | When to use |
|---|---|
Ec2InstanceMetadata | The Scalr agent runs on an EC2 instance with an attached IAM instance profile. This is the default. |
EcsContainer | The Scalr agent runs as an ECS task and obtains credentials from the ECS task role via the container endpoint. |
The setting applies only when the provider configuration uses the Service trusted entity type (trusted_entity_type = "aws_service"). It has no effect on OIDC, Scalr Account, or Account trusted entities, which obtain credentials through other mechanisms.
Resolution Order
At run time, Scalr resolves the AWS credential source in the following order:
- The
credential_sourcevalue set on the provider configuration (UI, API, or Terraform). - The
SCALR_AWS_SERVICE_CREDENTIALS_SOURCEenvironment variable on the agent (agent version 0.54.0 and later). Ec2InstanceMetadataas the final default.
The provider configuration always takes precedence over the environment variable. You can continue to use the environment variable for accounts or agents that have not yet been migrated to the new setting.
Scalr Account Trusted Entity
Scalr account trusted entity credentials use IAM roles that have a trusted relation with
a Scalr AWS account, specifically 919814621061. No keys are needed, just the trust.
resource "scalr_provider_configuration" "aws" {
  name                   = "aws_account_example"
  account_id             = "acc-sscctbisjk13345"
  export_shell_variables = false
  environments           = ["*"]
  aws {
    account_type        = "regular"
    credentials_type    = "role_delegation"
    trusted_entity_type = "aws_account"
    role_arn            = "arn:aws:iam::6700252123456:role/user"
    external_id         = "dOtbGEdaiXD12345"
  }
}
The role must be created in AWS and the ARN of the role entered into
Scalr as seen above.
Please refer to IAM Role Delegation for details of setting up the role with a trusted relationship to the Principal account shown on the credentials screen. The external ID shown must be used in the role configuration.
{
   "Version": "2012-10-17",
   "Statement": [
       {
           "Effect": "Allow",
           "Principal": {
               "AWS": "arn:aws:iam::919814621061:user/scalr-saas"
           },
           "Action": "sts:AssumeRole",
           "Condition": {
               "StringEquals": {
                   "sts:ExternalId": "<external-id>"
               }
           }
       }
   ]
}
Account Trusted Entity
Account trusted entities are different than the Scalr account trusted entities in that you are not adding the Scalr AWS account as the trusted entity. In this case, you are creating an AWS user, creating a new role, sharing the rule trust with the user and then adding the user with the credentials in Scalr. See more on IAM Role Delegation.
resource "scalr_provider_configuration" "aws" {
  name                   = "aws_account_example"
  account_id             = "acc-sscctbisjk13345"
  export_shell_variables = false
  environments           = ["*"]
  aws {
    account_type        = "regular"
    credentials_type    = "role_delegation"
    trusted_entity_type = "aws_account"
    access_key          = "<access-key>"
    secret_key          = "<secret-key>"
    role_arn            = "arn:aws:iam::6700252123456:role/user"
    external_id         = "dOtbGEdaiXD12345"
  }
}
Review the full provider configuration documents on how to link the provider configuration to an environment and workspace here
AWS Default Tags
AWS default tags automatically apply tags to all AWS resources managed by the provider configuration from which the tags are created. These tags are merged with user-defined tags during Terraform runs, ensuring compliance with organizational tagging policies.
The feature supports two merge strategies:
- Skip: User-defined tags take precedence over provider default tags when conflicts occur
- Update: Provider default tags override user-defined tags when conflicts occur
Provider example
resource "scalr_provider_configuration" "aws" {
  name                   = "aws_with_default_tags"
  account_id             = "acc-sscctbisjk12345"
  export_shell_variables = false
  environments           = ["*"]
  aws {
    credentials_type = "oidc"
    role_arn         = "arn:aws:iam::11111111111:role/production-role"
    audience         = "production-audience"

    # AWS Default Tags configuration
    default_tags {
      strategy = "update"
      tags = {
        "Environment" = "production"
        "CostCenter"  = "engineering"
        "Owner"       = "platform-team"
        "ManagedBy"   = "scalr"
      }
    }
  }
}
Default tags are applied during the Terraform planning phase and work with multiple provider configurations via aliases, allowing different tag sets for different regions or accounts.
Updated 3 months ago