JumpCloud
NoteScalr supports all SAML 2.0 providers; this is just an example of a commonly used one.
Overview
In JumpCloud, start by clicking SSO Applications and select Custom Application. Select Manage Single Sign-On(SSO) and select the SAML option:
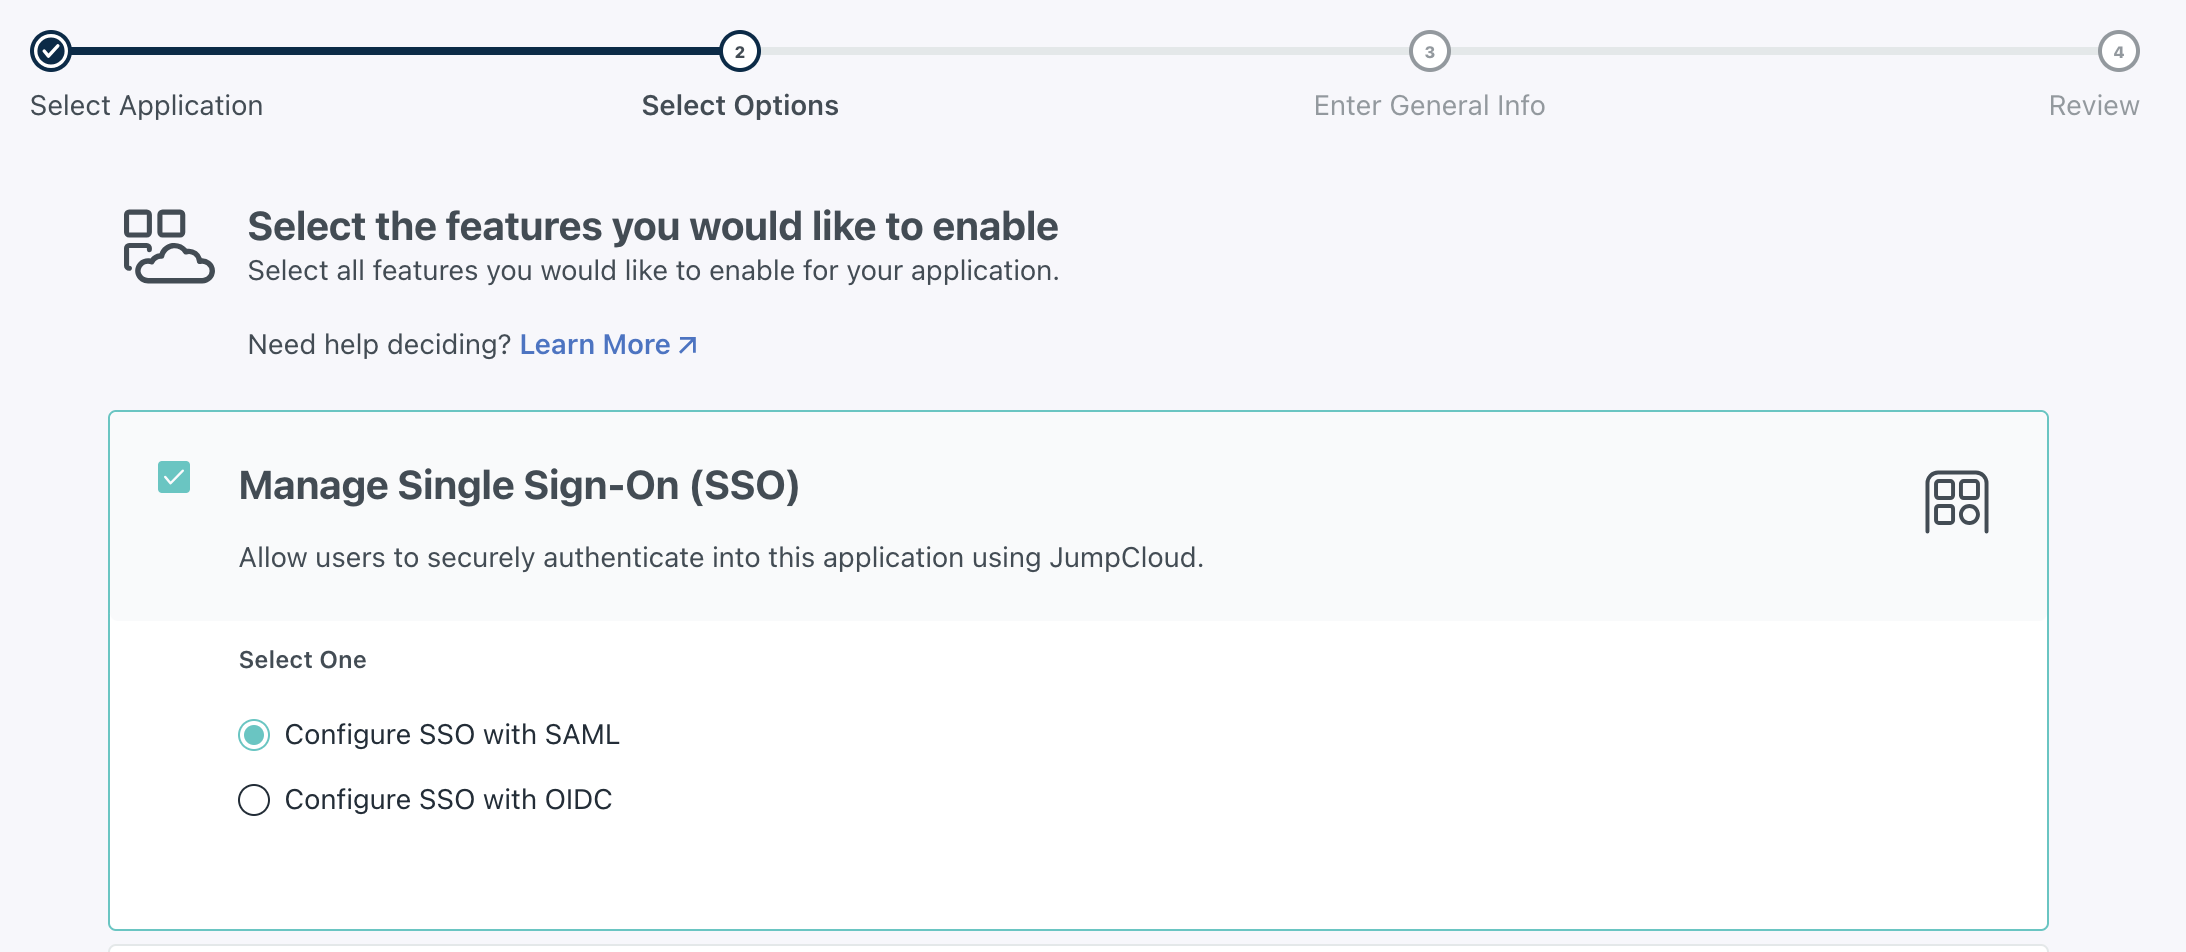
Enter the Display Label and a description of your choice. In the configuration of the application in JumpCloud, add the IdP Entity ID, which can be pulled from the Scalr UI:
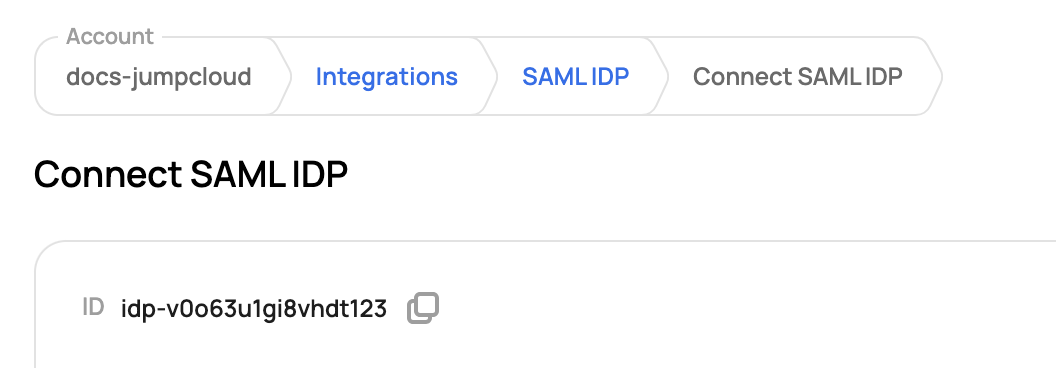
Enter the ID into JumpCloud:
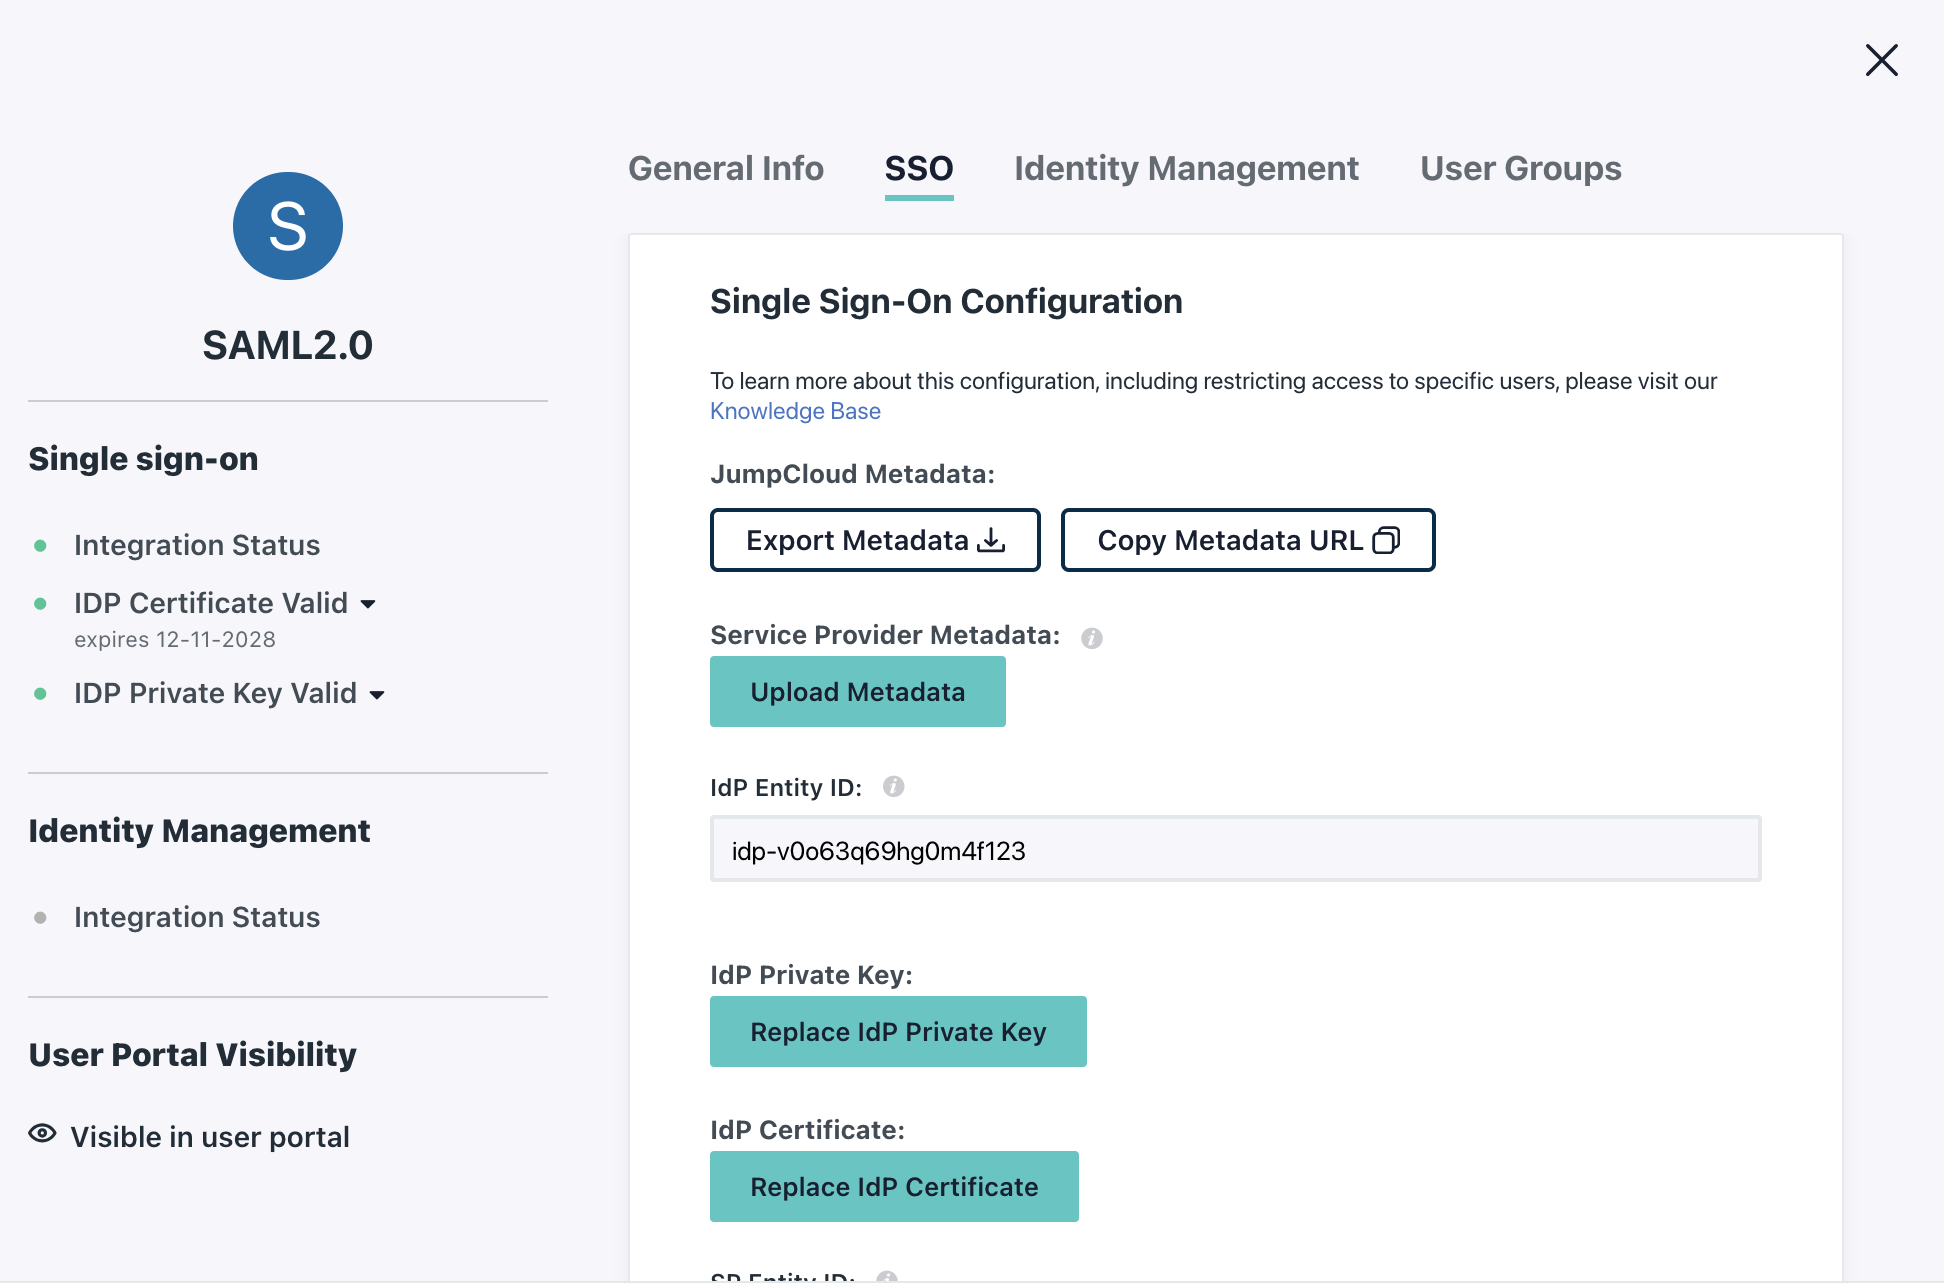
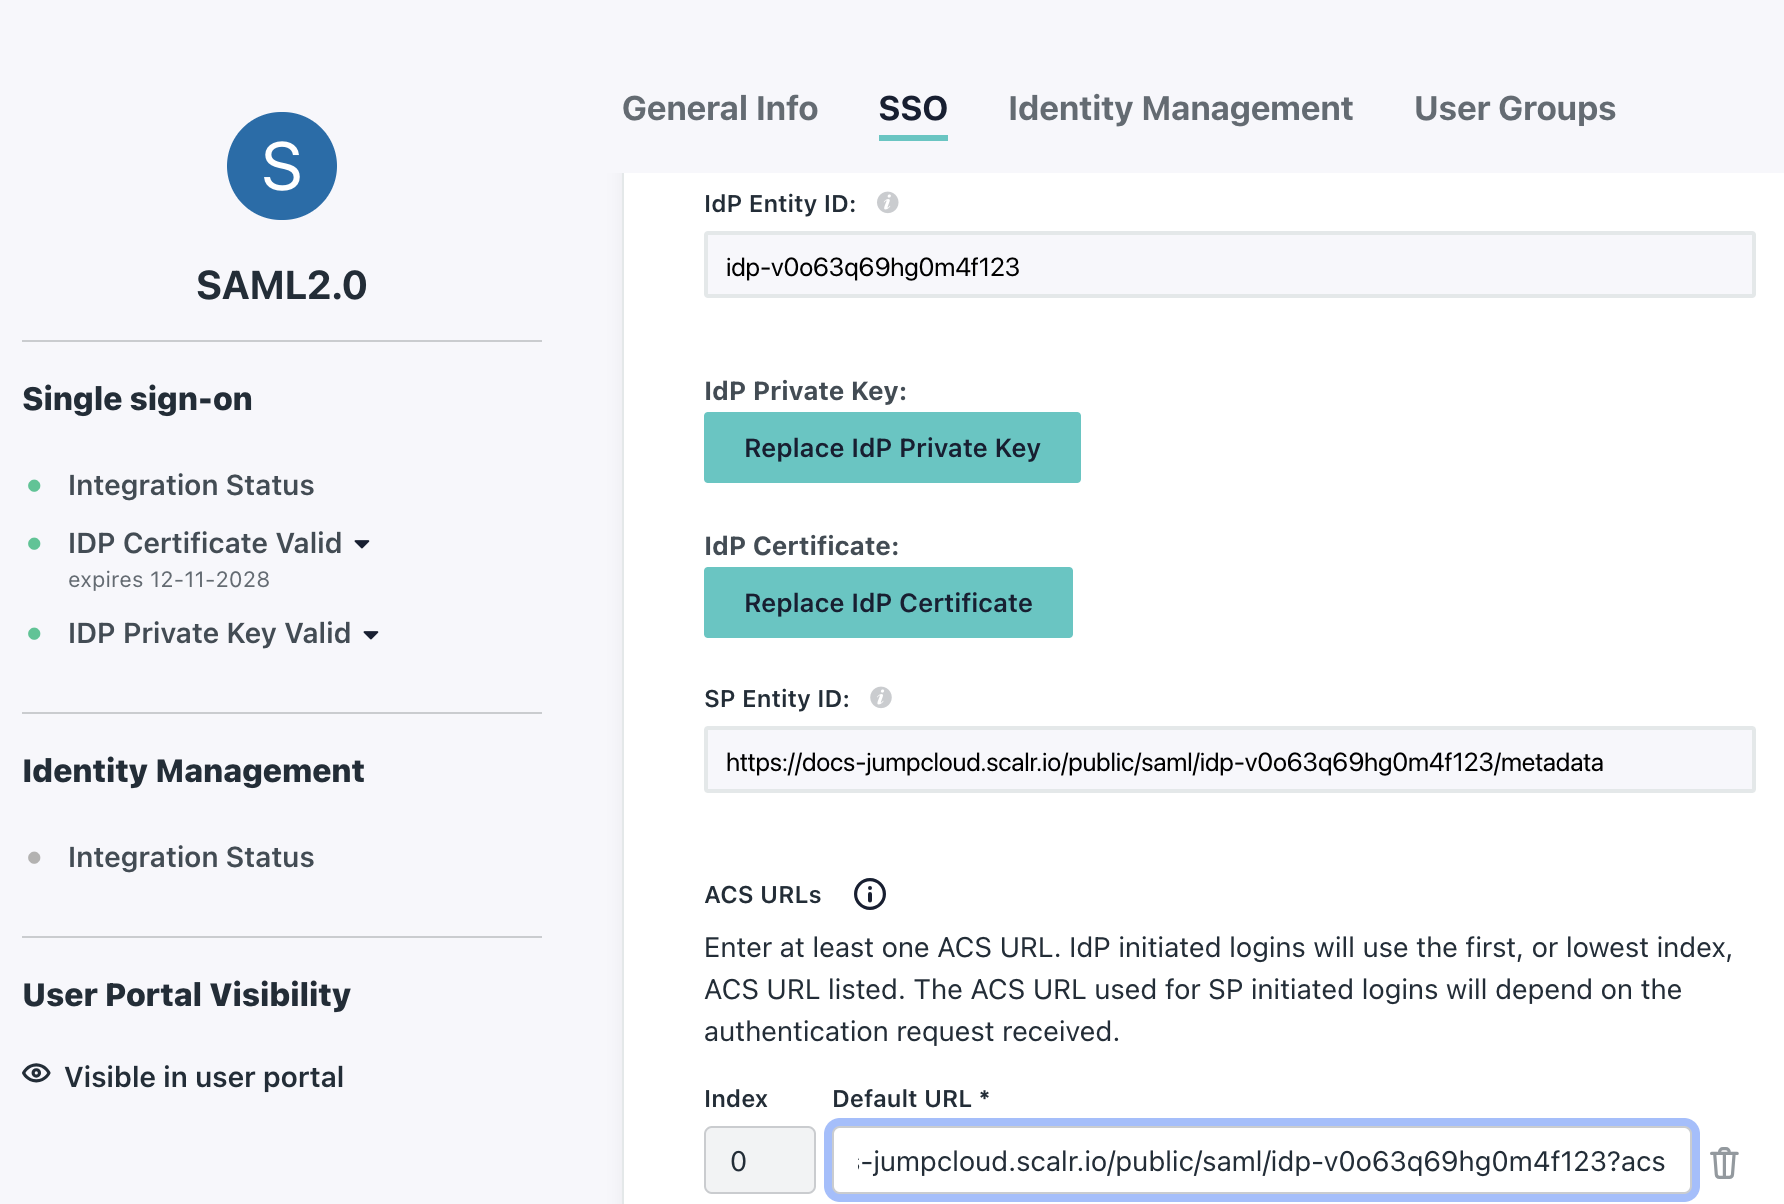
The SP Entity ID in JumpCloud can be pulled from Scalr, in Scalr it is the SP Endpoint
The ACS URLs in JumpCloud can also be pulled from Scalr, in Scalr it is the Single sign on URL
The LoginURL in JumpCloud is also the Single sign on URL provided in Scalr.
The remaining settings in JumpCloud can be left as the default unless your organization requires them to be changed.
In Scalr, the following settings should be applied:
First, the IDP single sign on service must be set and it is provided by JumpCloud as the IDP URL in the application settings. The IDP entity ID is the same as the general IDP ID provided by Scalr. The last step in the general settings is to paste in the IDP X509cert which is provided by JumpCloud. Here is a working example of the general settings in Scalr:
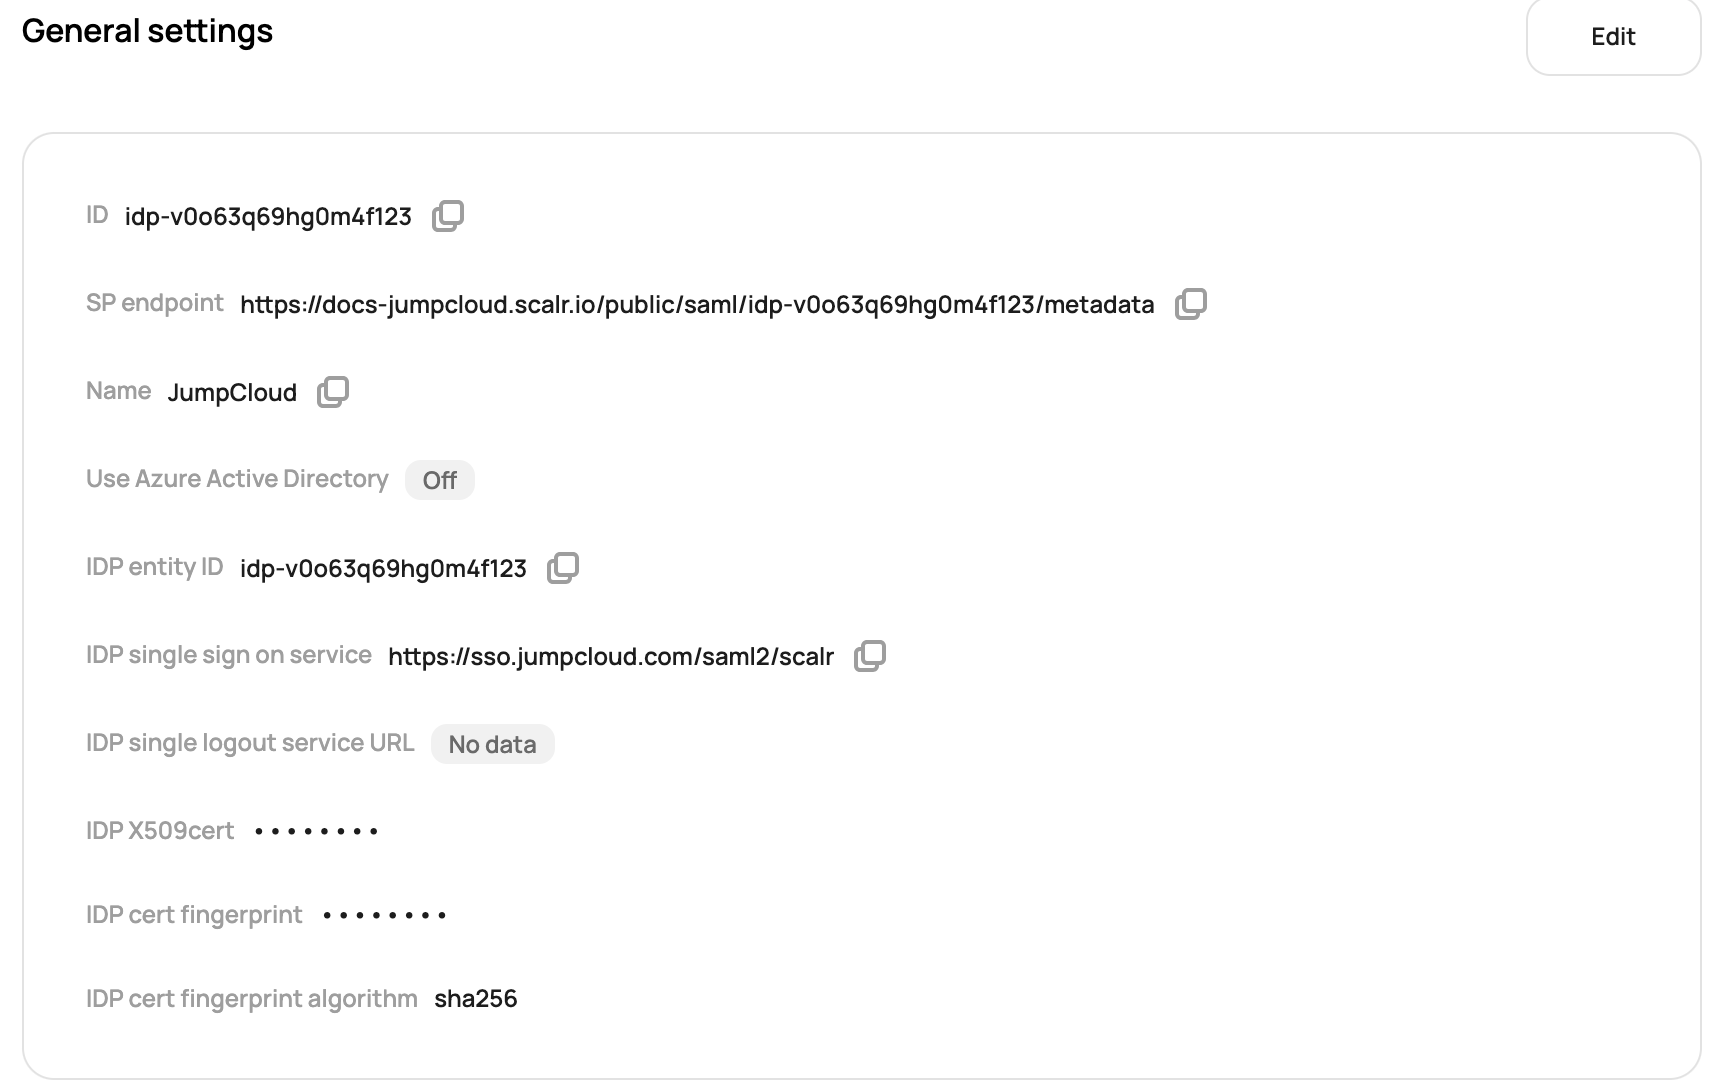
No changes should be needed in the Security section in Scalr, here is a working example:
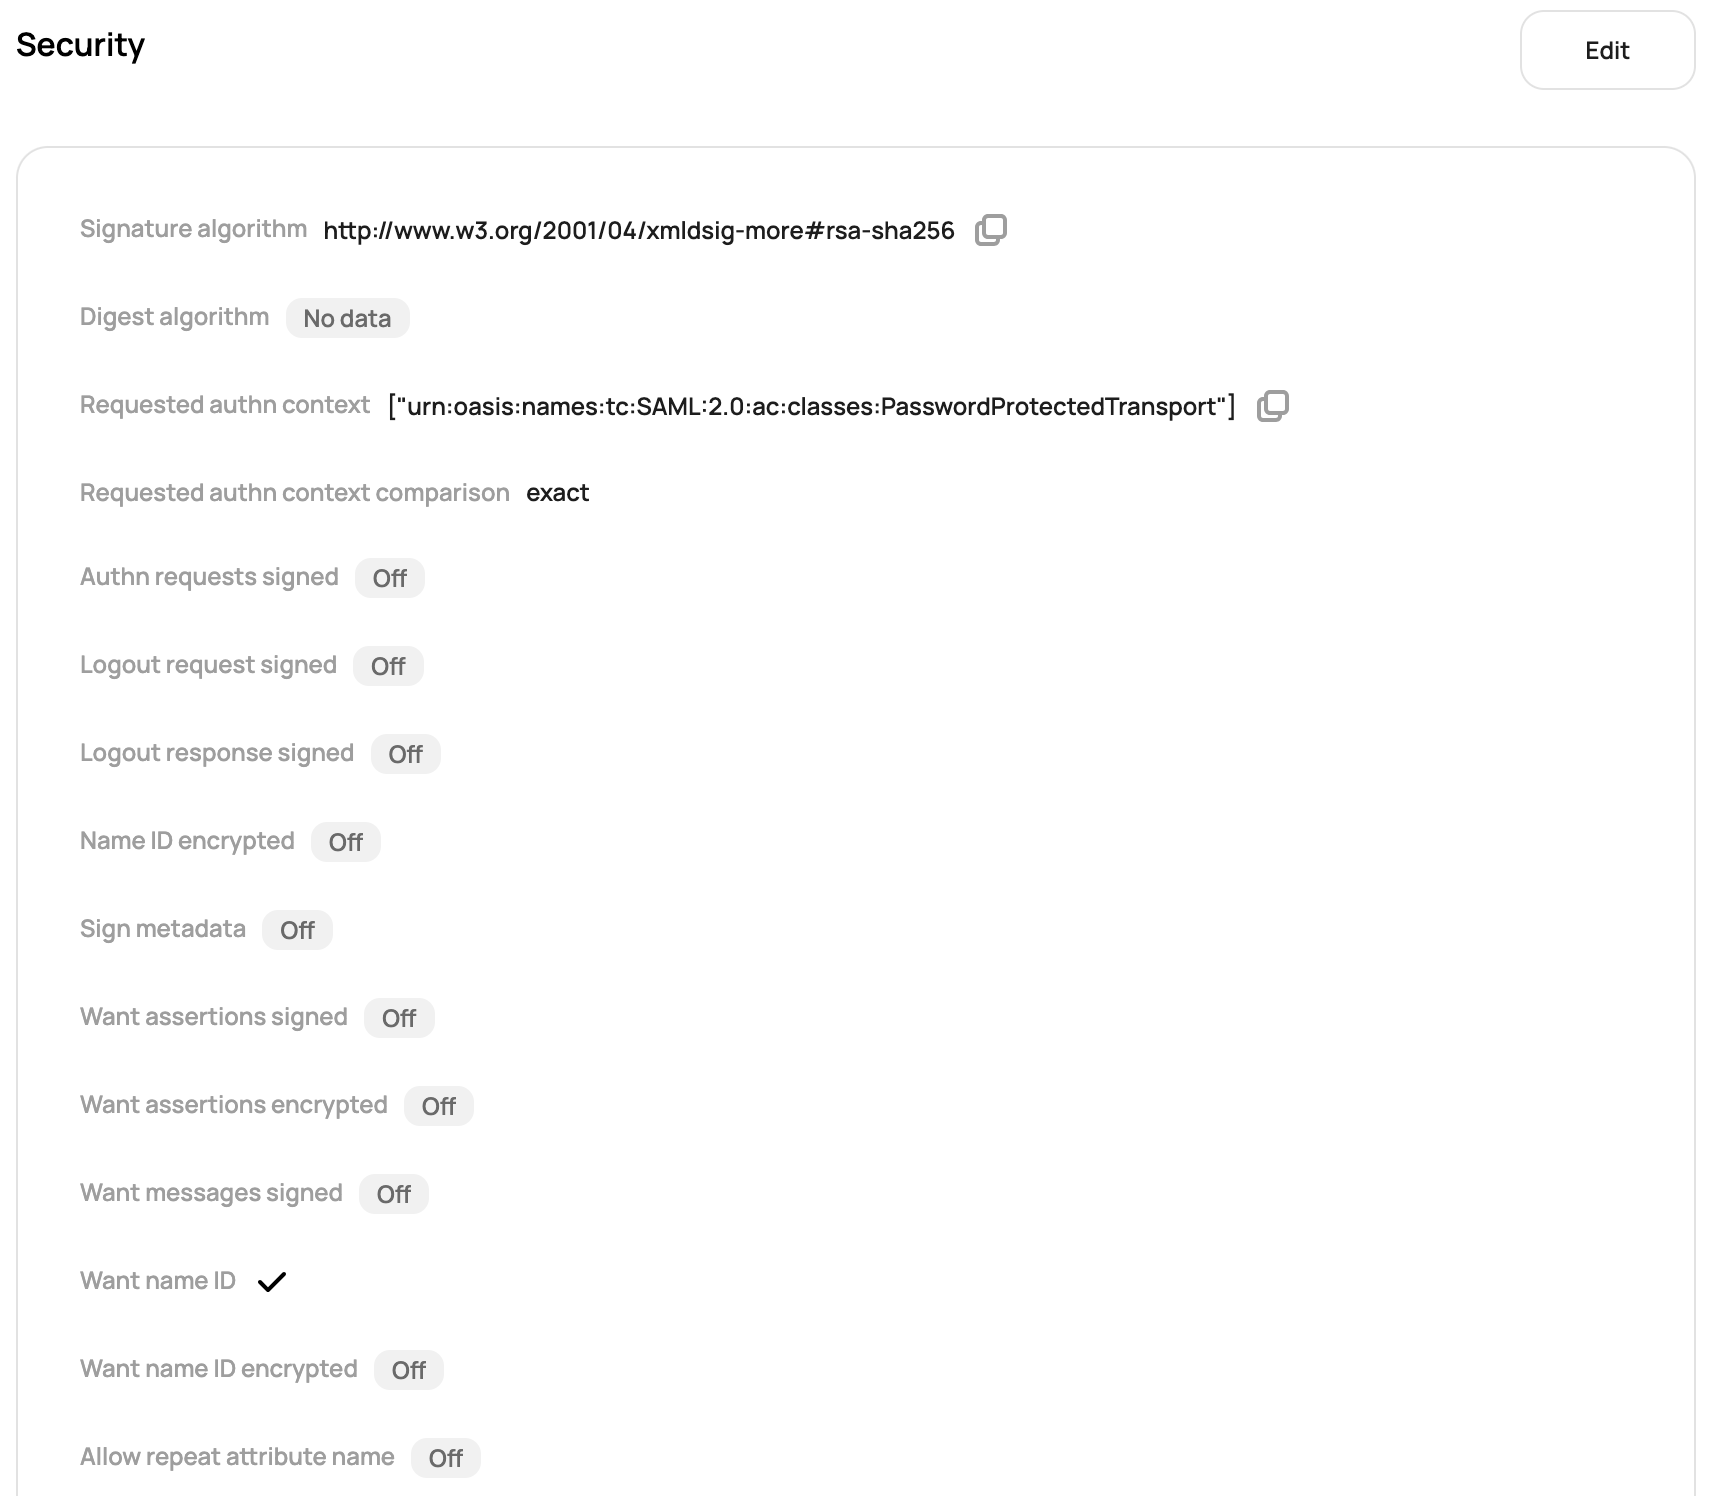
In the mappings section, you must supply the Groups. In this example, we have the include group attribute set to memberOf in JumpCloud (this may differ based on your setup):

In Scalr:
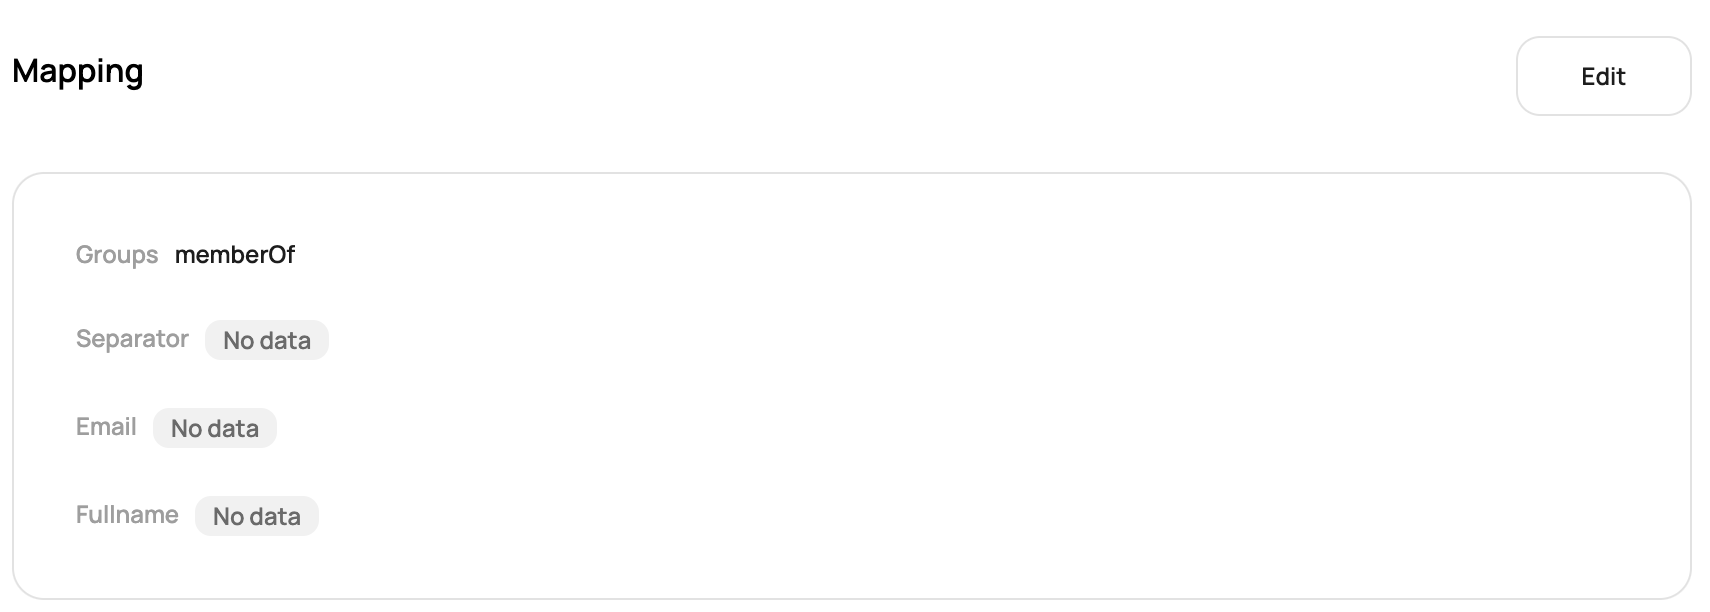
Lastly, in the advanced section, the only update that you may need to make is to update the SP name ID format based on what you have in JumpCloud. In this example, we left the default in JumpCloud and updated Scalr to urn:oasis:names:tc:SAML:1.0:nameid-format:unspecified:
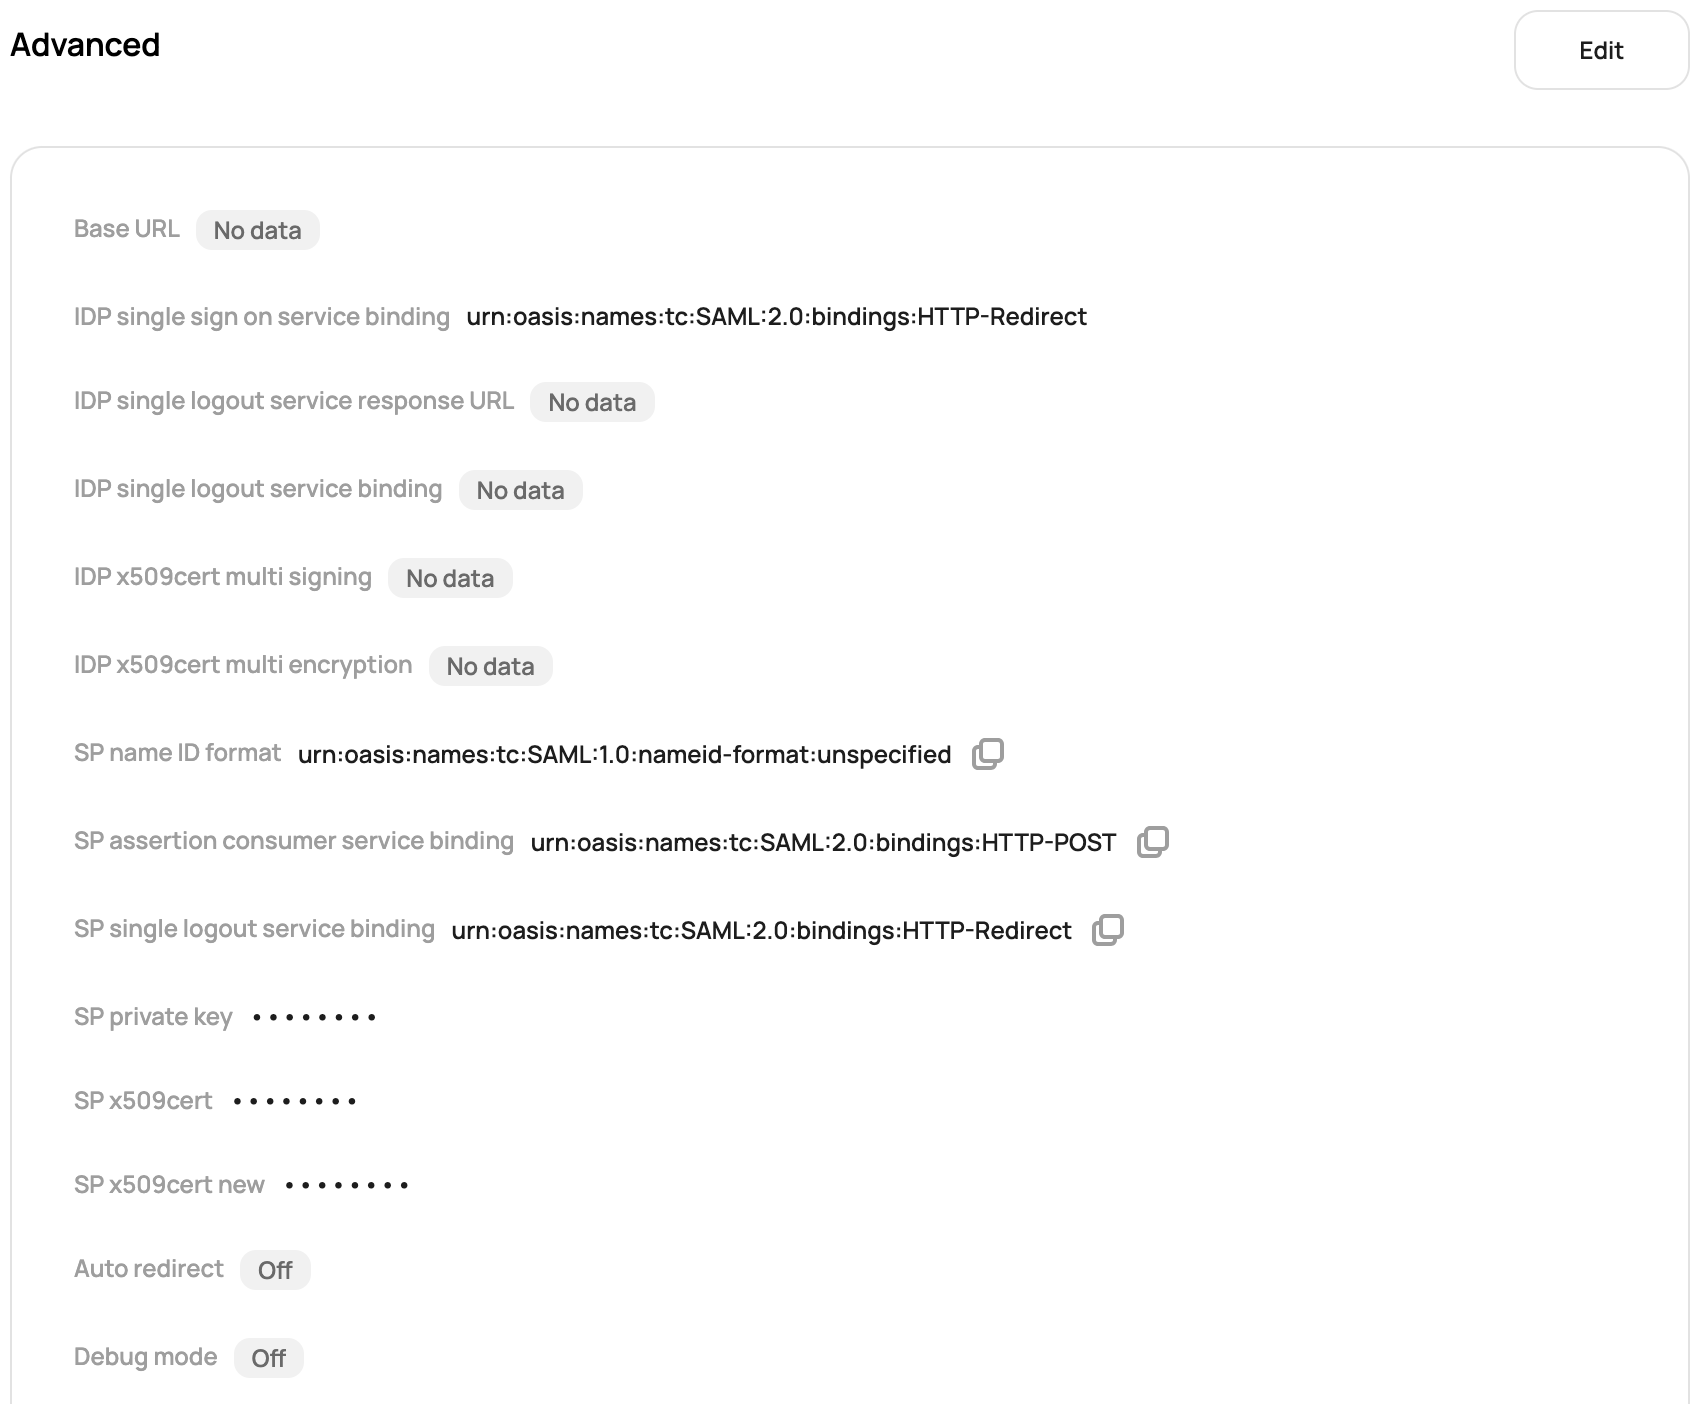
You can now save and verify the connection.
Updated 6 months ago
