Okta
Configure Okta
In Okta, go to the admin portal, select applications, and then Browse App Catalog.

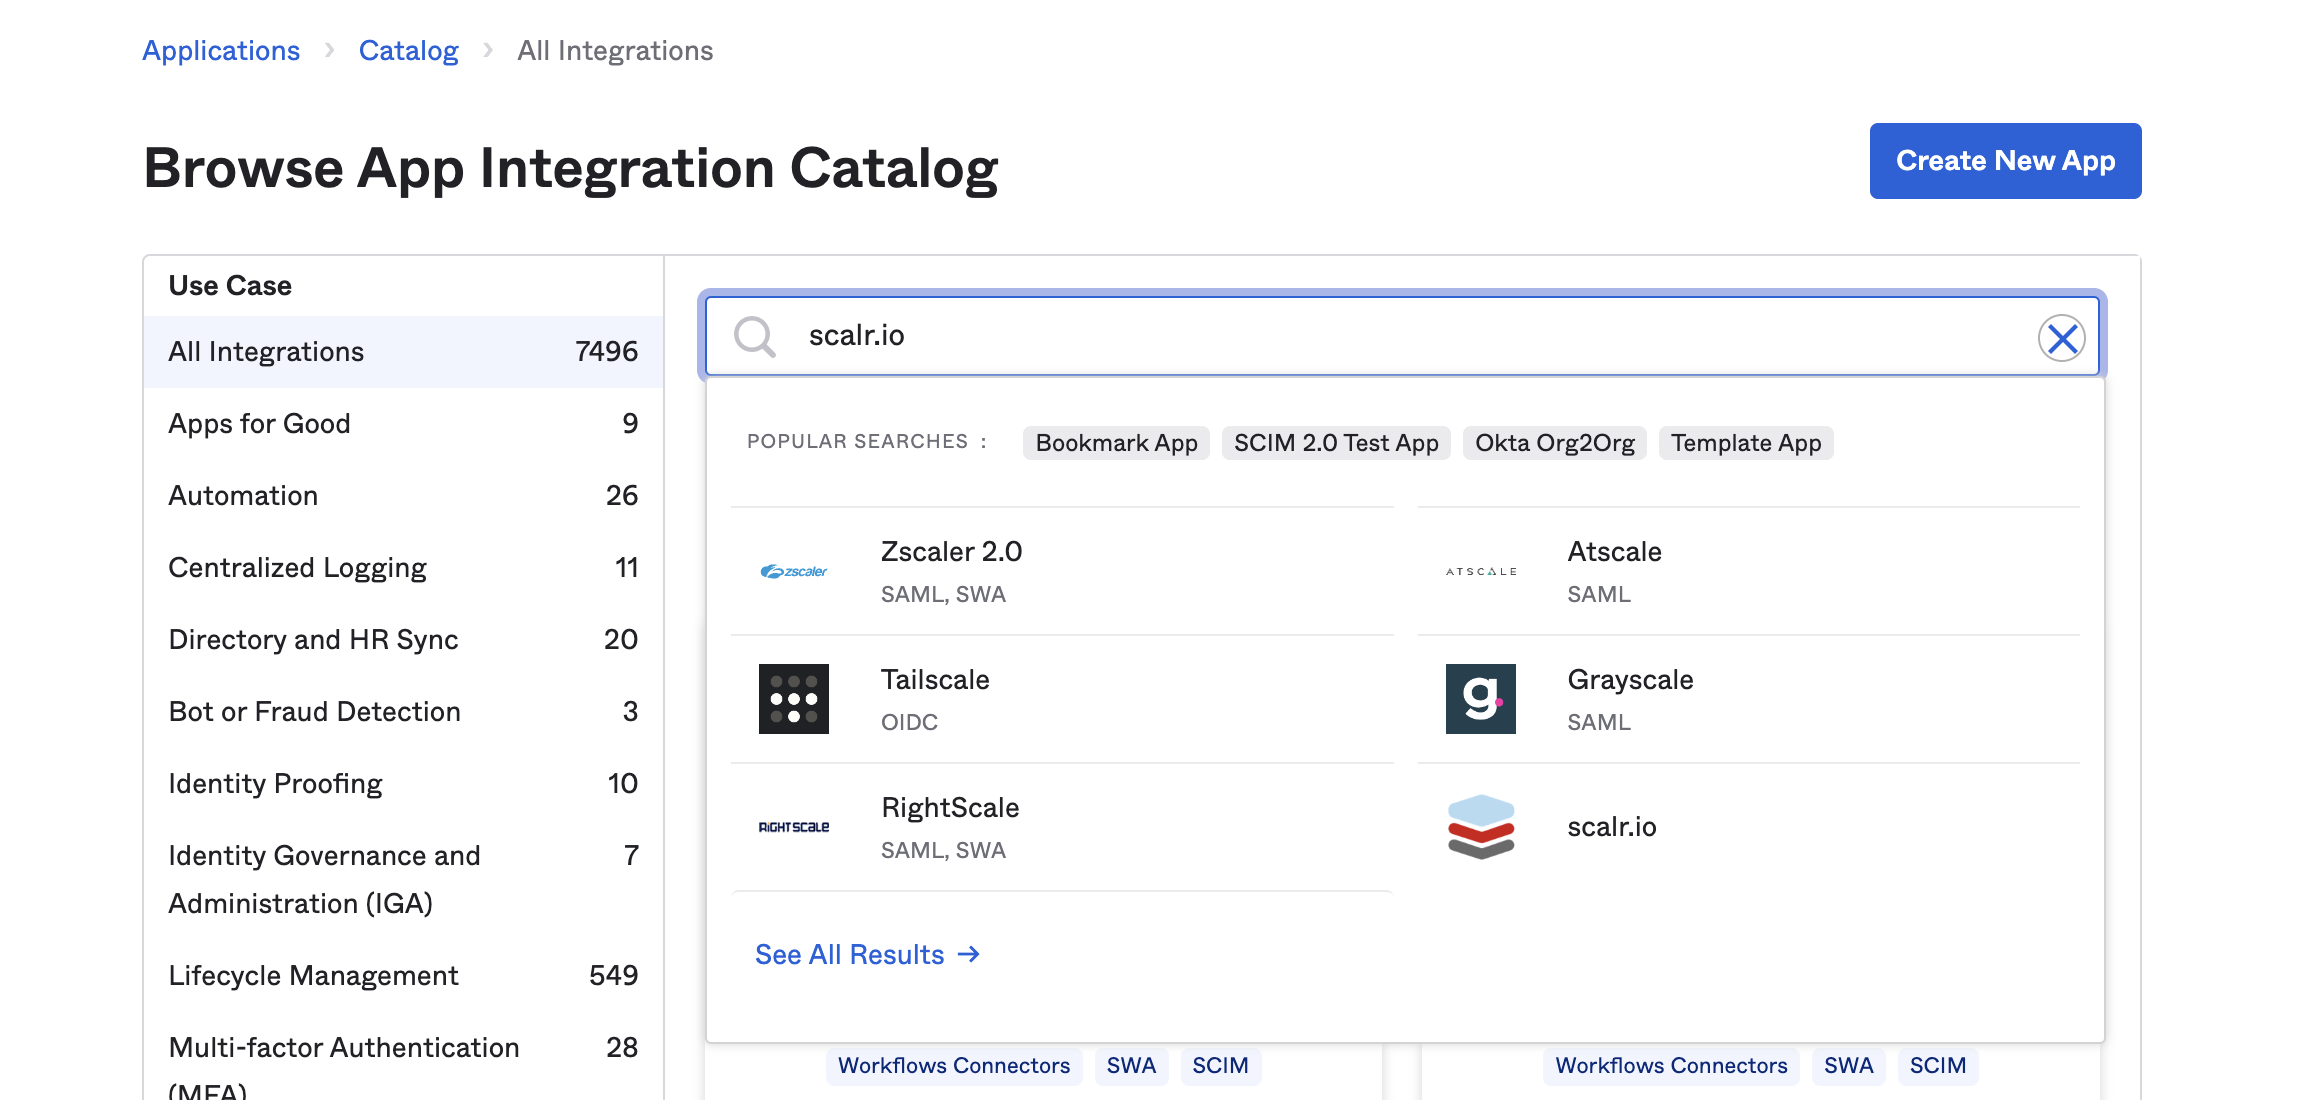
Browse the app catalog for Scalr:
Select the Add Integration option to proceed to configuration.
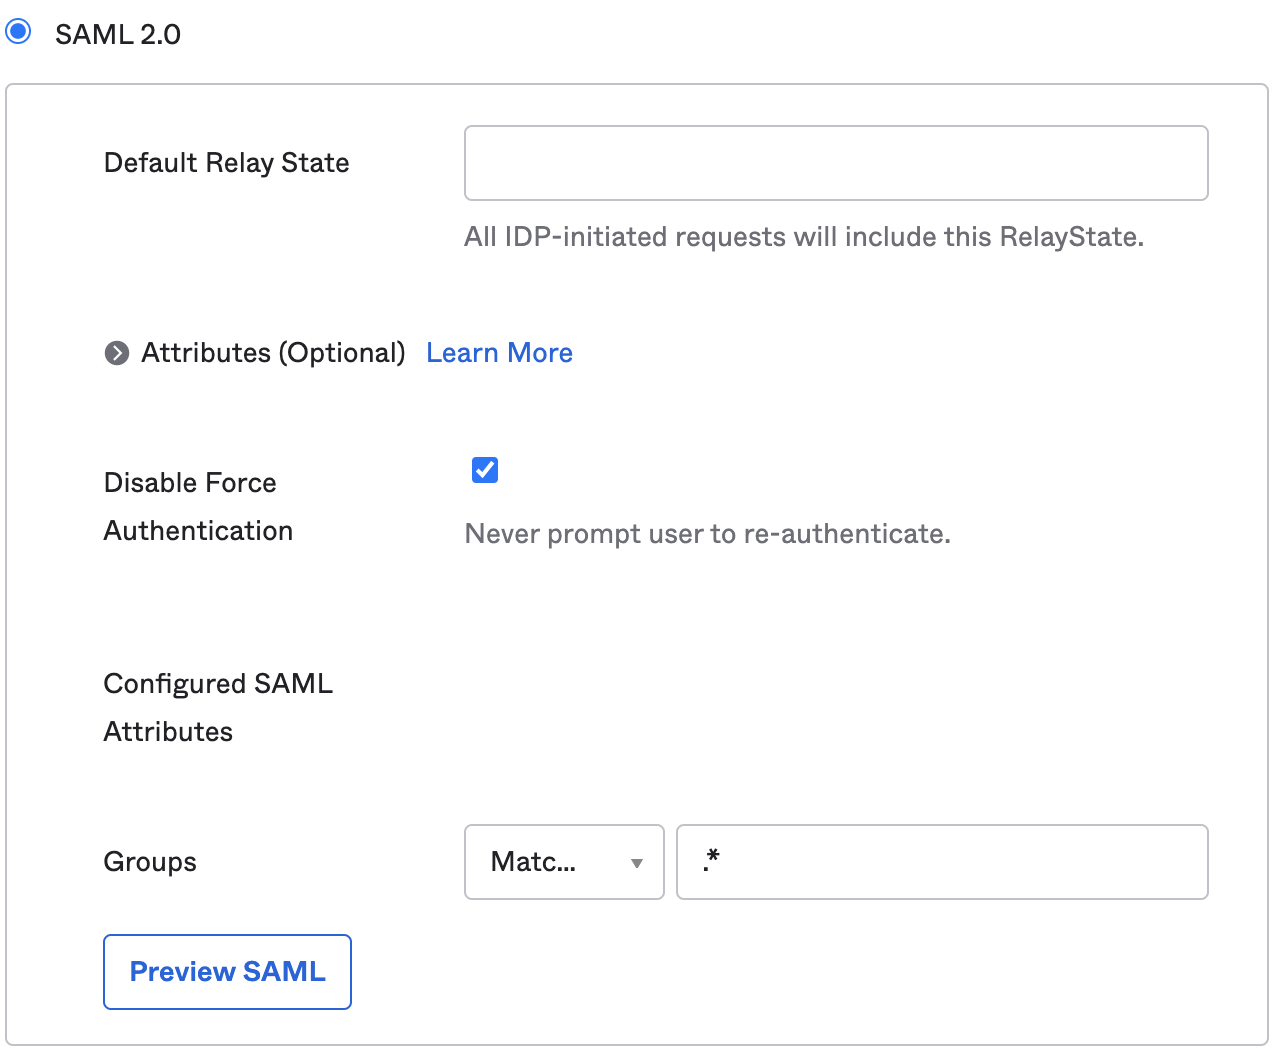
Under the Sign On tab, go to SAML 2.0 and update Groups to Matches regex and the value is .*:
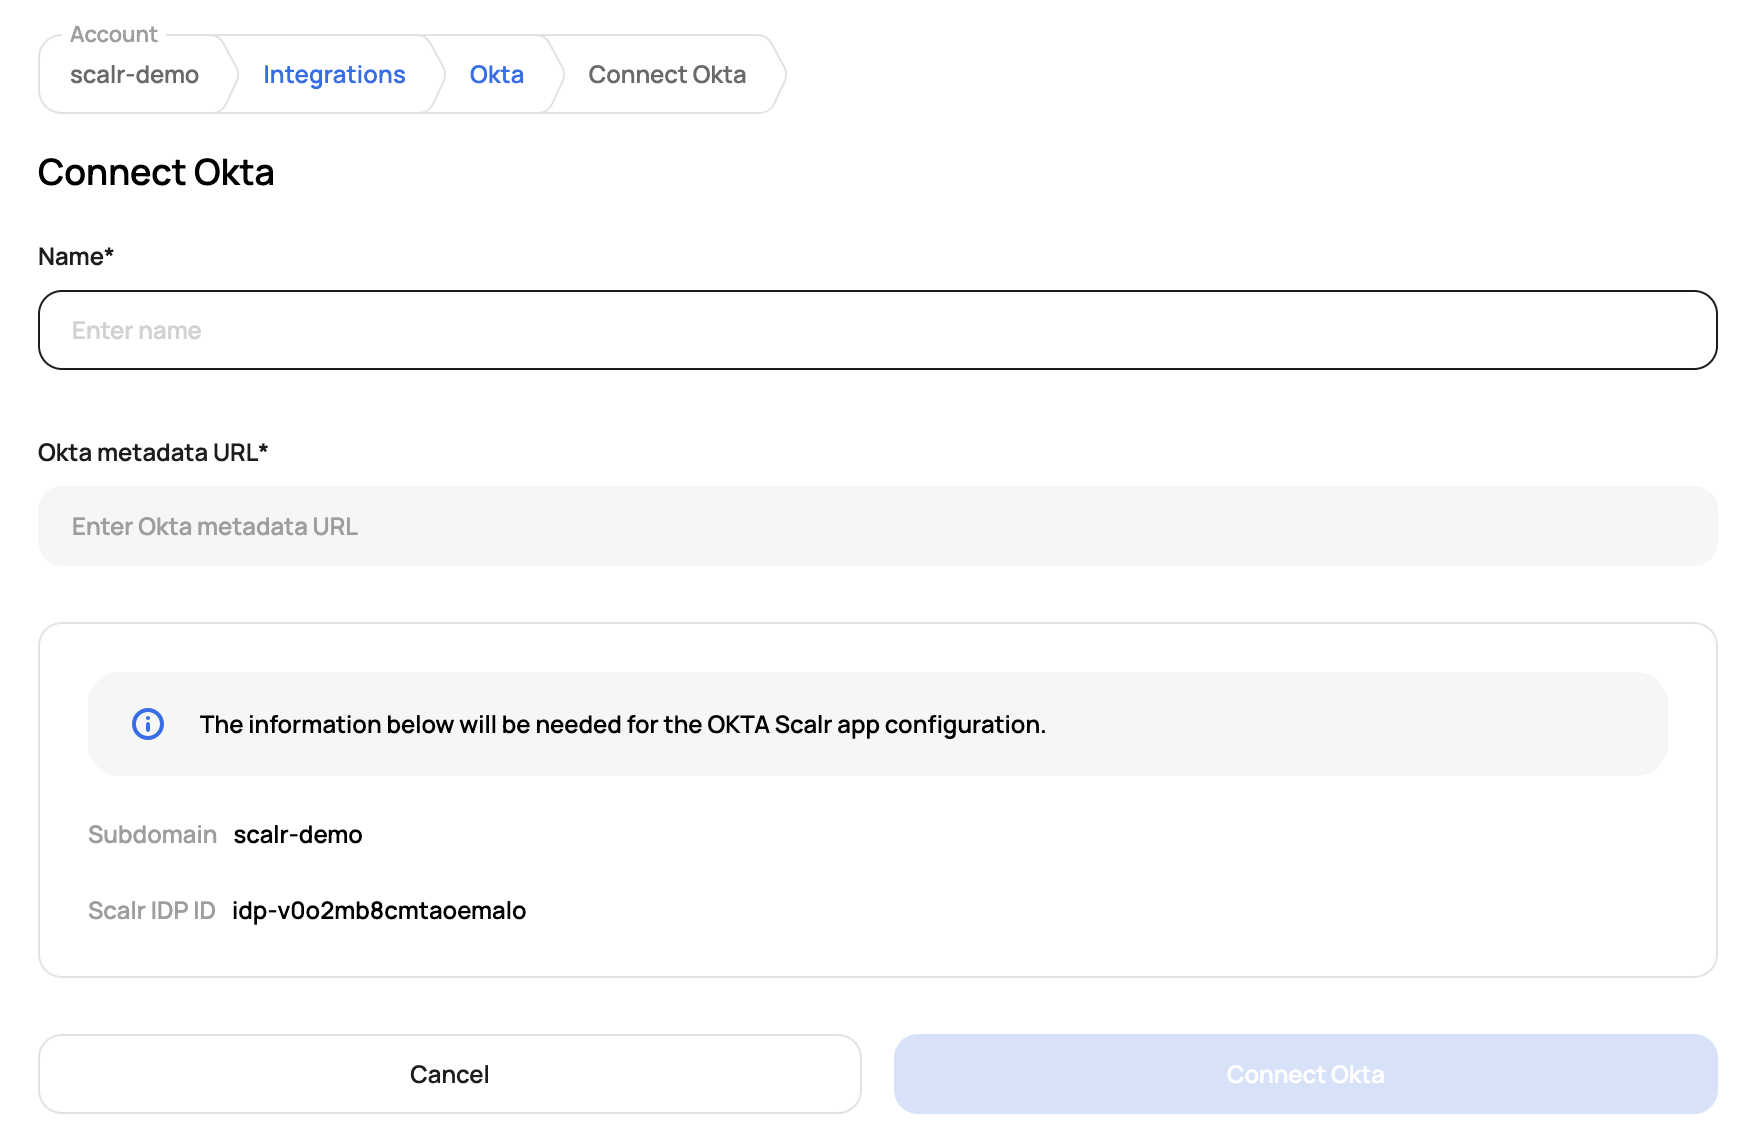
Go to the Scalr account scope, click on Integrations and then Okta to obtain the IDP ID:
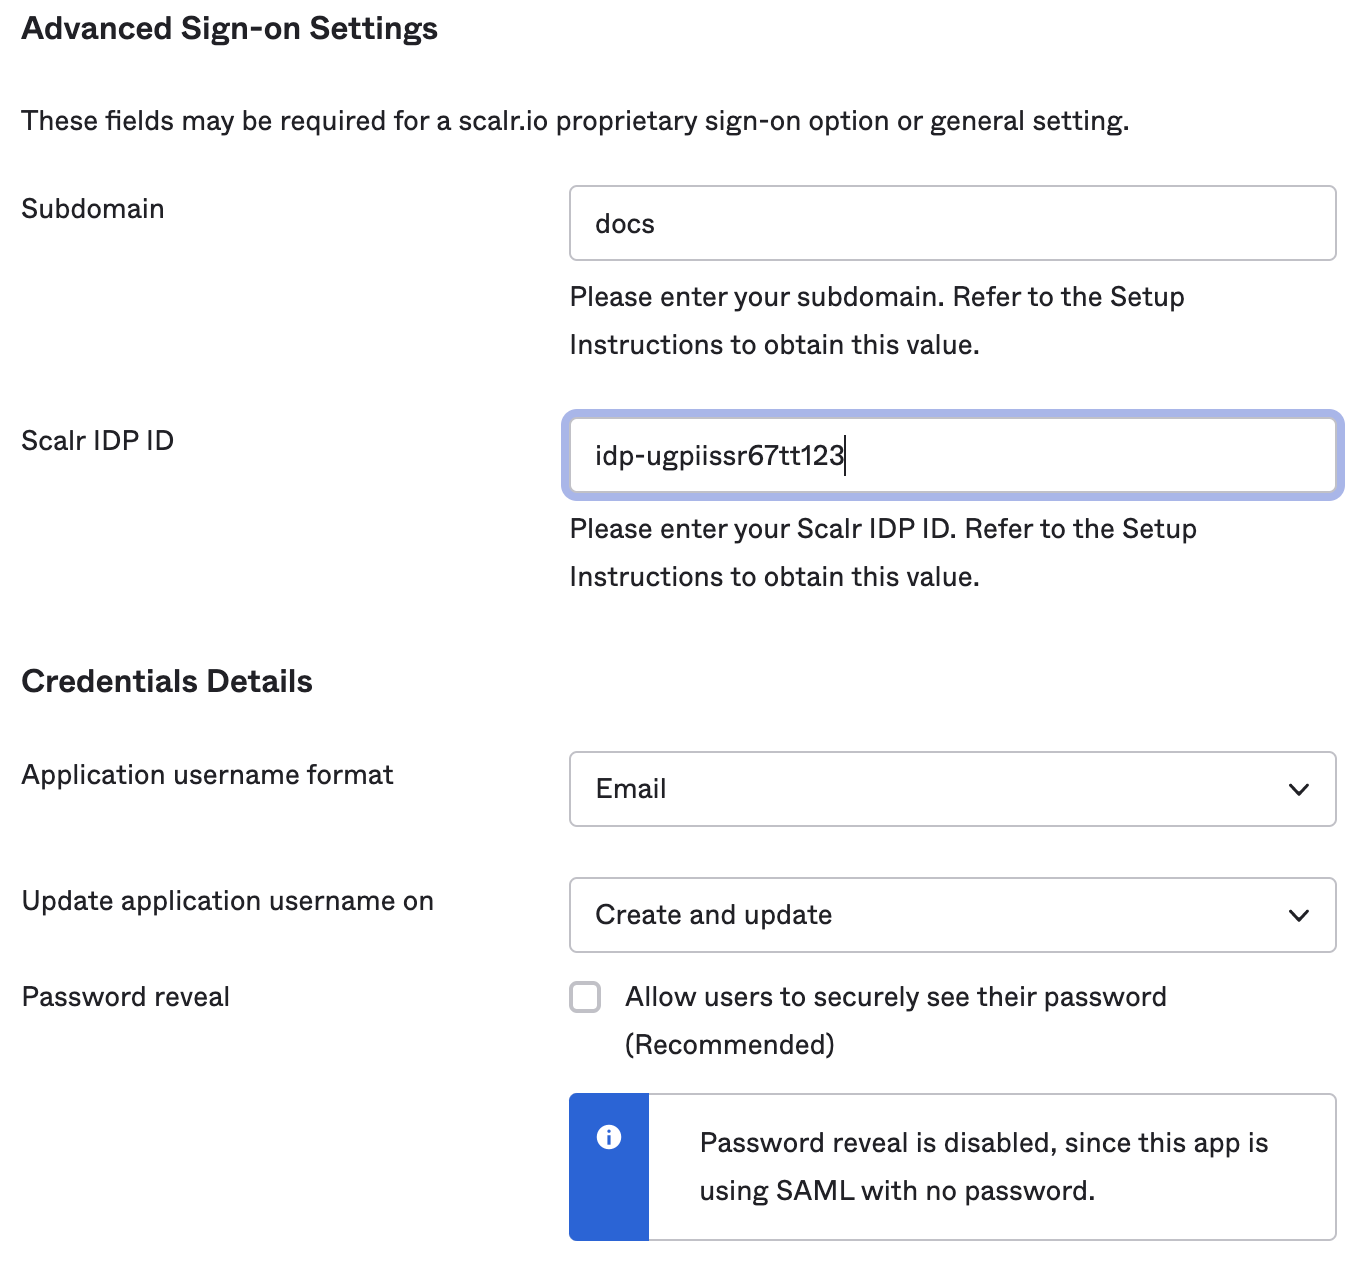
In Okta, go to the Advanced Sign-on Settings, add the Scalr subdomain and IDP ID. Also, make sure that the Application username format in the Credentials Details in Okta is set to Email.
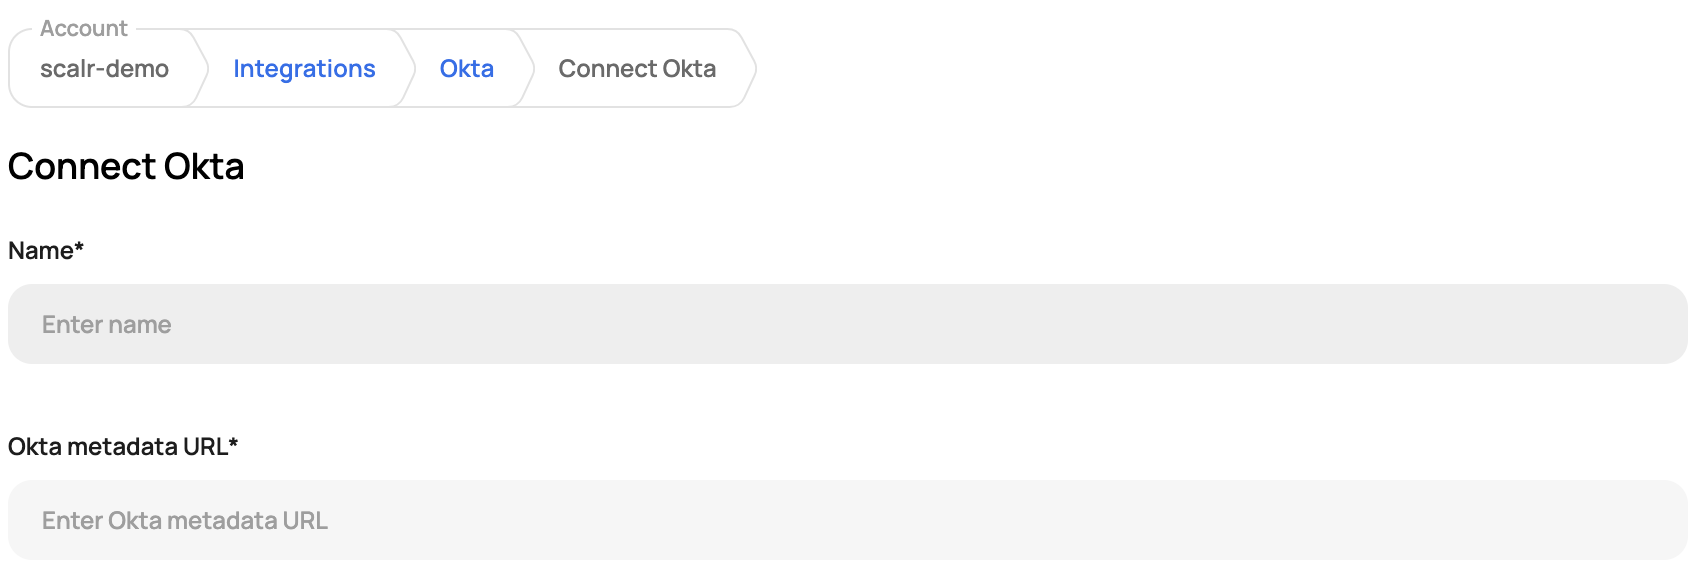
In Okta, click on View SAML setup instructions on the right-hand side to obtain the metadata URL and paste it into Scalr:
You can now verify the connection in Scalr. The SAML integration is now complete, you can set up automatic provisioning by proceeding with the rest of this document.
Provisioning/SCIM Settings
Before configuring SCIM please make sure SAML is configured and enabled.
Note: This is included in the enterprise plan. Contact support if you have any questions.
Supported Features
- Create Users
- Update User Attributes
- Deactivate Users
- Import Users
- Import Groups
- Group Push
Configuration Steps
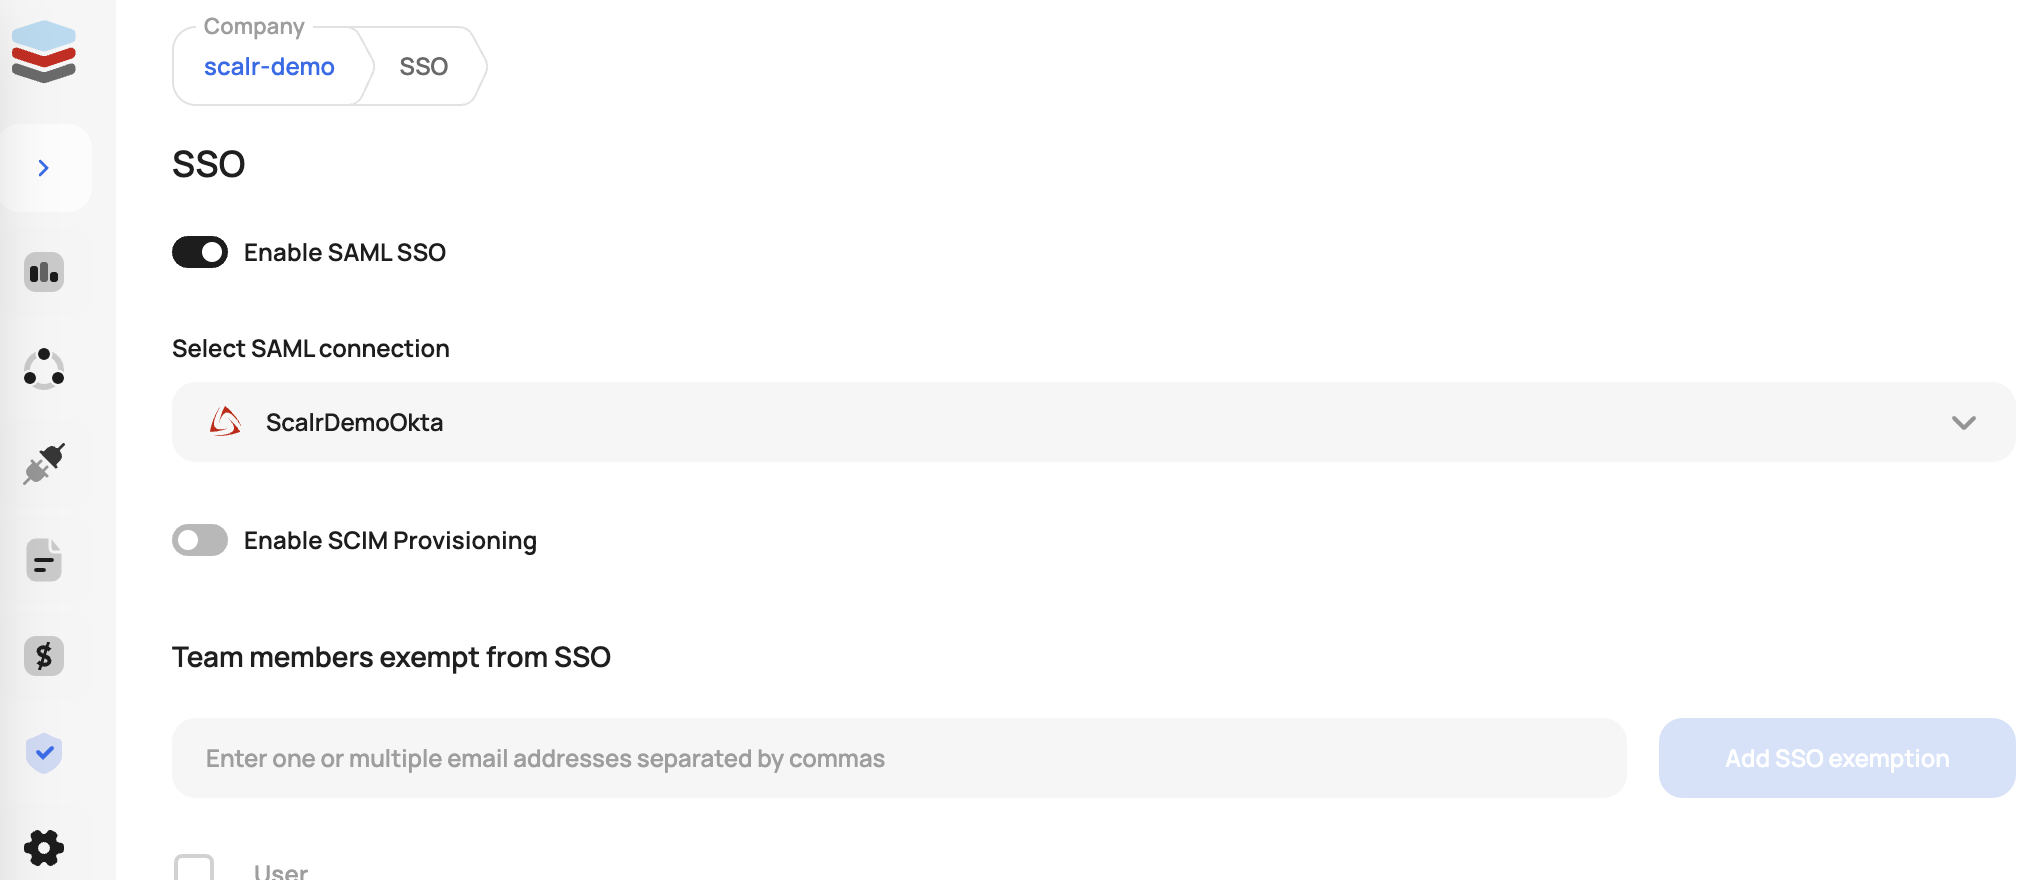
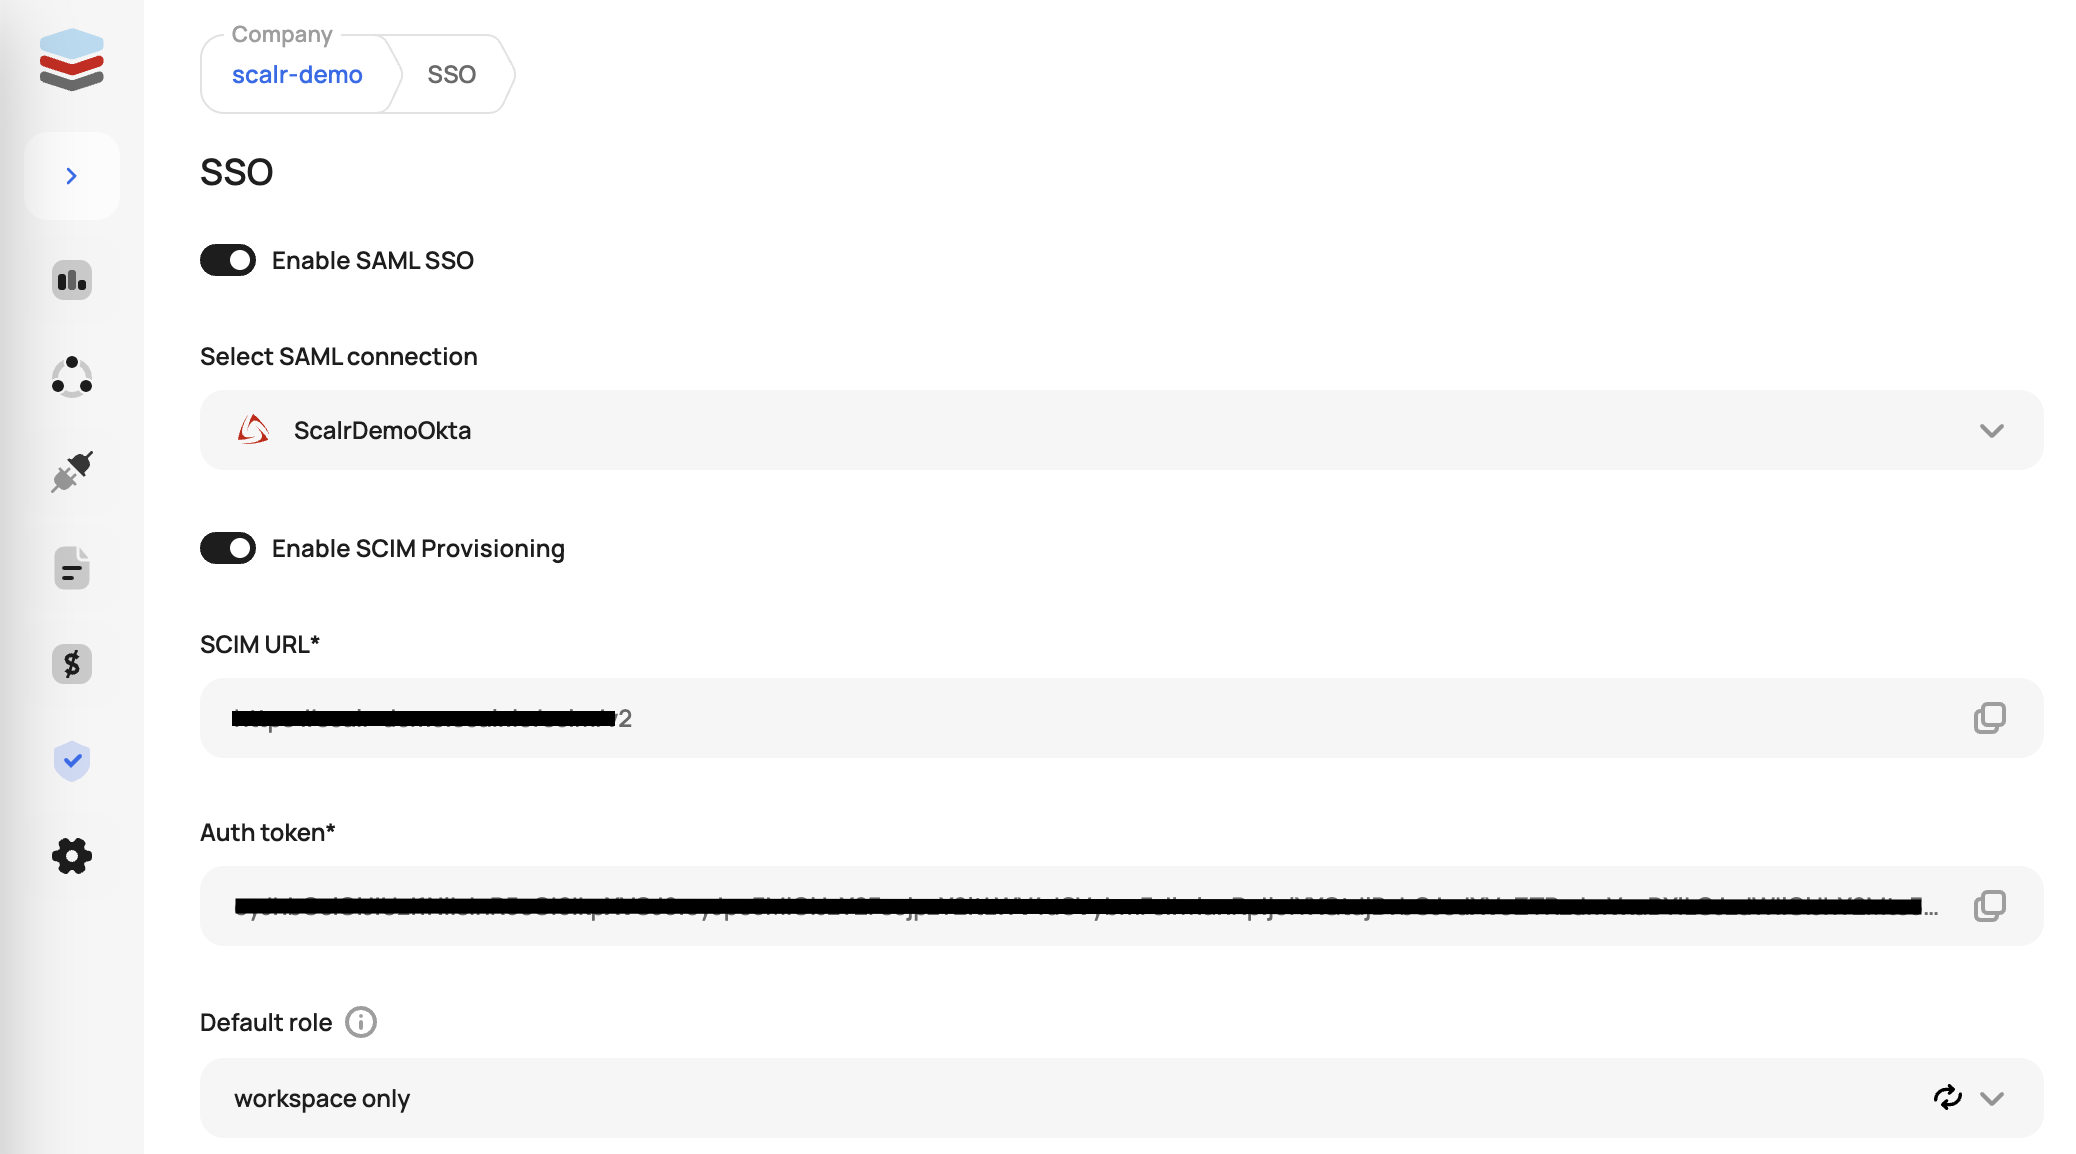
Scalr supports the SCIM (System for Cross-domain Identity Management) protocol to automatically add and remove users from Scalr. To enable it, first generate the SCIM token from Scalr by going to the Security->SSO settings and clicking "Enable SCIM Provisioning". This will be used in Okta in a later step.
Open the Provisioning tab in Okta and select the Configure API Integration button. You will then see the following options:
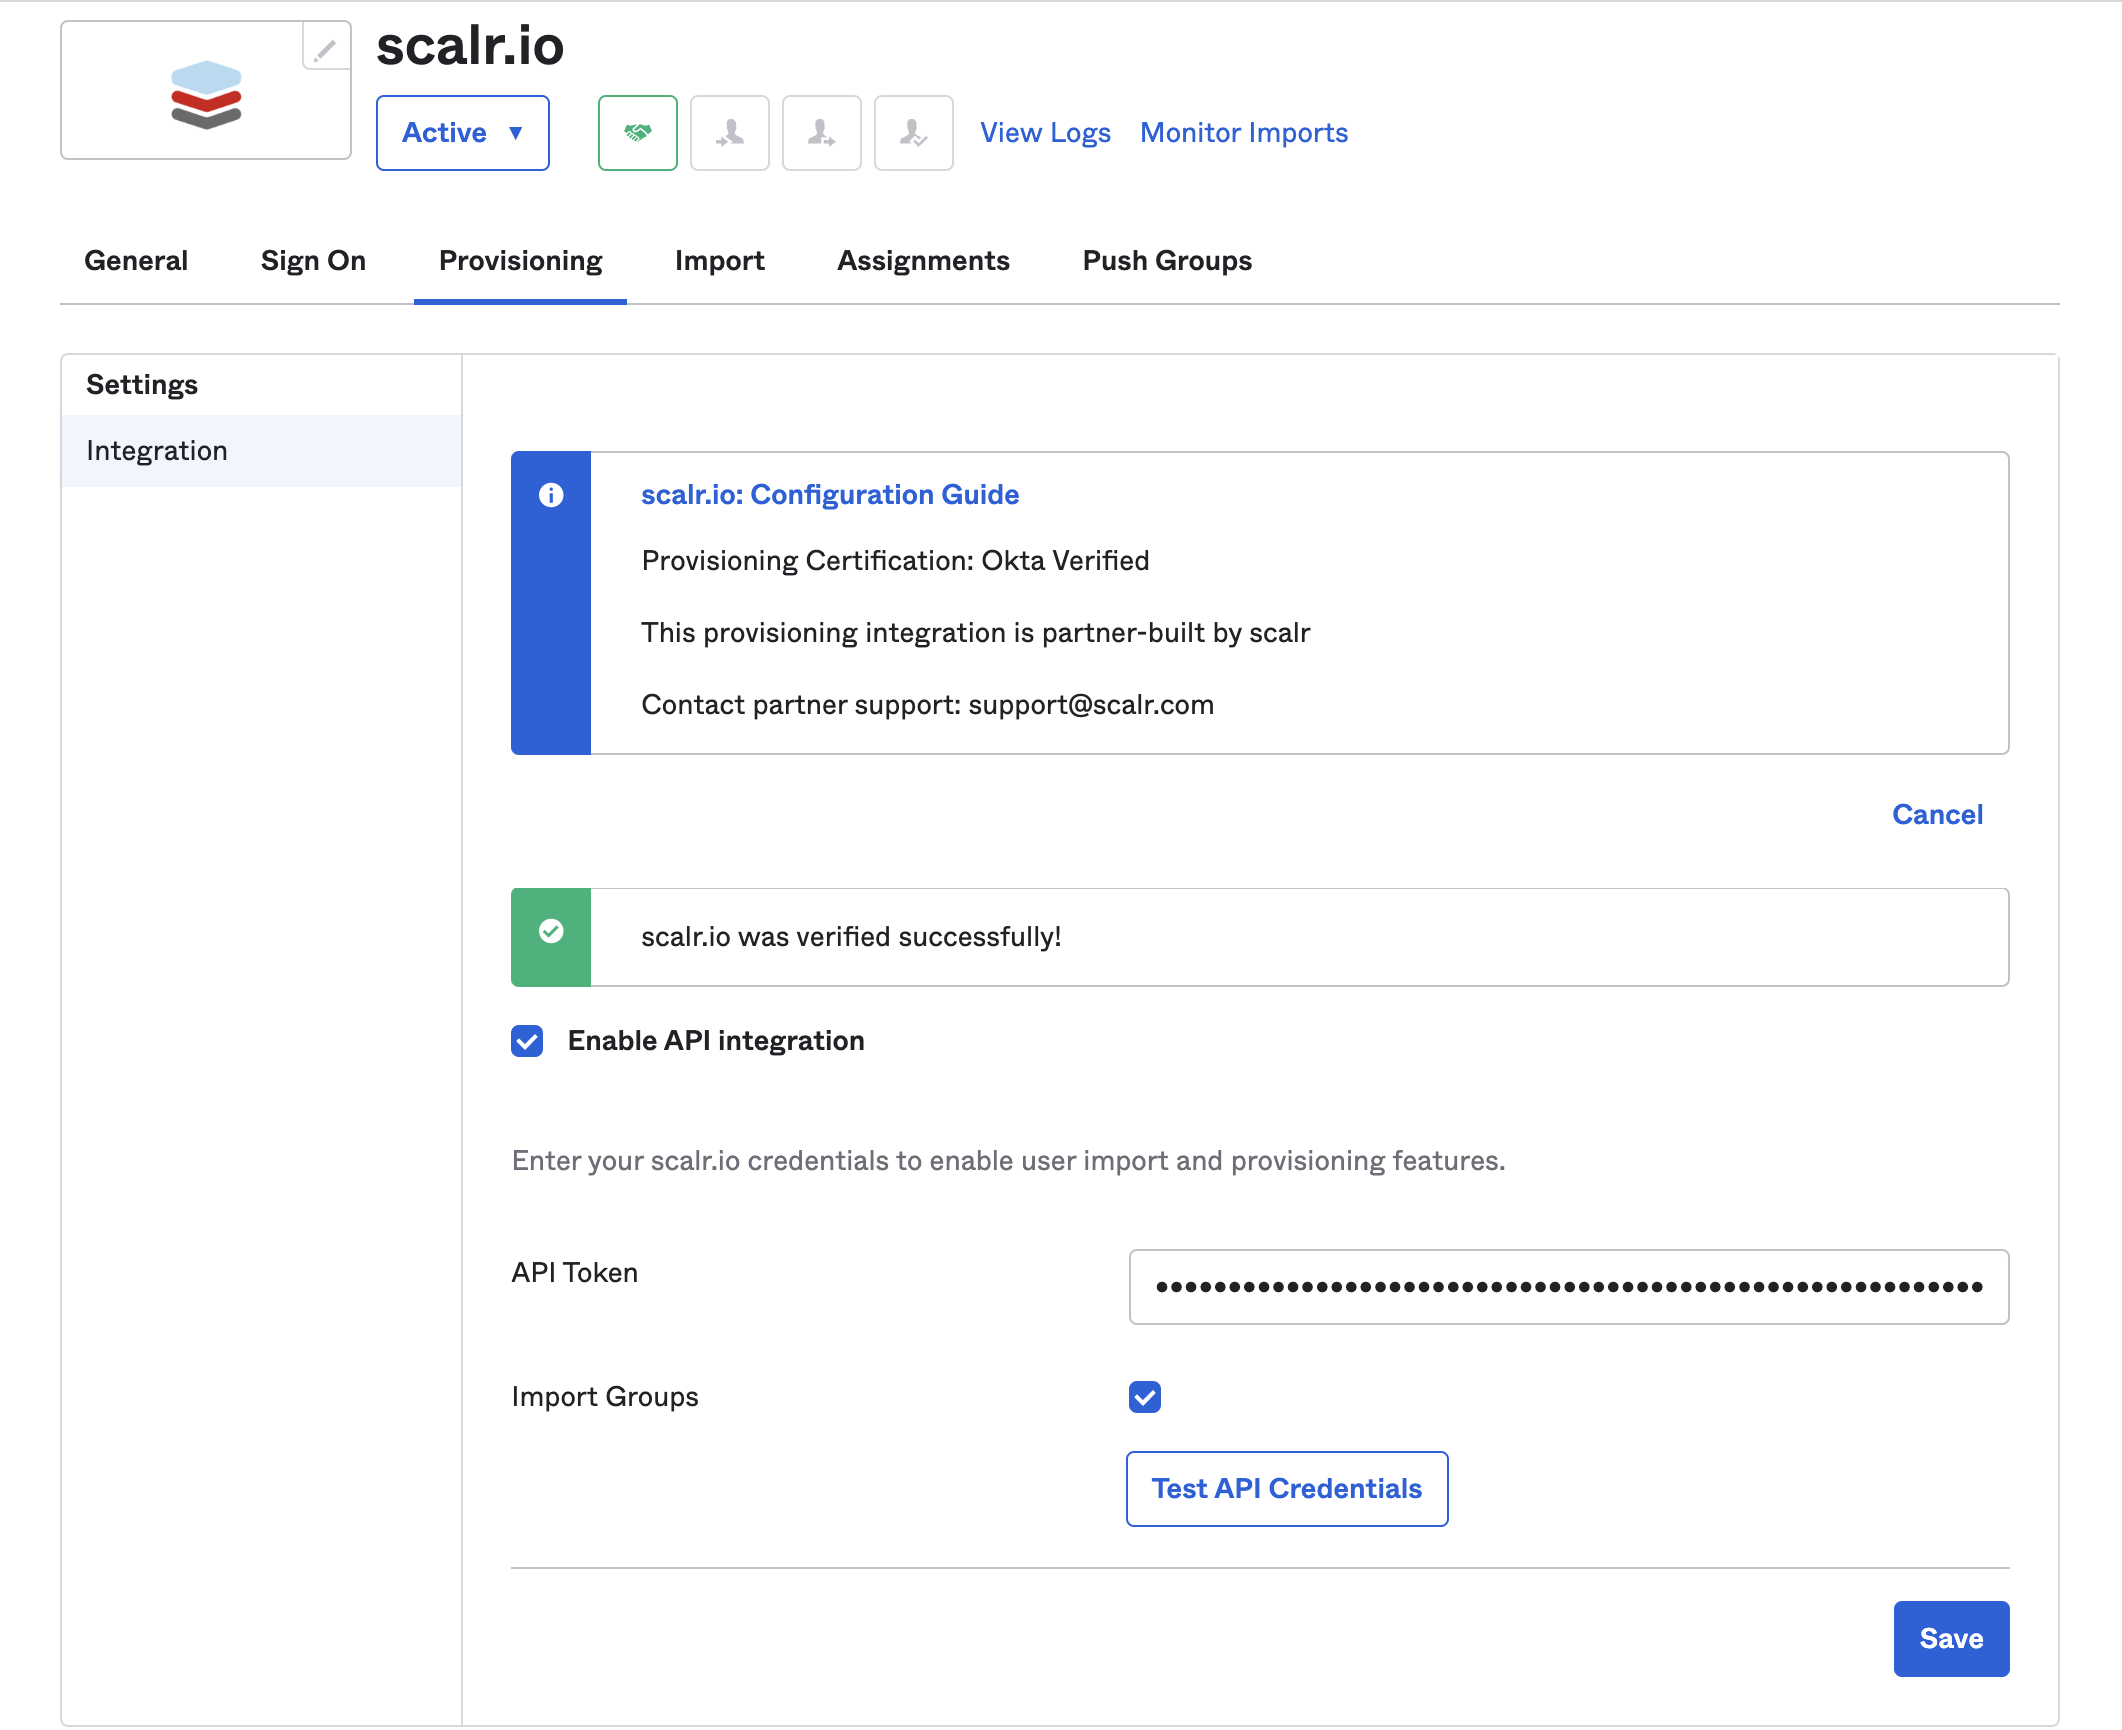
Check the Enable API Integration checkbox. Add the API token from earlier.
Once you are finished, click the Test API Credentials button to test your configuration and save.
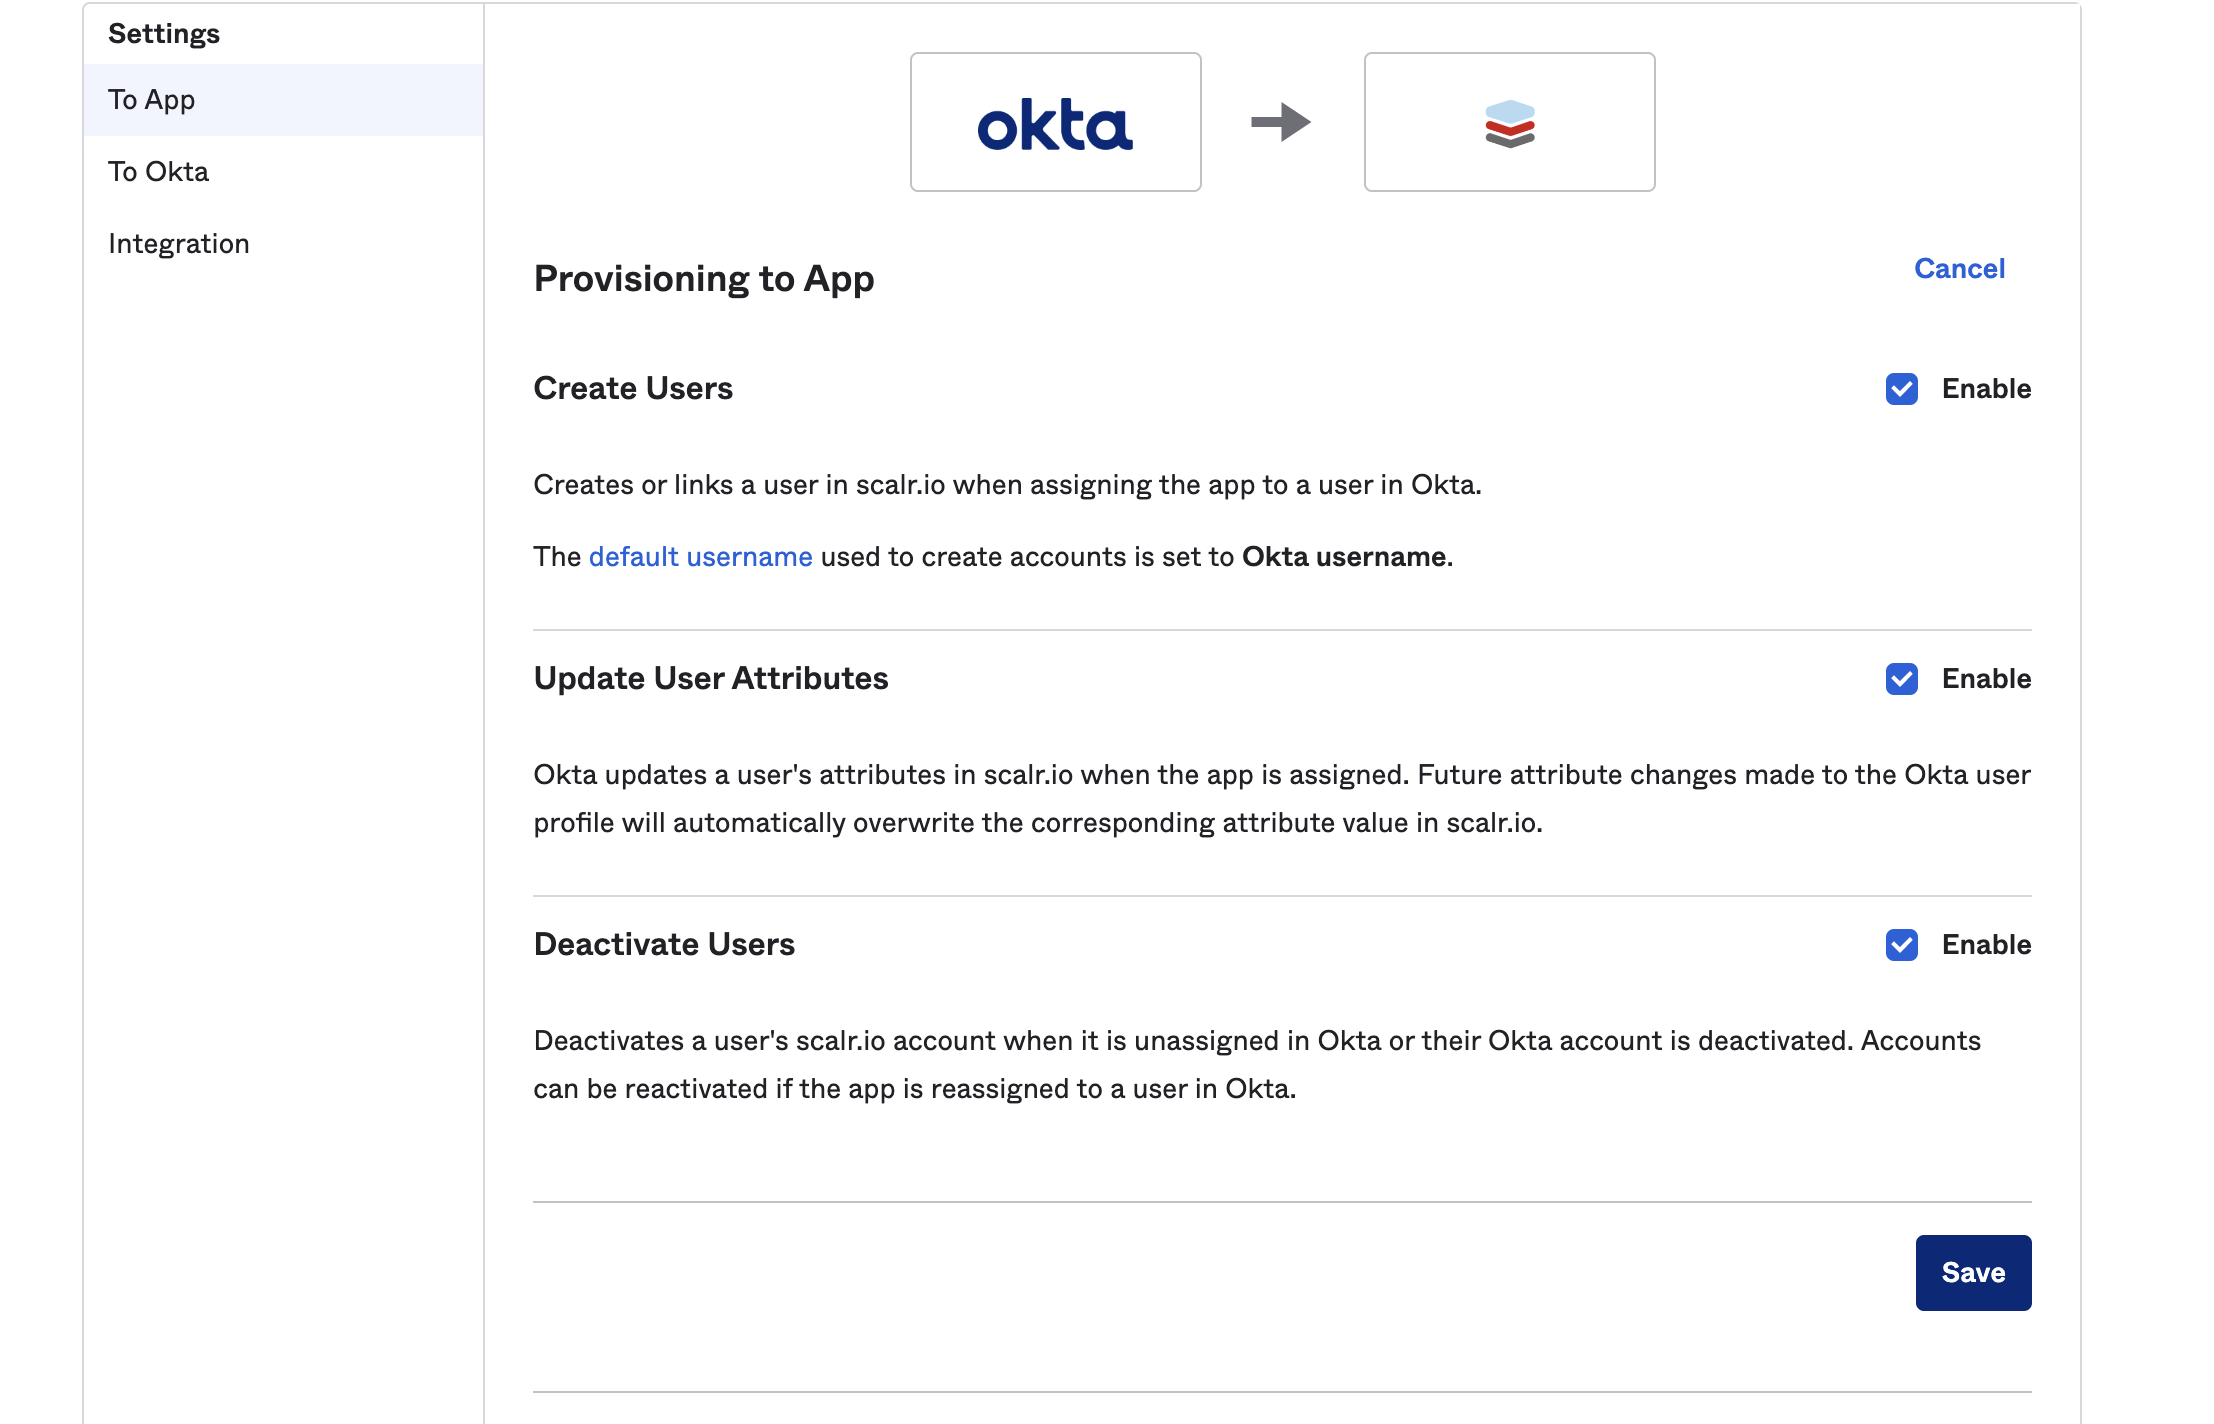
Click on the To App tab in the provisioning settings and check off Create Users, Update User Attributes, and Deactivate Users.
Default Scalr Role
Optionally, a default Scalr role can be set for all newly provisioned users. If a role is not specified, the users will be assigned the account:read permission to give them access to Scalr, with minimal permissions:
Updated 5 months ago