VCS Agents
Overview
Scalr relies on access to VCS providers to pull Terraform or OpenTofu code to workspaces, populate the module registry, or pull in OPA policies. If you have a VCS provider that is behind a firewall, it is unlikely that you'll want to open it to scalr.io and expose it to the internet. VCS agents create a relay between the VCS provider and scalr.io so that the VCS provider only needs to connect to the agent, and the agent has an HTTPS connection to scalr.io. VCS agents can be used with GitHub Enterprise, GitLab Enterprise, and Bitbucket Datacenter.
Configuring Agent Pools
Prerequisites:
- Run and VCS agents SHOULD NOT be deployed on the same infrastructure.
- Agents can be deployed on:
- Rocky Linux 9.x
- Ubuntu 20.04/22.04
- Docker (version 18+) containers
- Kubernetes - The helm chart for Kubernetes can be found here.
- ARM64 is supported - Minimum agent version is 0.43.0, and the golden image must be used.
- The agents must have HTTPS connections to
*scalr.ioand*docker.io.
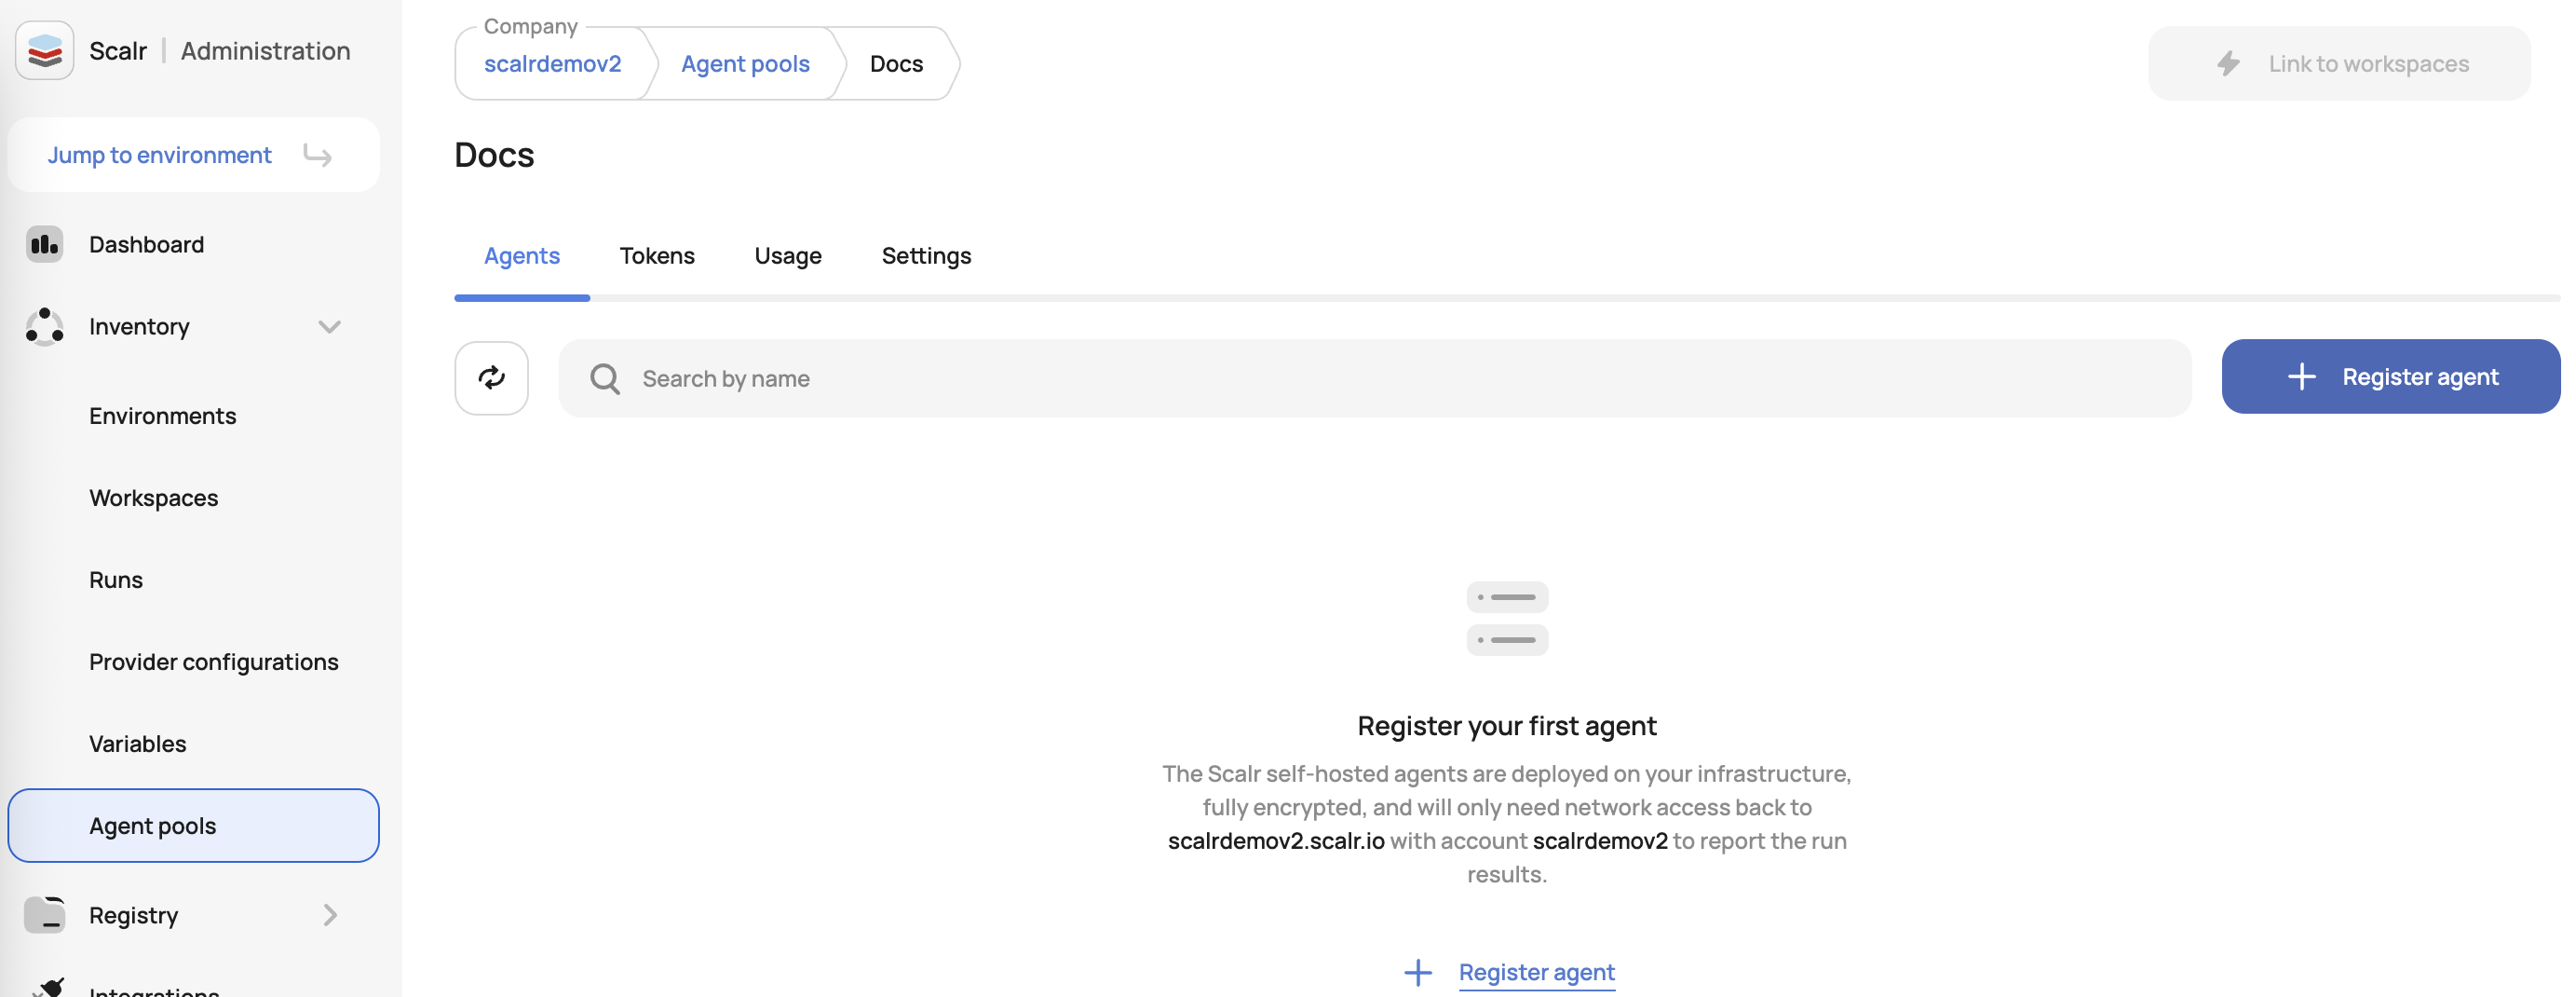
Agent pools are created at the account scope and can be made the default for the entire account or linked to specific workspaces. To create a pool, go to the account scope, expand the inventory menu, and click agent pools. Select VCS, and then follow the in-app instructions:
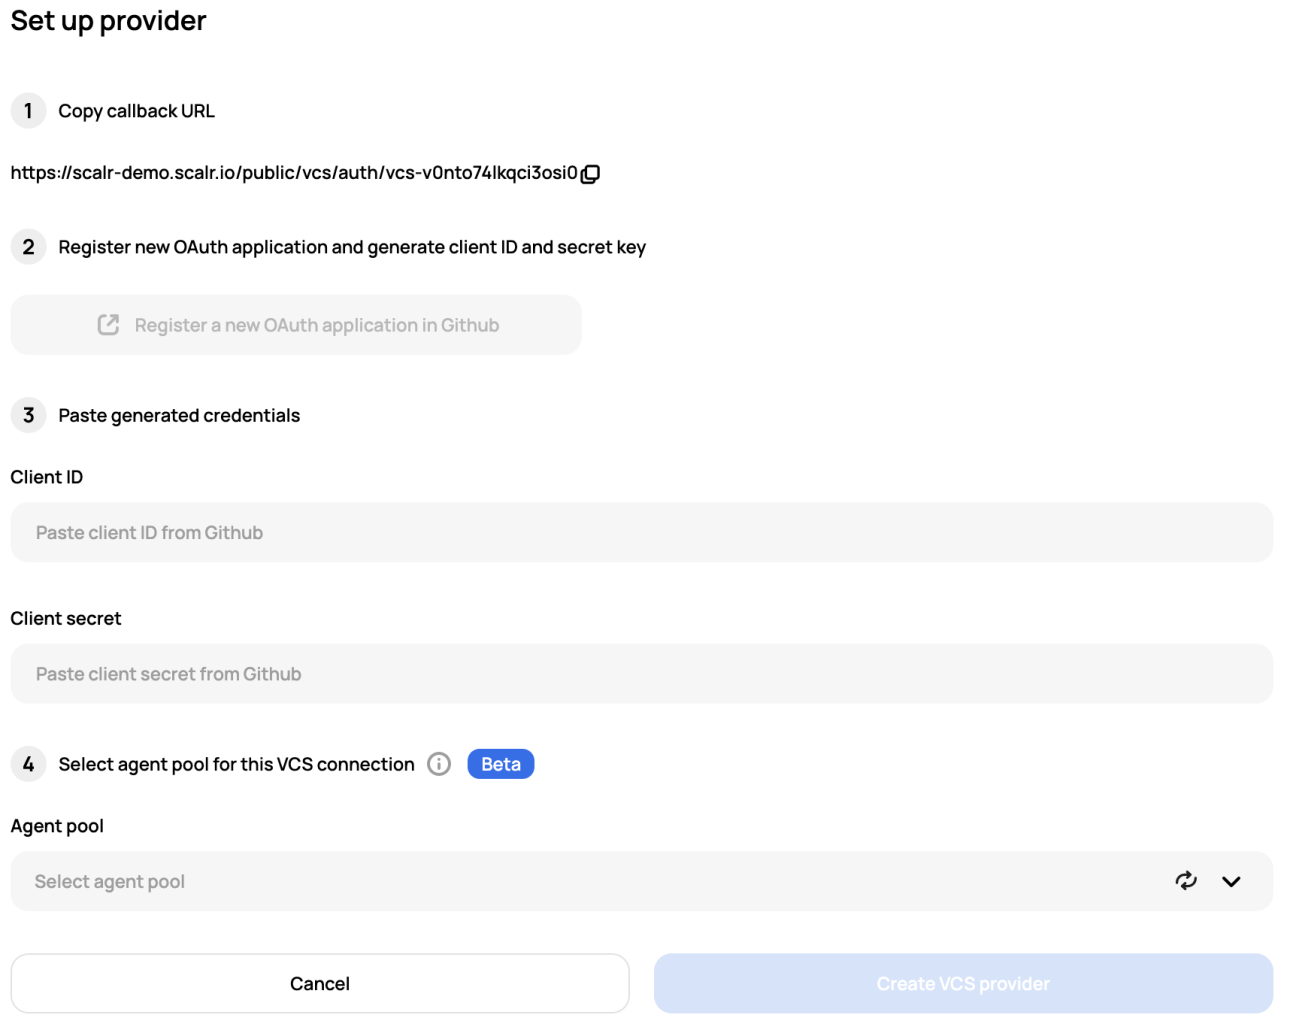
Once the agent is registered, you can now set up the VCS provider and select the agent as the last step of the VCS setup:
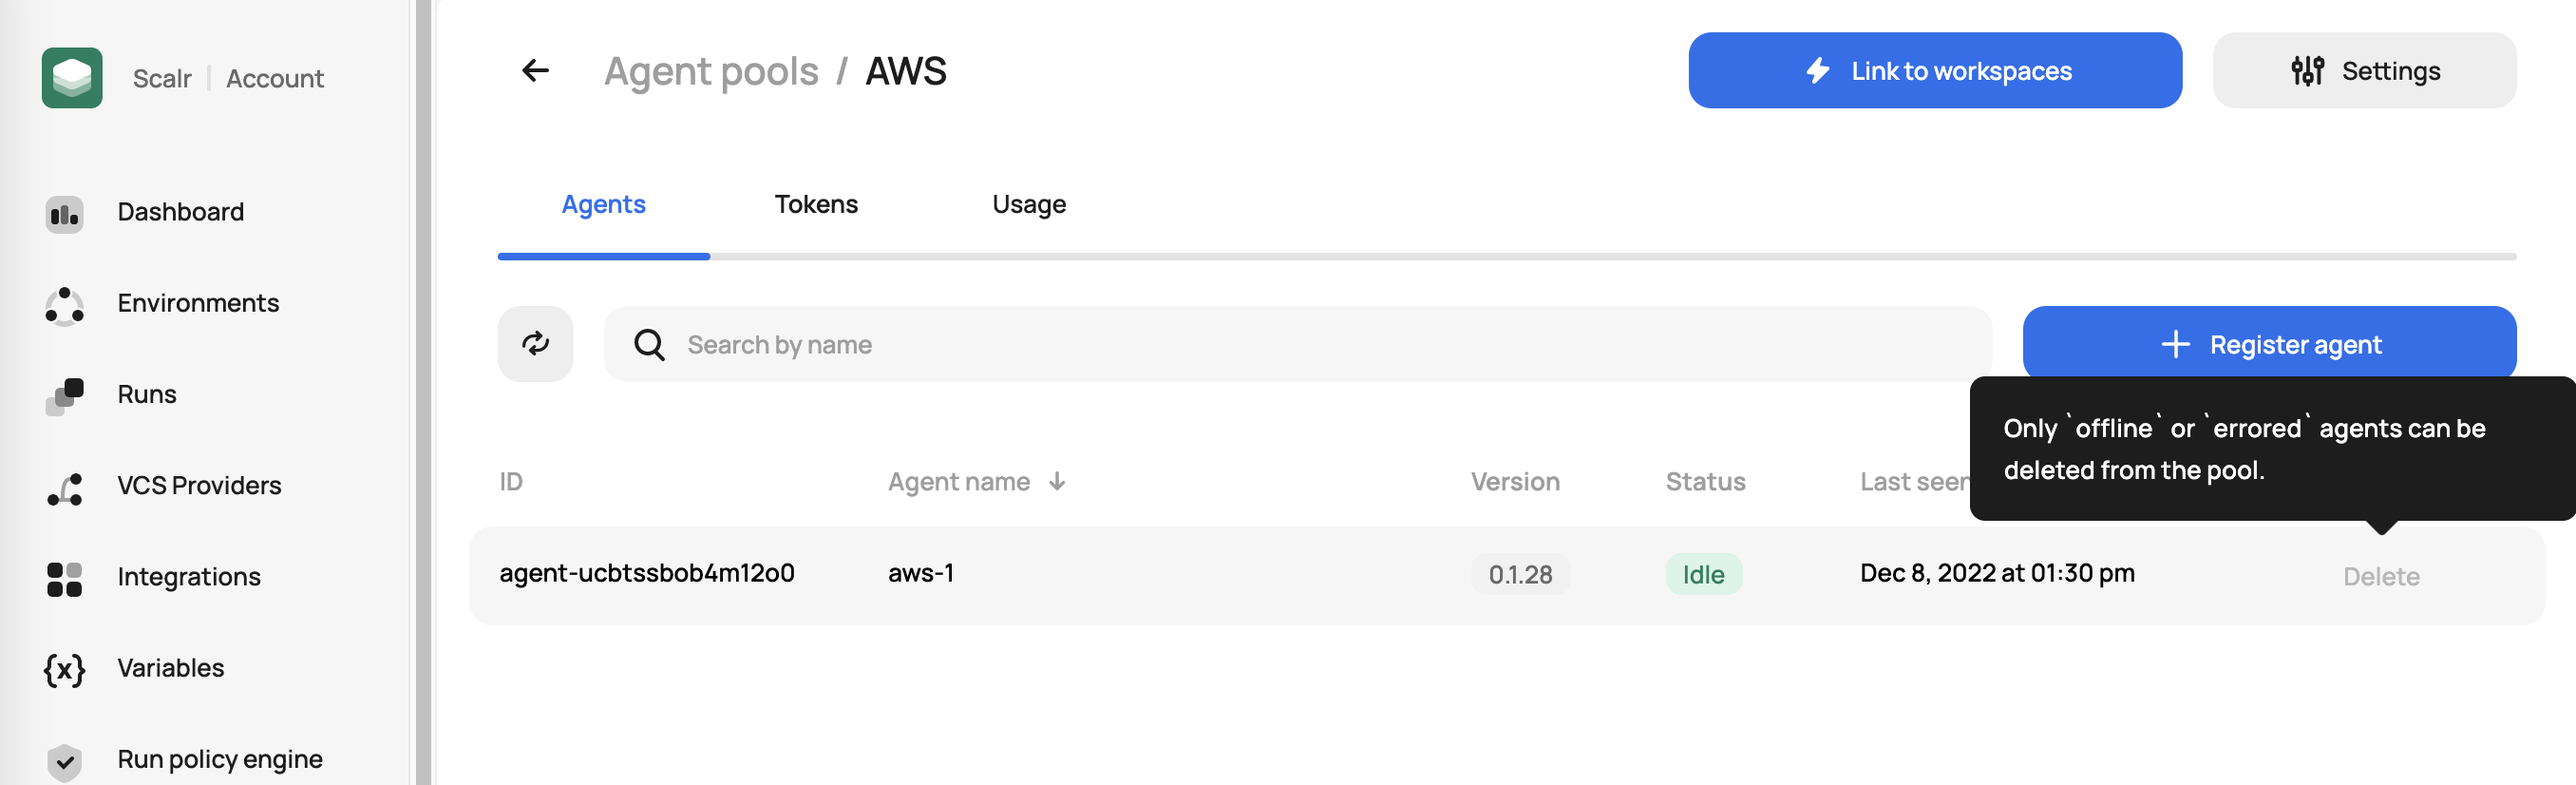
Managing Agent Pools
Once a pool is created, you can check the status of agents in the pool:
Logs
The logs for the agents can be seen by running the following commands depending on the platform the agent is running on:
- VM:
journalctl -xe -u scalr-agent > scalr_agent.logs - Docker:
docker logs <container-name> - Kubernetes:
kubectl logs <POD_NAME>
Adding a CA bundle
The instructions below are for VM or Docker-based deployments. For Kubernetes-based agents, use the agent.container_task_ca_cert setting in the helm chart to path to the certificate. See more here.
To configure SSL certificates globally, use the SCALR_CA_CERT variable option. To configure SSL certificates only for isolated containers for the tasks (e.g. tofu/terraform/infracost operations), set the SCALR_CONTAINER_TASK_CA_CERT option.
The CA file can be located on the agent's VM, allowing a certificate to be selected by its file path. If the agent is running within Docker, ensure the certificate is mounted into the agent container.
Alternatively, a base64-encoded string containing the certificate bundle can be used. Example of encoding a bundle:
$~ cat /path/to/bundle.ca | base64Example of running an agent with custom CA certificates with a Docker deployment method:
$~ docker run
  -v /var/run/docker.sock:/var/run/docker.sock
  -v /var/lib/scalr-agent:/var/lib/scalr-agent
  -e SCALR_URL=https\://<account>.scalr.io
  -e SCALR_TOKEN=<token>
  -e SCALR_DATA_HOME=/var/lib/scalr-agent
  -e SCALR_CA_CERT=/var/lib/scalr-agent/ca.cert
  --rm -it --pull=always --name=scalr-agent scalr/agent:latest
Note that the certificate is located in the /var/lib/scalr-agent/ directory, which is mounted into the container.
You can optionally bundle your certificate into an agent image. Place the custom CA file at extra_ca_root.crt and build the customized image:
FROM scalr/agent:latest

ADD extra_ca_root.crt /usr/local/share/ca-certificates/extra-ca.crt
RUN apt update
    && apt install ca-certificates -y
    && chmod 644 /usr/local/share/ca-certificates/extra-ca.crt
    && update-ca-certificates
ENV SCALR_CA_CERT="/etc/ssl/certs/ca-certificates.crt"
This step also bundles your certificate with the set of public certificates provided by ca-certificates system package. You can optionally skip this step and instead point SCALR_CA_CERT to your certificate if it already includes public CA certificates or if they are not needed (e.g., in a setup completely hidden behind a proxy).
Note that by default, the scalr agent uses the certificate bundle provided by the certifi package instead of the system certificate bundle provided by the ca-certificates package.
Adding a Proxy
The instructions below are for VM or Docker based deployments. For Kubernetes-based agents, see the proxy settings in the helm chart here.
VM-Based
For a VM, if the agent requires a proxy to get back to scalr.io, please create a system drop-in directory:
mkdir -p /etc/systemd/system/scalr-agent.service.d/Create the /etc/systemd/system/scalr-agent.service.d/proxy.conf file, with the following contents:
[Service]
Environment="HTTP_PROXY=http://proxy.example.com:3128"
Environment="HTTPS_PROXY=http://proxy.example.com:3128"
Symlink the proxy.conf into the scalr-docker drop-in.
mkdir -p /etc/systemd/system/scalr-docker.service.d/
ln -s /etc/systemd/system/scalr-agent.service.d/proxy.conf \
   /etc/systemd/system/scalr-docker.service.d/proxy.conf
Once the above is added, execute the following commands:
systemctl daemon-reload
systemctl restart scalr-docker
systemctl restart scalr-agent
Docker-Based
For Docker, add the option environment variables (HTTP_PROXY, HTTPS_PROXY, NO_PROXY):
$~ docker run \
  -v /var/run/docker.sock:/var/run/docker.sock \
  -v /var/lib/scalr-agent:/var/lib/scalr-agent \
  -e SCALR_URL=https://<account>.scalr.io \
  -e SCALR_TOKEN=<token> \
  -e SCALR_DATA_HOME=/var/lib/scalr-agent \
  -e HTTP_PROXY="<proxy-address>" \
  -e HTTPS_PROXY="<proxy-address>" \
  -e NO_PROXY="<addr1>,<addr2>" \
  --rm -it --pull=always --name=scalr-agent scalr/agent:latest
Updated 27 days ago