GCP Provider Configuration
Scalr offers two types of authentication for the Google Compute Cloud (GCP) provider. The OIDC generates temporary credentials for each run and is considered a best practice. The service account key method uses static credentials, which should be rotated regularly.
OIDC
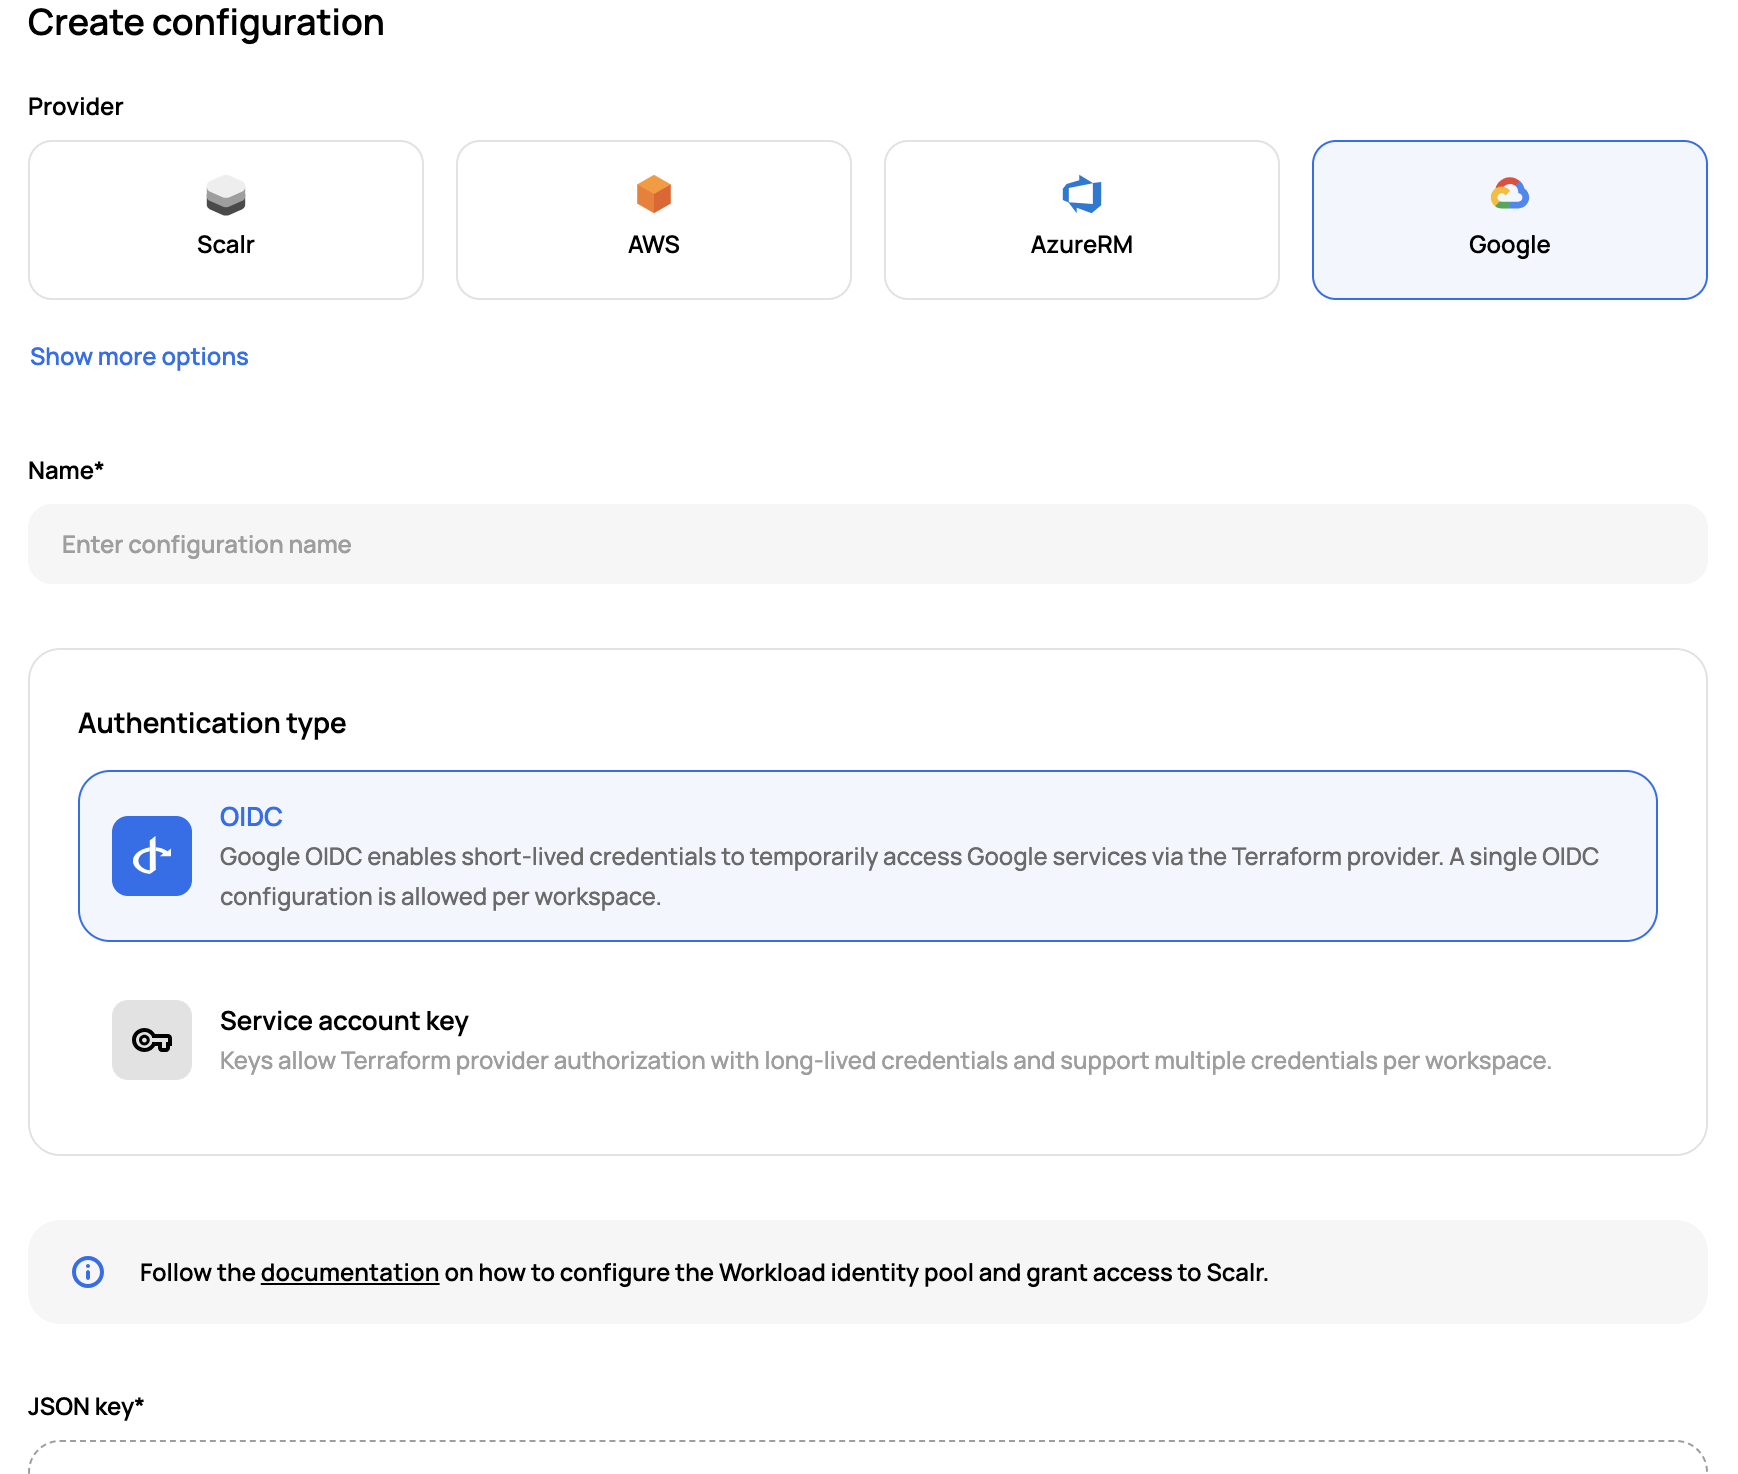
The OIDC authentication method will create a temporary access token for each run avoiding the need to store static credentials in Scalr. A single OIDC provider can be linked to many workspaces, but each workspace can only have one OIDC provider linked to it.
GCP Steps
To enable this, the following must be done in GCP first (see GCP OIDC docs here):
Create a Workload Identity Pool
- Create a workload identity pool, the name is required while the ID and description are optional.
Create a Workload Identity Provider
- Register Scalr as the identity provider in the identity pool, the provider type must be
OIDC. - Add the provider name, e.g.
scalr. - The identity provider issuer URL is https://scalr.io (this must be an exact match).
- Leave the audience as the
Default audience - Now add the provider attribute mappings with the following settings. One of these two attribute mappings is required (the rest are optional):
attribute.scalr_account_idattribute.scalr_environment_id
attribute_mapping = {
    "google.subject"                   = "assertion.sub",
    "attribute.aud"                    = "assertion.aud",
    "attribute.scalr_run_phase"        = "assertion.scalr_run_phase",
    "attribute.scalr_workspace_id"     = "assertion.scalr_workspace_id",
    "attribute.scalr_workspace_name"   = "assertion.scalr_workspace_name",
    "attribute.scalr_environment_id"   = "assertion.scalr_environment_id",
    "attribute.scalr_environment_name" = "assertion.scalr_environment_name",
    "attribute.scalr_account_id"       = "assertion.scalr_account_id",
    "attribute.scalr_account_name"     = "assertion.scalr_account_name",
    "attribute.scalr_run_id"           = "assertion.scalr_run_id",
    "attribute.scalr_tags"             = "assertion.scalr_tags" # comma-separated list of workspace tags
}- Optionally, you can add attribute conditions to restrict the access for tokens to specific workspaces in Scalr. For example, you can limit the provider to be available only in certain environments or workspaces e.g. by name or tag. From a security perspective, attribute conditions are considered a best practice.
Grant access
To grant access you can use a pre-configured service account or create a new one with the required IAM permissions by the workspace(s). Scalr doesn't require any extra permission.
This Google doc describes how to allow your workload to access Google Cloud resources:
- To create a service account for the external workload, do the following:
- Enable APIs
- Create a service account (or use a pre-configured one)
- Grant the service account access to resources that you want external identities to access.
- Grant the Workload Identity User role
roles/iam.workloadIdentityUserto the service account.
- Grant access to a federated identity using service account impersonation using the Google Cloud console or the gcloud CLI:
- Go to the Workload Identity Pools page.
- Select Grant access.
- In the Grant access to service account dialog, select Grant access using Service Account impersonation.
- In the Service accounts list, select the service account for the external identities to impersonate
- Select
scalr_account_idorscalr_environment_idattribute and paste your Scalr account id or environment id in the value field.
- Select
- Click Save
- Lastly, in the Configure your application dialog do the following:
- Select provider
- Enter
/in OIDC id token path field - Choose JSON format and download the configuration
Scalr Steps
In Scalr, you must create a provider configuration by going to the Administration and then provider configurations. Select GCP and OIDC, then upload the JSON into Scalr.

Once the provider configuration is added, it should then be shared with the environment(s) and linked to the workspace(s).
Provider Example
The following is an example of how to configure this in Scalr with the Scalr Terraform provider:
resource "scalr_provider_configuration" "oidc" {
  name       = "oidc-main"
  account_id = "acc-xxxxxxxxx"
  google {
    auth_type              = "oidc"
    service_account_email  = "[email protected]"
    workload_provider_name = "projects/123/locations/global/workloadIdentityPools/pool-name/providers/provider-name"
  }
}
The above is an example, please see the full provider documentation here.
Service Account Key Method
Create the Credential in GCP
In GCP, create the service account and assign enough permissions to manage the intended GCP objects. See more in the GCP docs here.
Once the key is created, download it and store it in a secure place.
Create the Provider Configuration in Scalr
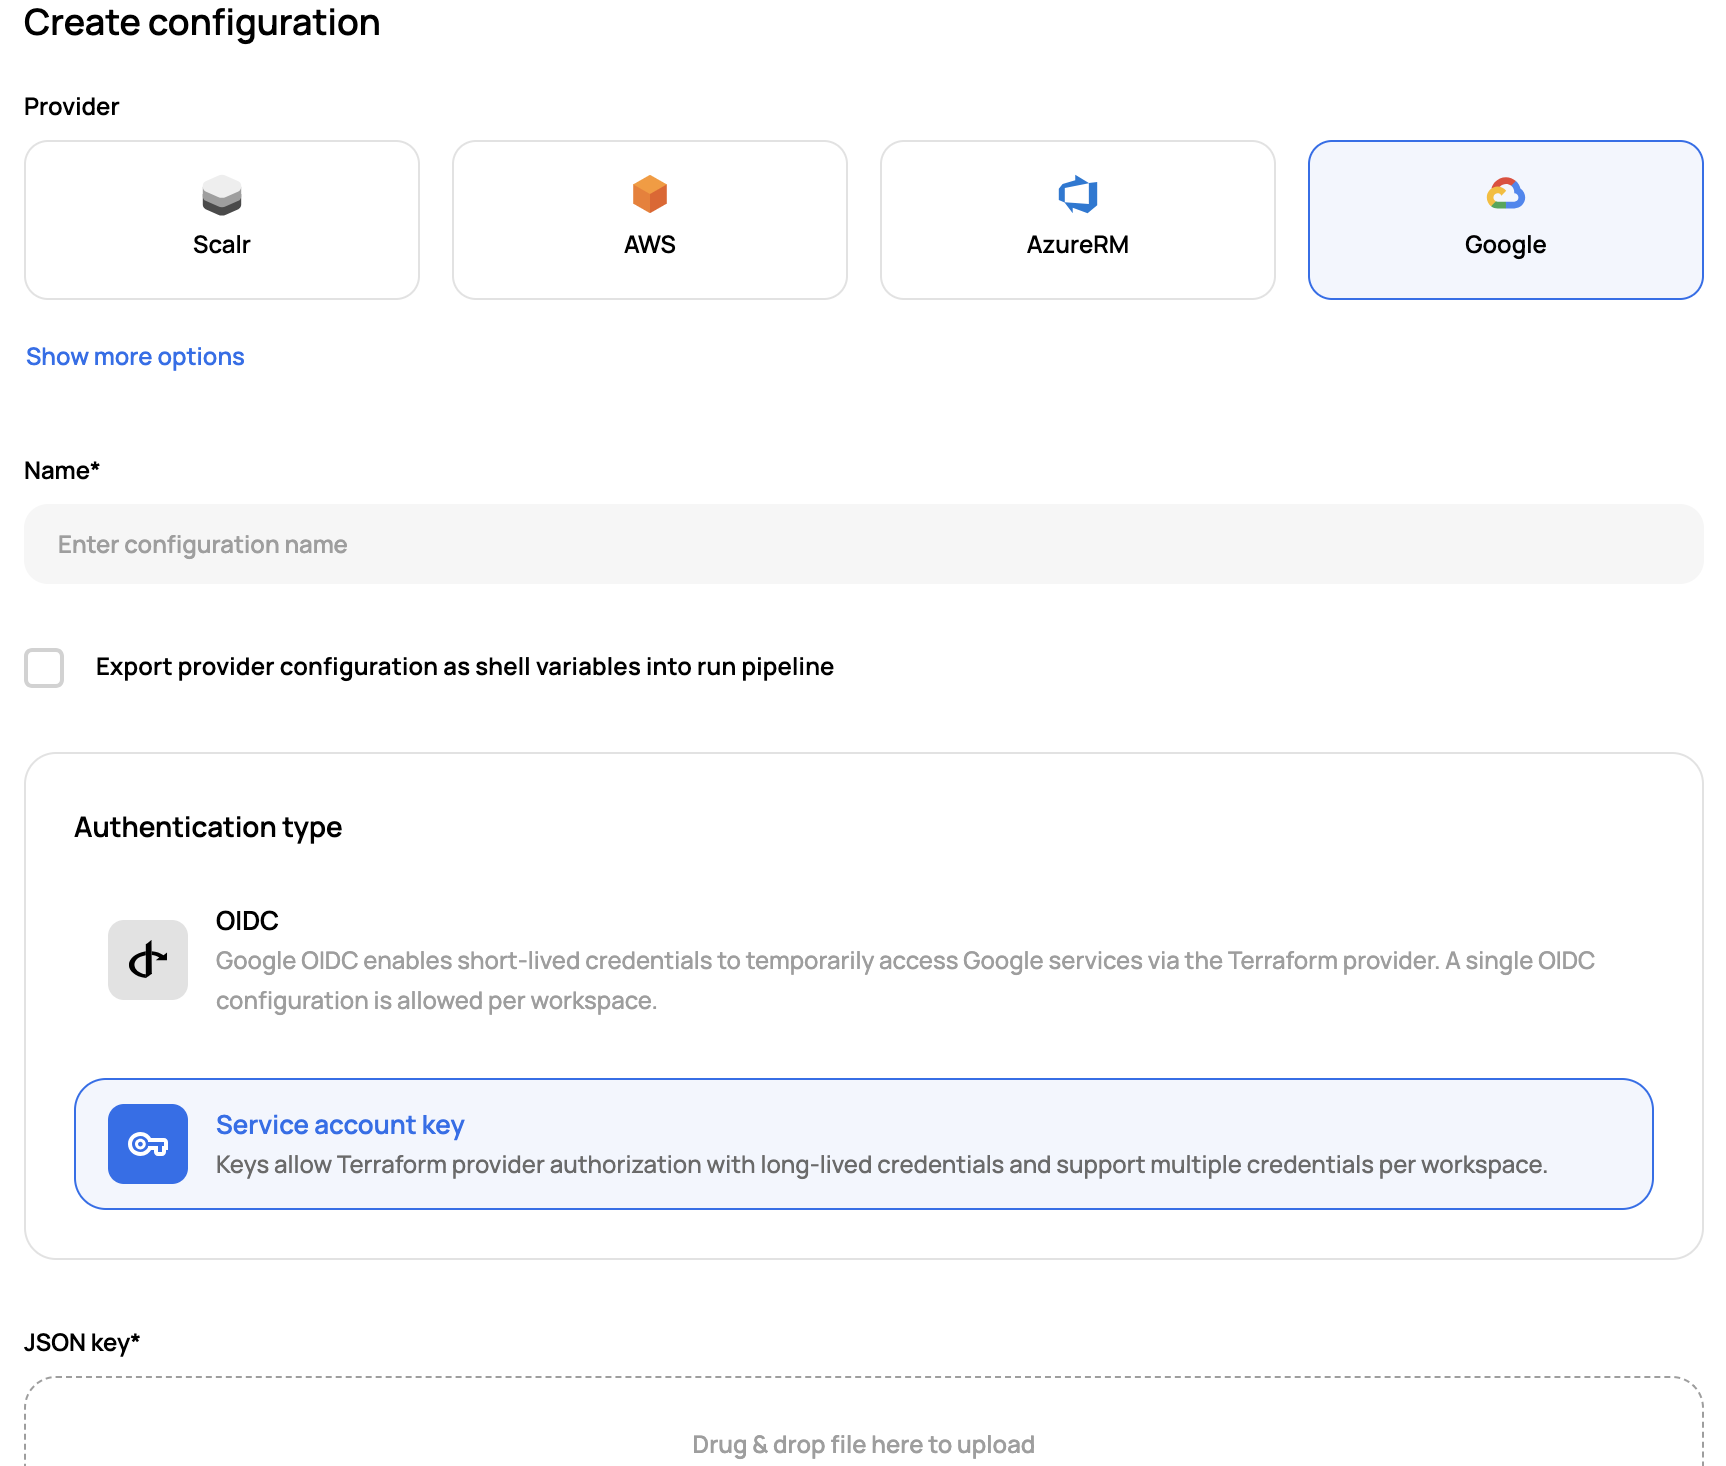
Once you have the JSON file, it can be uploaded into Scalr:

Share the configuration with environments and/or workspaces once it has been created. See more on this here.
Provider example
The following is an example of how to configure this in Scalr with the Scalr Terraform provider:
resource "scalr_provider_configuration" "service-account" {
 name       = "google_main"
  account_id = "acc-xxxxxxxxx"
  google {
    project     = "my-project"
    credentials = "my-credentials"
  }
}
The above is an example, please see the full provider documentation here.
Review the full provider configuration documents on how to link the provider configuration to an environment and workspace here
Enabling the Google Beta Provider
To use the configuration provider with the Google beta provider, you must enable the "export credentials as shell variables" option.
Updated 6 months ago
