Single Sign-On

📘

This is for all SSO providers other than Okta. Please see this doc for the Okta integration.

General Configuration

Scalr supports SSO providers that use SAML 2.0. When SSO is activated, it will move the authentication step outside of Scalr and hand it over to the SSO provider that you have configured. During the login to Scalr, the user will be transferred to a sign-in page provided by the SSO server. After signing in, the user will then be redirected back to Scalr which will subsequently treat the user as signed in.

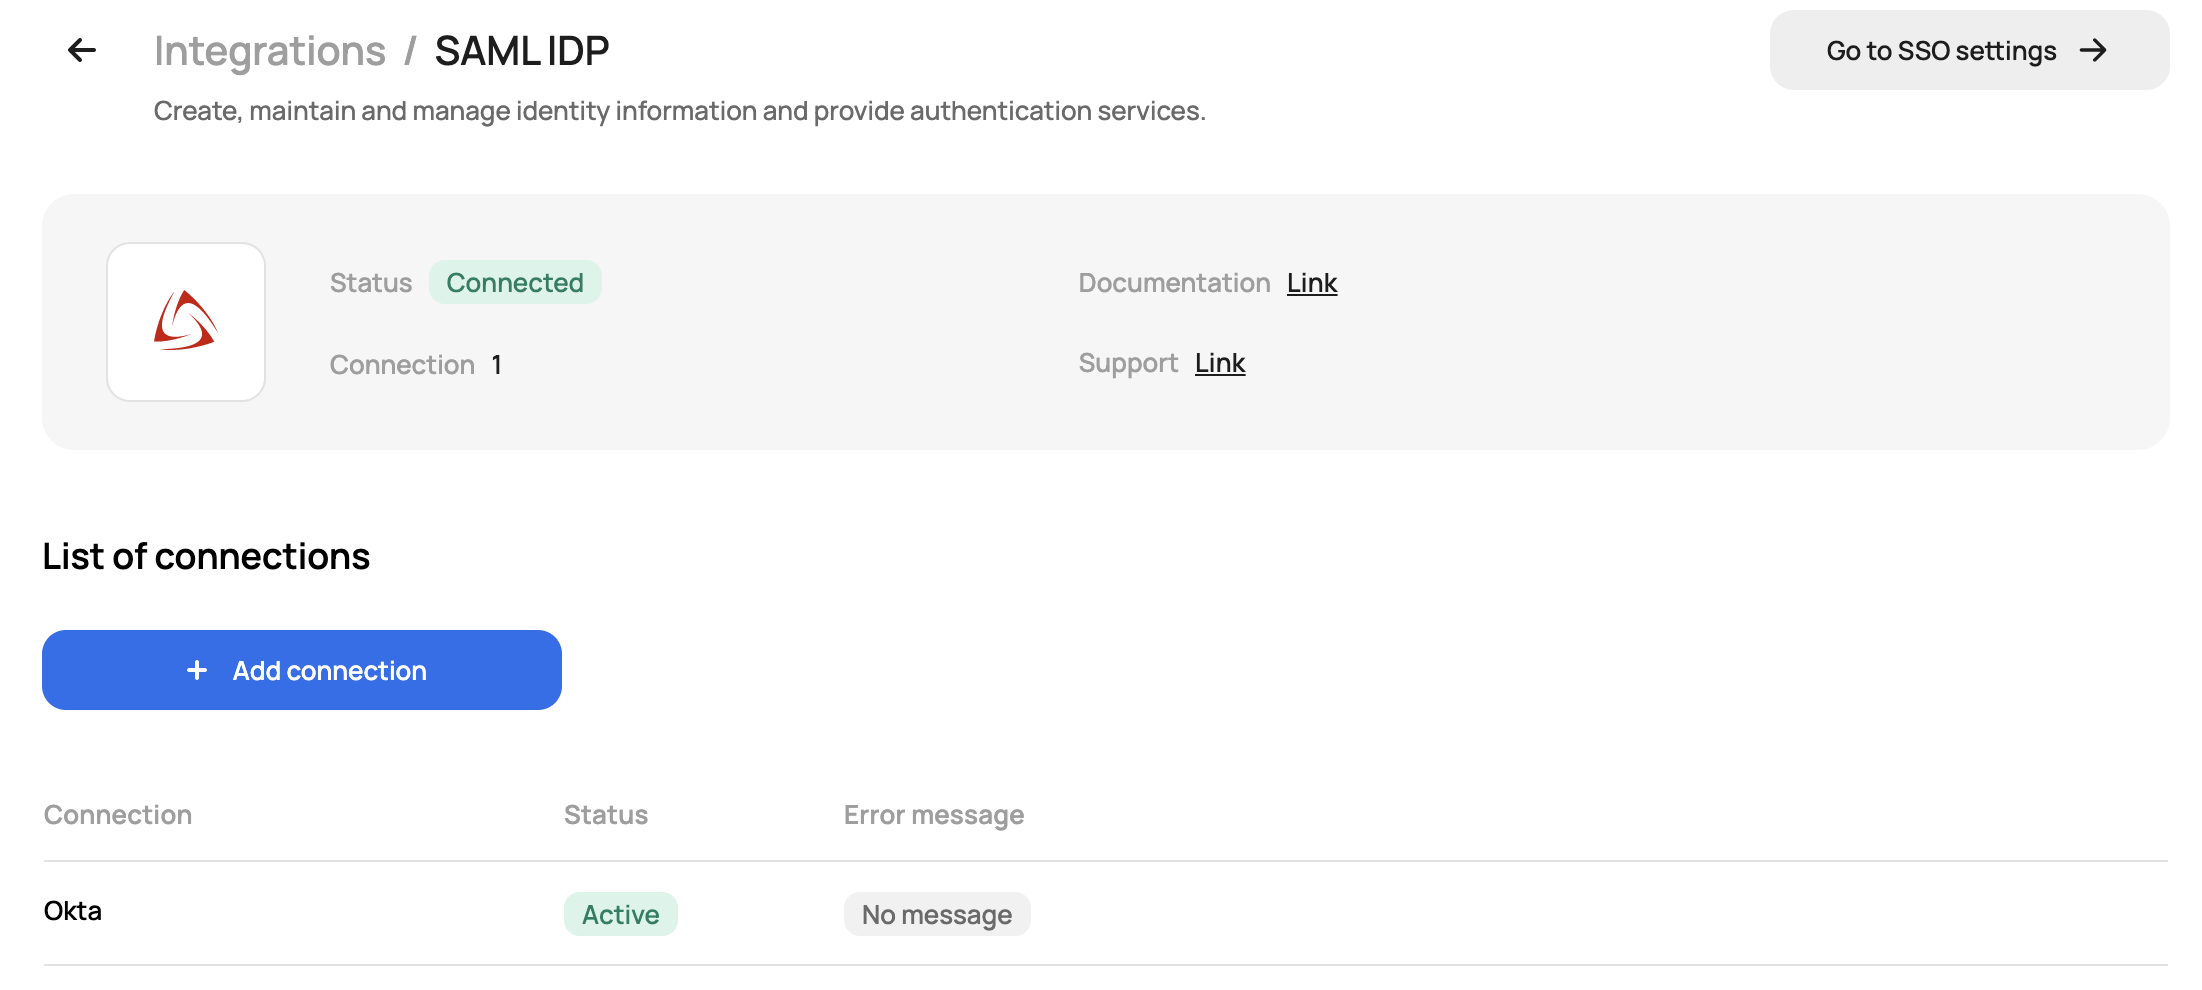
To enable SSO, go to the integration tab at the account scope and click on SAML IDP. You will then be given information that will be needed in your SSO provider:

Go to your SSO provider and start the configuration (see below for examples). The Scalr setup can be finished upon completion of the SSO provider configuration.

Upload the metadata file or manually fill in the fields required by your SSO provider and verify the connection when prompted:

2202

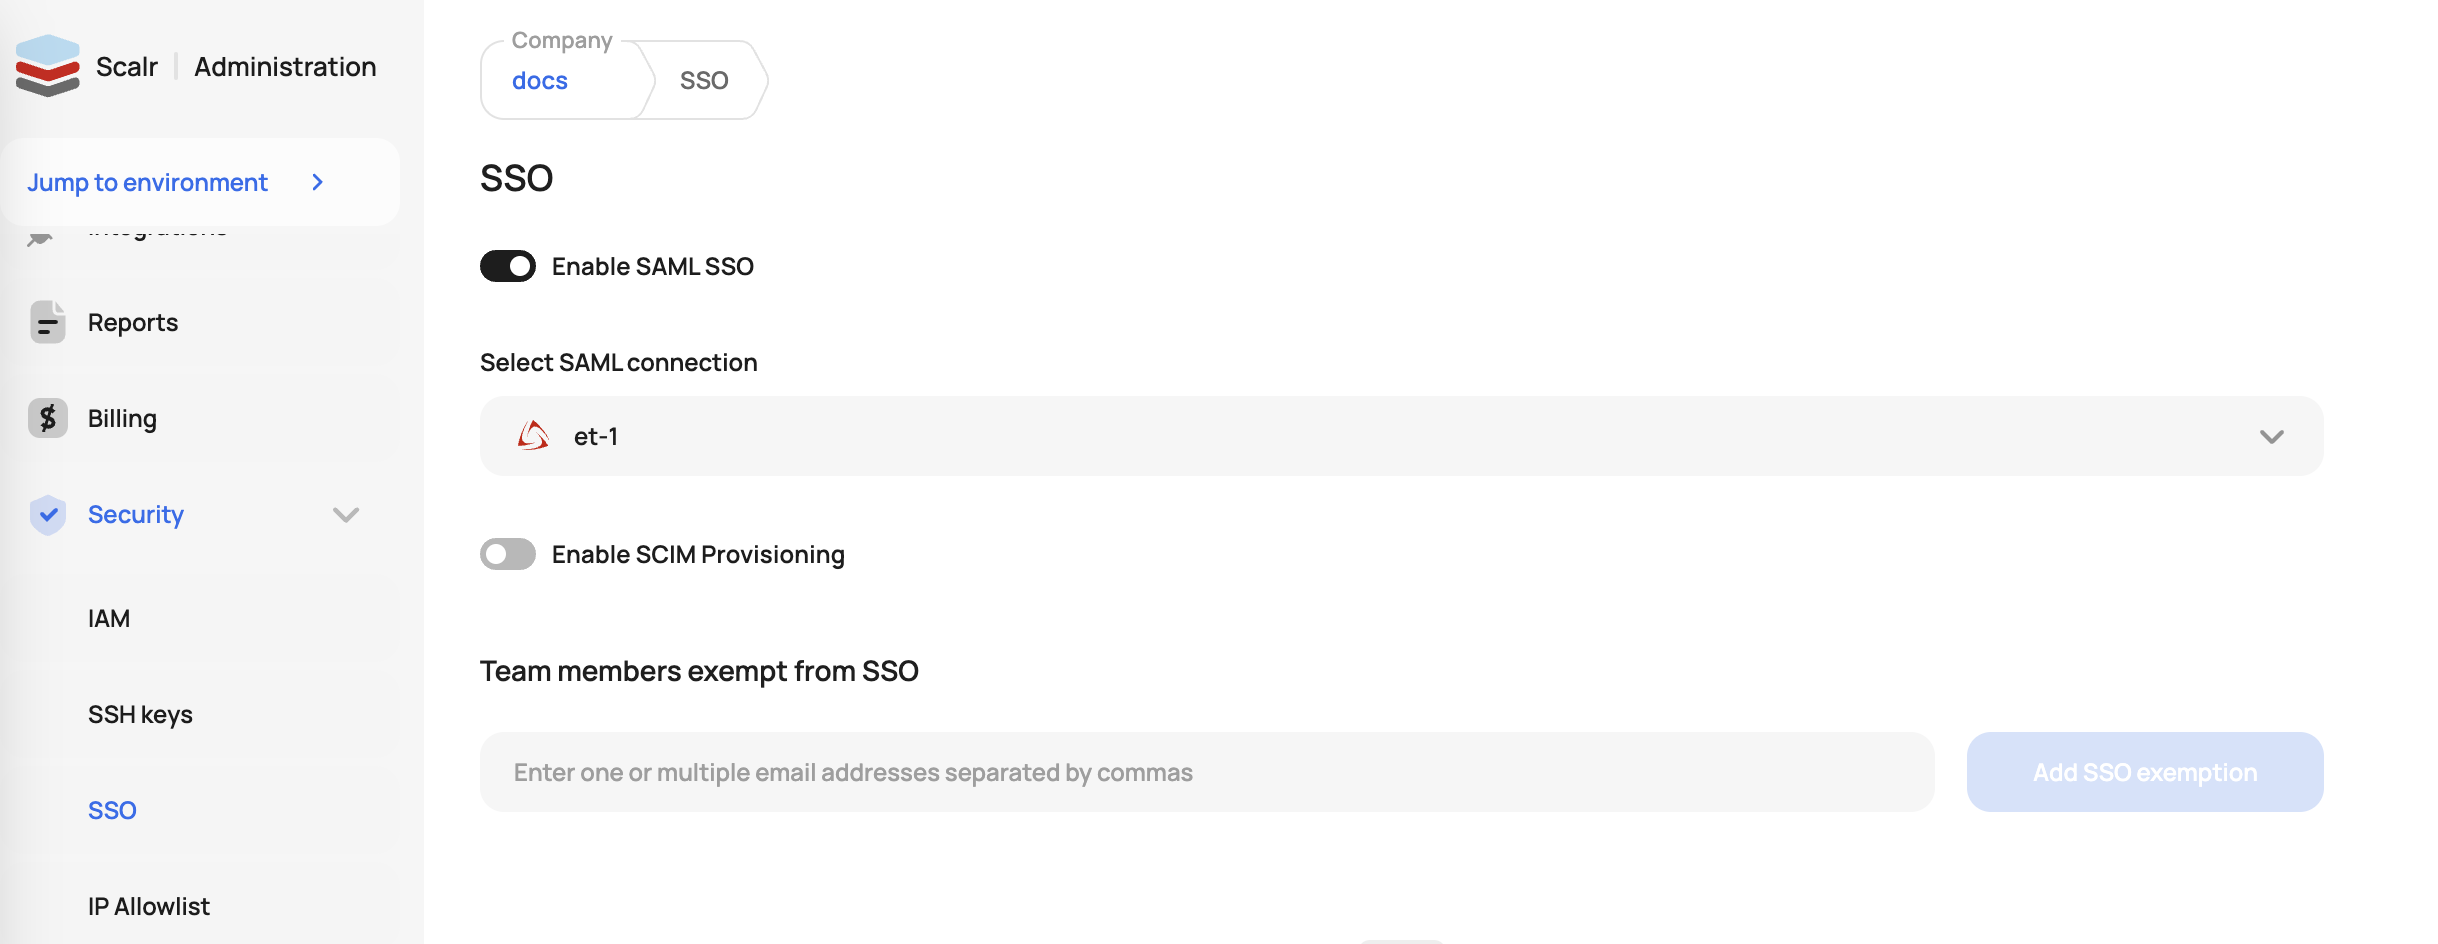
After you save the configuration, turn on the SSO authentication by going to the account settings:

2196

Users and Teams with SSO

After Scalr has been reconfigured for SSO, users and teams work as follows:

  1. Teams map to SSO groups. Account admins have access to create teams in Scalr and the team name will be validated against the groups in SSO, so the team name must match the group name.

  2. Teams must link to at least one environment and account.

  3. Once a team has been linked and given the proper permissions, any member of the related SSO group can attempt to log in to Scalr. On the first login, a user record gets created in Scalr and set as SSO authenticated.

Break Glass Users

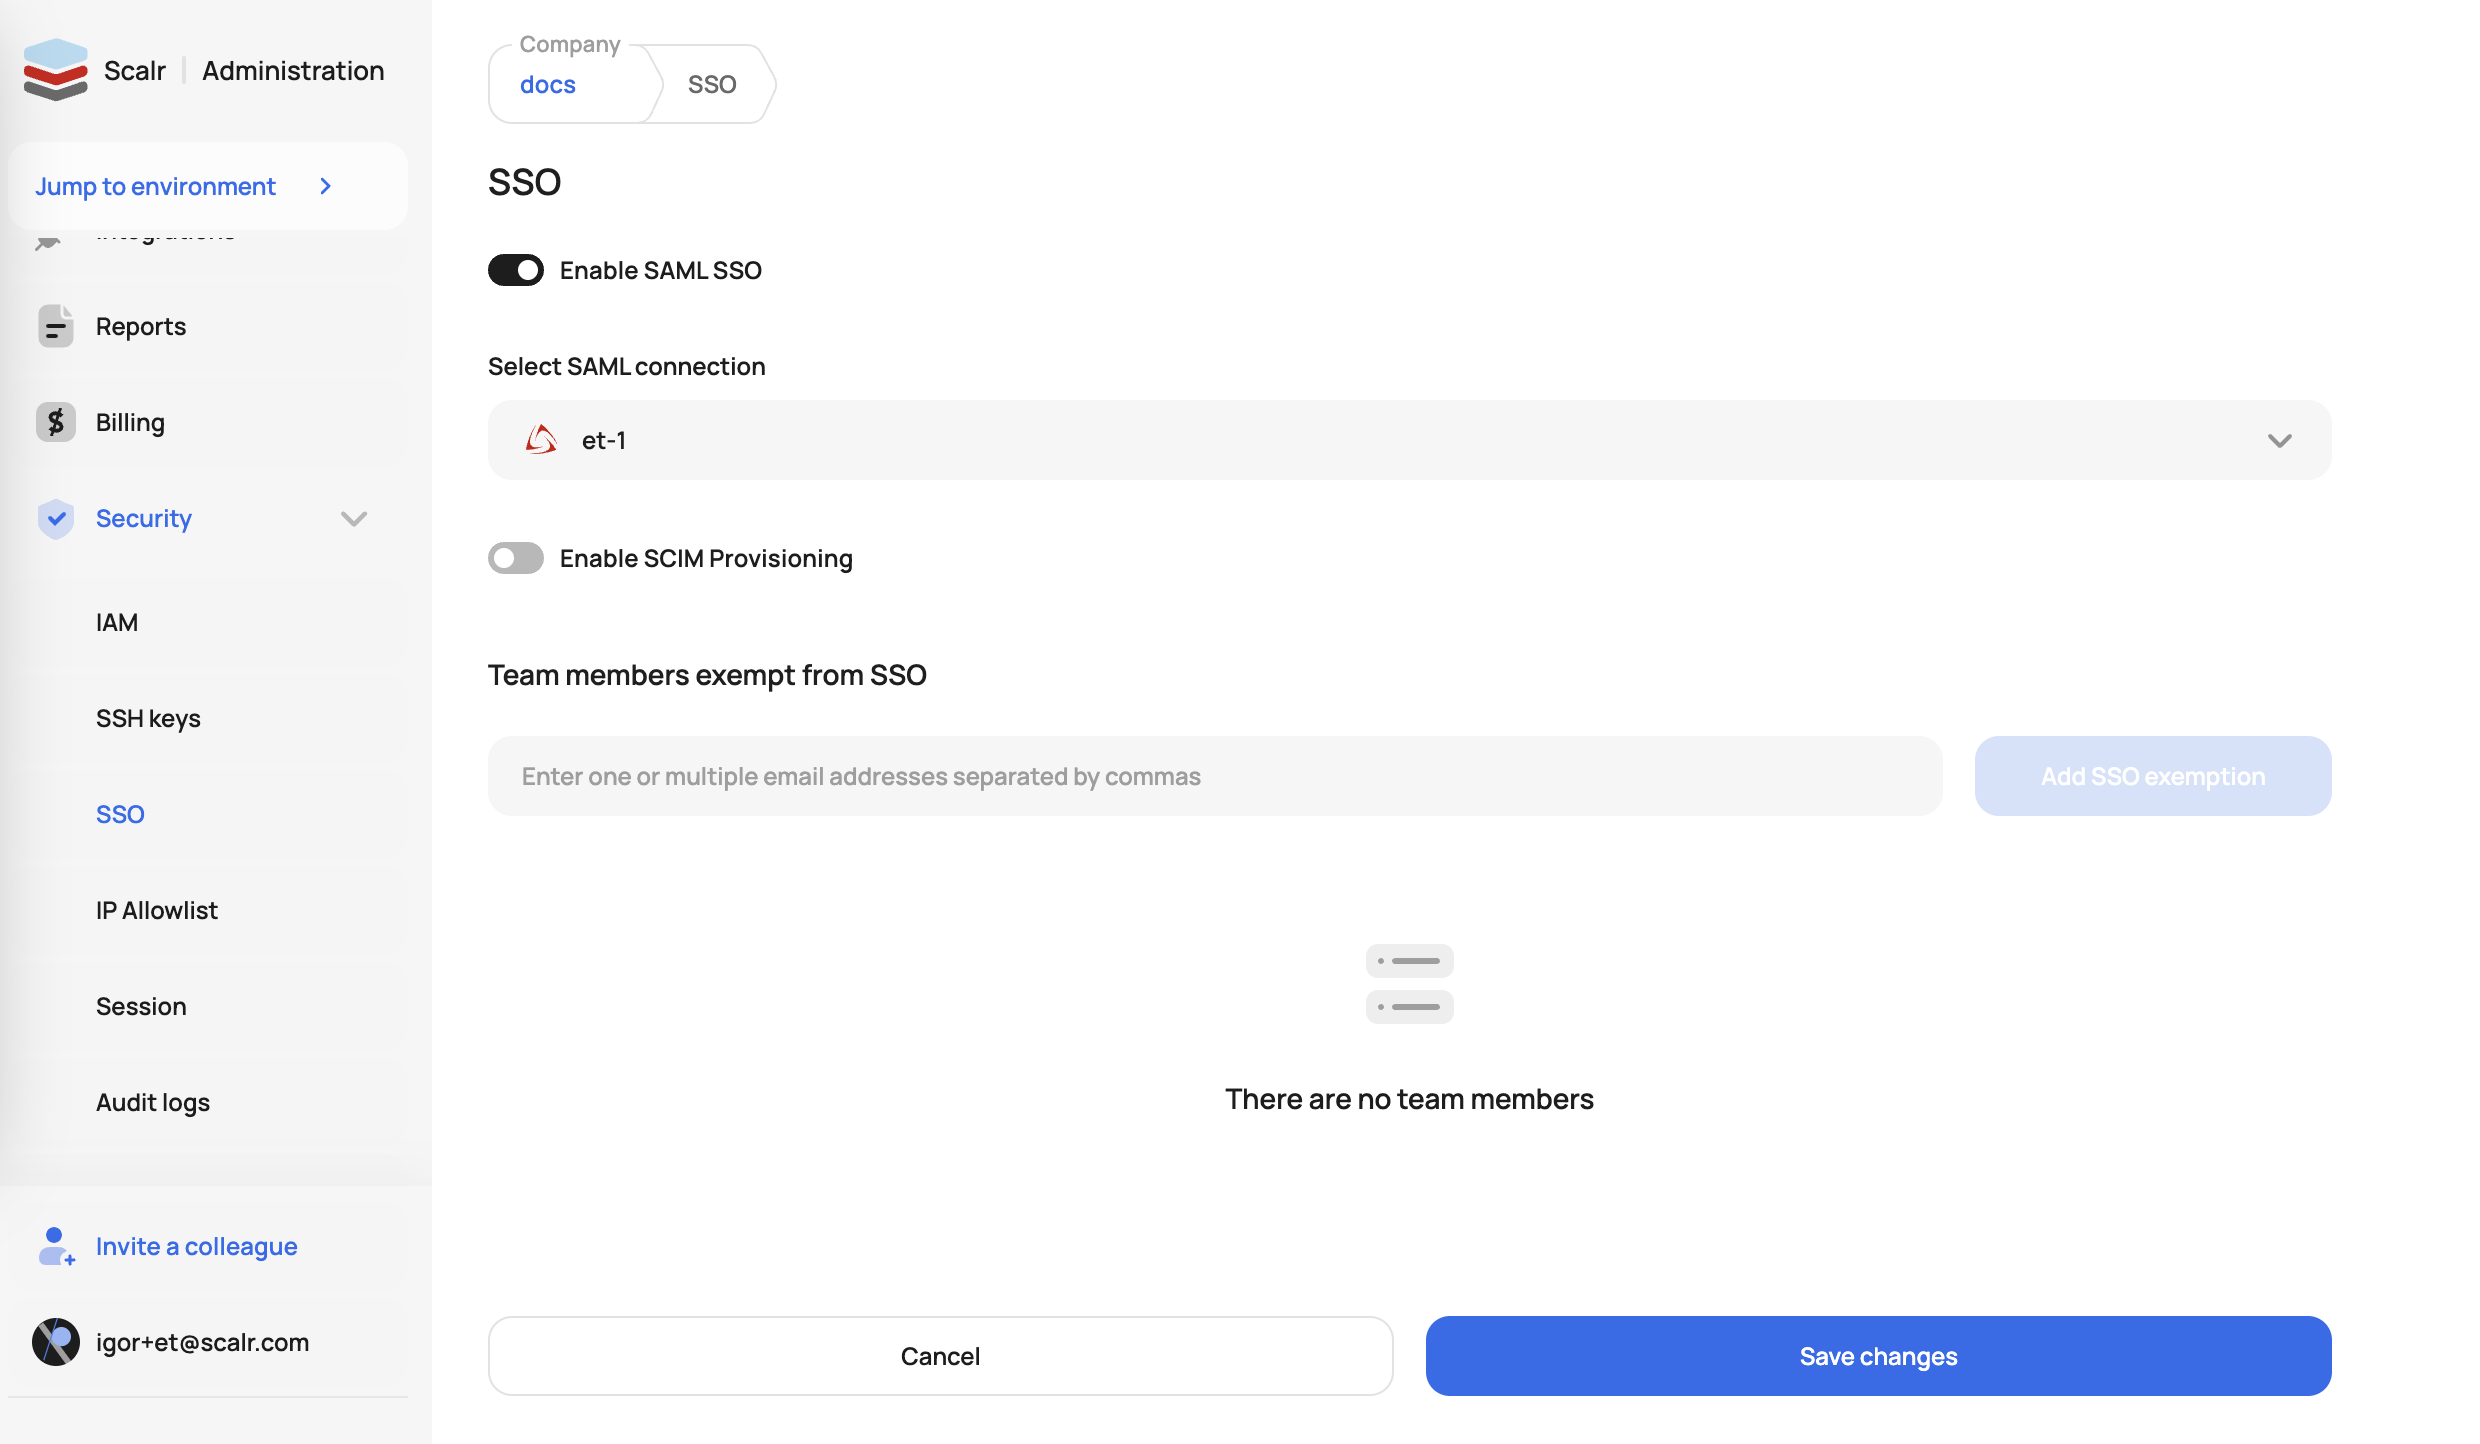
Incidents happen and it is likely that, at some point, your SSO provider will have an outage. If this happens, you can avoid being locked out of Scalr through the “break glass” feature. This feature allows you to specify a list of users who are exempt from SSO login the event of a SSO outage. These users can be specified by going to account settings:

2162

Edit the SSO setting:

1082

Now add the list of users who can bypass SSO when needed:

1732

📘

Bypass Login URL

To bypass SSO login, users should add the ?noLoginRedirect query parameter to the account URL, e.g. https://account.scalr.io?noLoginRedirect
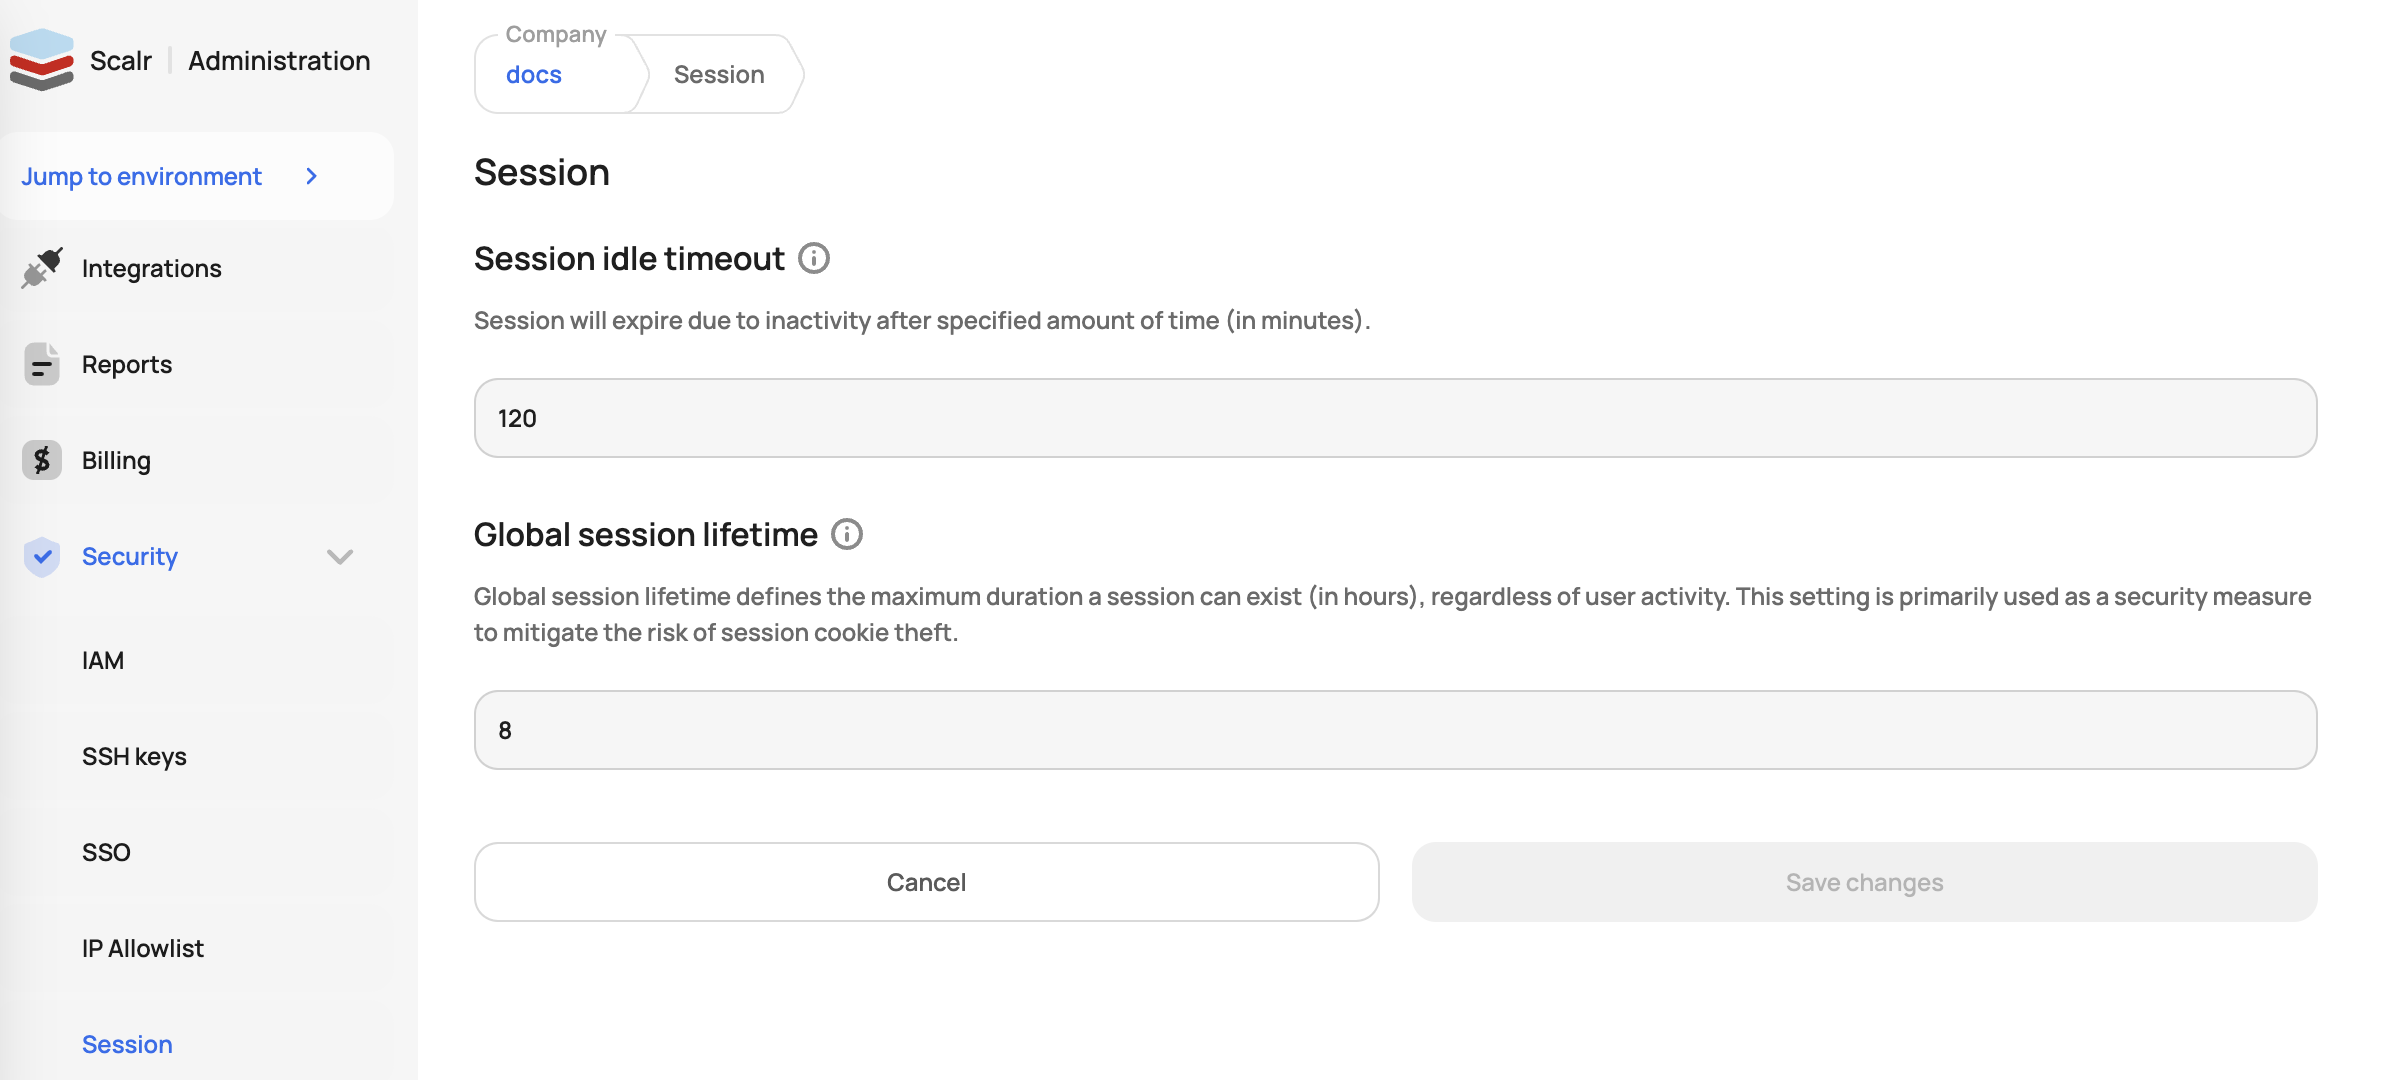
SSO Timeout

The SSO timeout can be configured by going to the account SSO settings and updating the default timeout, which is 2 hours:
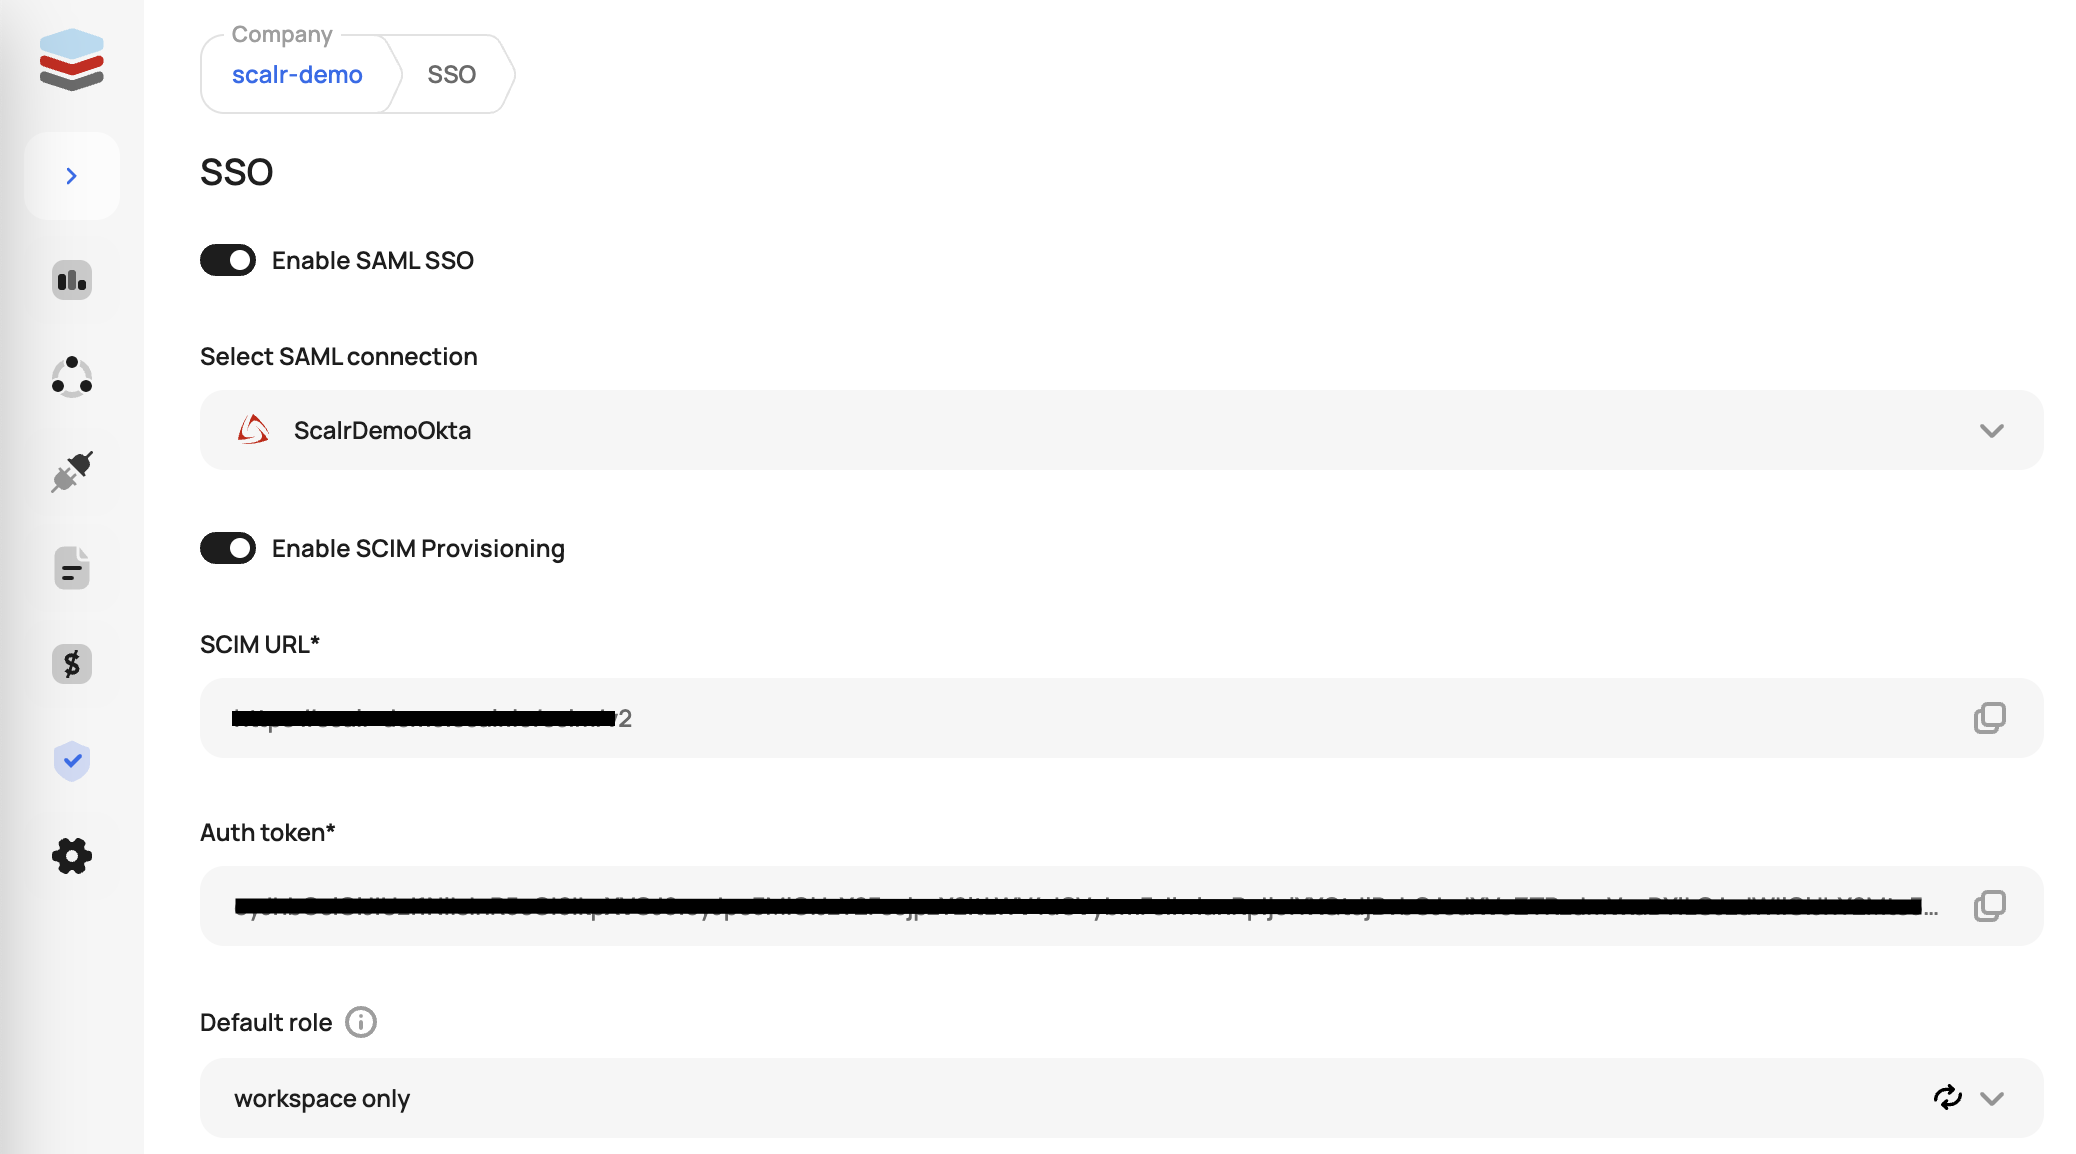
Azure AD (Microsoft Entra) SSO Example

📘

Note

Scalr supports all SAML 2.0 providers, this is just an example of a commonly used one.

Go to Azure Active Directory and click on Enterprise applications:

1152

Select New application and Create your own application:

1452

Name the application and select “Integrate any other application you don’t find in the gallery”:

1050

Select “Set up single sign-on”:

1980

Click edit on the SAML Configuration option and enter the following:

1502

Open the User Attributes & Claims, click add new claim, select “All groups”, and save:

2720

On the Single sign-on page, go to the SAML Signing Certificate section and download the Certificate (Base64). Paste that into the IDP x509cert section in Scalr:

Azure:

Scalr:

On the Azure Single sign-on page, go to the Set up section:

  • Azure AD Identifier = the IDP entity ID in Scalr
  • Login URL = the IDP single sign-on service URL in Scalr
  • Logout URL = is the IDP single logout service URL in Scalr

Azure:

1302

Scalr:

In Azure, go to App registrations, find your app and click on it. Copy the Application (client) ID and Directory (tenant) ID, and paste the IDs into the respective fields in Scalr:

Azure:

2652

Scalr:

In Azure, click on Certificate & Secrets and generate a Client secret. Paste the secret into the respective field in Scalr:

Azure:

1616

Scalr:

In Azure, click on API Permissions. Add permission, select Microsoft Graph, Application permissions, and add Directory.Read.All. Ensure that “admin consent” is set to yes and the permission type is “application”.

2662

In Scalr, add the following settings in the mapping section:

In Scalr, click on the advanced section and update the following fields:

  • IDP single sign on service binding = urn:oasis:names:tc:SAML:2.0:bindings:HTTP-POST
  • SP name id format = urn:oasis:names:tc:SAML:2.0:nameid-format:persistent

Click Connect SAML IDP and then verify the connection on the main SAML page in Scalr.

Azure SCIM

Scalr supports the SCIM (System for Cross-domain Identity Management) protocol to automatically add and remove users from Scalr.

To enable the SCIM protocol for Azure AD, go to the Azure application that you already provisioned above and follow the steps below:

Go to Provisioning, click Get Started:

  • Select Automatic for Provisioning mode
  • For Tenant URL insert SCIM server URL (https://<account>.scalr.io/scim/v2)
  • For Secret Token insert the SCIM access token, which can be obtained in Scalr in the SCIM Protocol section of the account settings page.
  • In Azure, verify the connection by clicking Test Connection
  • Click Save
  1. In Azure, configure the following Attribute Mappings for Provision Azure Active Directory Users in Mappings section:
    • userPrincipalName -> userName (Matching precedence 1)
    • Switch([IsSoftDeleted], , "False", "True", "True", "False") -> active
    • givenName -> name.givenName
    • surname -> name.familyName
    • objectId -> externalId
  2. Configure the following Attribute Mappings for Provision Azure Active Directory Groups in Mappings section:
    • displayName -> displayName (Matching precedence 1)
    • members -> members

JumpCloud Example

In JumpCloud, start by clicking SSO Applications and select Custom Application. Select Manage Single Sign-On(SSO) and select the SAML option:

Enter the Display Label and a description of your choice. In the configuration of the application in JumpCloud, add the IdP Entity ID, which can be pulled from the Scalr UI:

Enter the ID into JumpCloud:

The SP Entity ID in JumpCloud can be pulled from Scalr, in Scalr it is the SP Endpoint

The ACS URLs in JumpCloud can also be pulled from Scalr, in Scalr it is the Single sign on URL

The LoginURL in JumpCloud is also the Single sign on URL provided in Scalr.

The remaining settings in JumpCloud can be left as the default unless your organization requires them to be changed.

In Scalr, the following settings should be applied:

First, the IDP single sign on service must be set and it is provided by JumpCloud as the IDP URL in the application settings. The IDP entity ID is the same as the general IDP ID provided by Scalr. The last step in the general settings is to paste in the IDP X509cert which is provided by JumpCloud. Here is a working example of the general settings in Scalr:

No changes should be needed in the Security section in Scalr, here is a working example:

In the mappings section, you must supply the Groups. In this example, we have the include group attribute set to memberOf in JumpCloud (this may differ based on your setup):

In Scalr:

In Scalr:

Lastly, in the advanced section, the only update that you may need to make is to update the SP name ID format based on what you have in JumpCloud. In this example, we left the default in JumpCloud and updated Scalr to urn:oasis:names:tc:SAML:1.0:nameid-format:unspecified:

You can now save and verify the connection.

Google Workspace Example

In Google, go to Apps then Web and mobile apps. Select Add custom SAML app. Enter the app name and details.

Click Continue, which brings you to Google IDP details page. At this point, go to Scalr, the Integrations tab, and select SAML IDP. On the SAML page, select Manual for the configuration method:

Open the Google console and copy the following fields from Google to the Scalr general settings:

  • SSO URL (Google) -> IDP single sign on service (Scalr)
  • Entity ID(Google) -> IDP entity ID (Scalr)
  • Certificate (Google)-> IDP X509cert (Scalr)
  • SHA-256 fingerprint (Google) -> IDP cert fingerprint (Scalr)

Click continue to go to the Service Provider Details in Google.

Open the Scalr console and copy the following fields from Scalr to Google:

  • Single sign on URL (Scalr) -> ACS URL (Google)
  • Audience URI (Scalr) -> Entity ID (Google)

The rest of the fields can left as the default. Click continue to go to Attribute mapping in Google. The following settings can vary based on your organization. In Google, set the Primary email -> email. The Group Membership can be left blank or updated based on your organizations choosing.

In Scalr, update the mapping section to equal the values in Google. In this case, the only one that needs to be specified is Groups (this can be a different attribute name in your Google attributes) and the email is automatically passed in. The rest of the settings in Scalr can be left as the defaults.

Now, just verify the connection and then turn on SSO for the account!