State Management
State storage in Scalr is determined by the organization's deployment model. As mentioned in the remote backend section, there are three models:
- Scalr Remote Backend w/ Scalr State Storage (default setting)
- Scalr Remote Backend w/ Customer Managed State Storage
- Non-Scalr Backend w/ Customer State Storage
This document will break down the state storage options based on the deployment model that is being used.
State Storage Options
Scalr Backend w/ Scalr State Storage
The Scalr backend with Scalr state storage is the default setting for all new accounts. If you have not explicitly modified the state storage settings, this is what your Scalr account is using. Using this model will give your full feature functionality in Scalr, there are no limitations to be aware of.
The Terraform or OpenTofu state is stored in a Scalr-managed bucket in Google Compute Cloud in the US Central region. All state is stored with AES 256 encryption and only the Scalr application has the ability to decrypt the state.
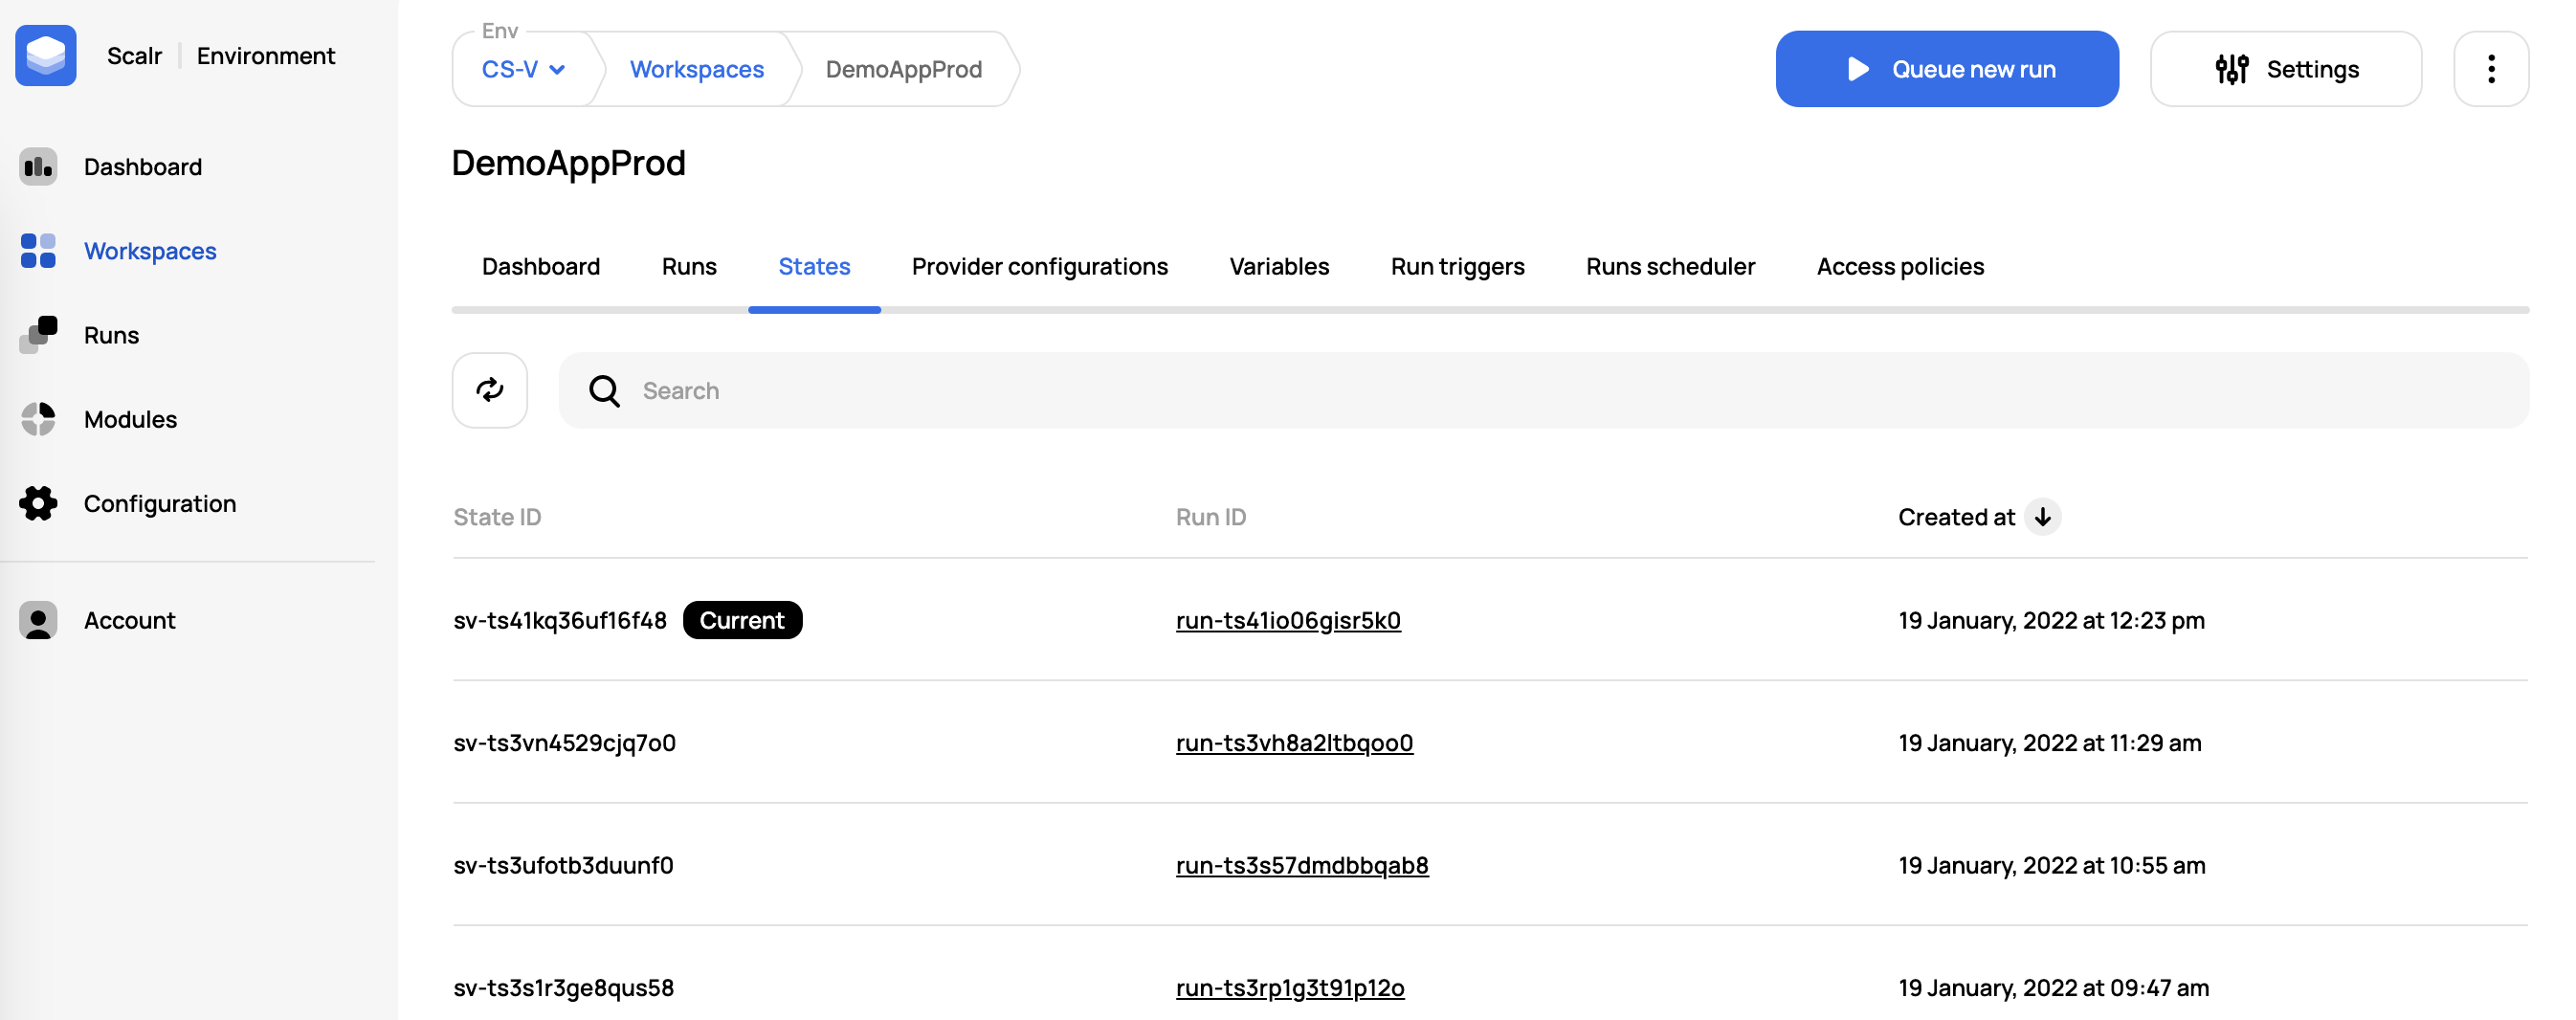
When a run is executed in a Scalr workspace the result is the deployment of resources and then the storage of the Terraform or OpenTofu state in Scalr. Scalr will store not only the current state but all previous state files as well with the ability to download them.
The permission state-versions:read must be granted for a user to read state.
Scalr Backend w/ Customer Managed State
With the bring your bucket option, you can store state and other blob objects in a GCP, Azure, or AWS bucket. To add your own bucket and set it as the account default, please follow the storage profile instructions.
The following objects will be stored in your bucket instead of in Scalr:
- State files
- Terraform/Tofu code artifacts
- Plan JSON and binaries
- Terraform/Tofu logs
The following objects that are used during runs are still stored in Scalr:
- Variables
- Provider configurations
Non-Scalr Backend w/ Customer Managed State
If a non-Scalr backend is used, such as AWS S3, AzureRM, GCS, or any supported backend, your state will be stored in the backend defined in your code. This is a helpful option for users who already use a different backend and don't want to change the backend or how the state is stored. The non-Scalr backend can be enabled/disabled on a per-environment basis:
Once the Scalr backend is disabled, it cannot be turned back on for the environment.
An example backend that is not Scalr would be S3. If using S3 as your backend, you likely have a code snippet similar to this defined:
terraform {
  backend "s3" {
    bucket = "yourbucket"
    key    = "path/to/key"
    region = "us-east-1"
  }
}
Another example is the backend snippet for AzureRM:
terraform {
  backend "azurerm" {
    resource_group_name  = "StorageAccount-YourResourceGroup"
    storage_account_name = "1234567"
    container_name       = "workspace-state"
    key                  = "workspace.terraform.tfstate"
  }
}
As a reminder, ANY supported backend can be used.
This means that the state will be stored in your bucket or container, not in Scalr. It is up to the owner of the backend to encrypt the state. Scalr provider configurations can be used to authenticate to other backends, see more on that here. It is important to note that non-Scalr backends will have some limited functionality, which can be seen here.
State Operations
Import State
If using OpenTofu, substitute thetofucommand forterraform.
Note: This functionality is only available if the Scalr backend is used.
State can be imported into workspaces using the Scalr UI or API; or the Terraform/Tofu CLI. When importing state into a new workspace, no manipulation is needed as long as it is a valid state file. When importing state into an existing workspace with existing state, there is some validation with the serial in the remote state.
The serial of the local state must be at least one number higher than the serial in the remote state. For example, if the state in Scalr shows the following (serial set to 3):
{
  "version": 4,
  "terraform_version": "1.5.7",
  "serial": 3,
...
Then ensure that the new state locally has serial set to 4 before pushing:
{
  "version": 4,
  "terraform_version": "1.5.7",
  "serial": 4,
...
If not, you will see the following error: “Failed to write state: cannot overwrite existing state with serial 1 with a different state that has the same serial.”
Scalr UI
Note: This functionality is only available if the Scalr backend is used.
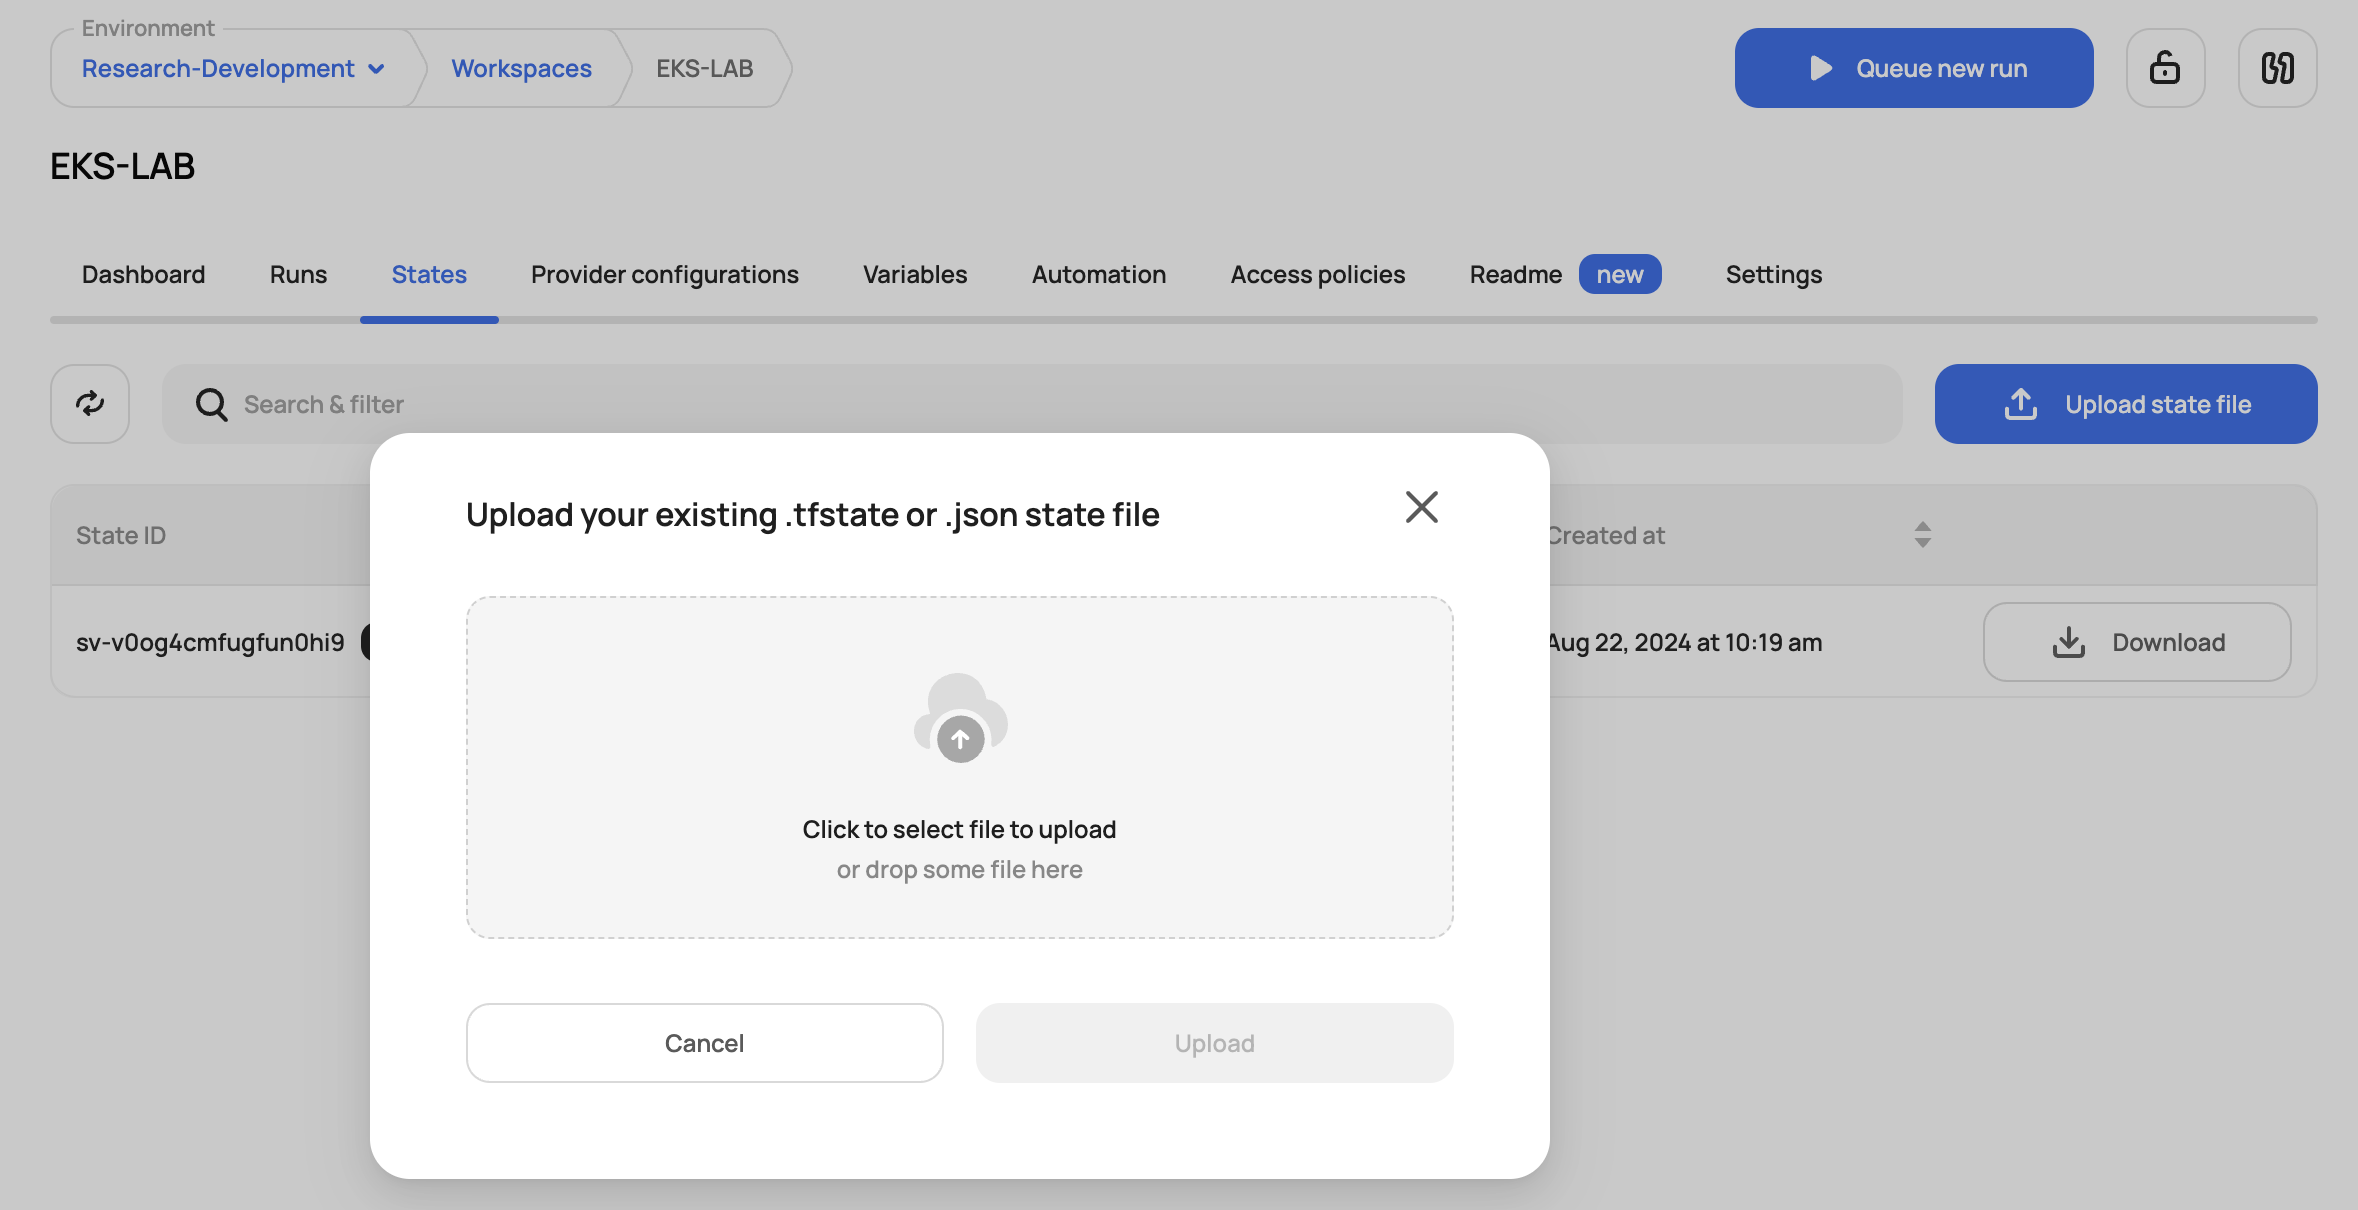
To import state, navigate to the state tab within a workspace and click on "Upload state file":
Terraform State Push
Note: This functionality is only available if the Scalr backend is used.
State can be updated and manipulated easily in Scalr as Scalr can be added as a remote backend to local workspaces. Scalr supports all of the standard Terraform or OpenTofu open-source commands as long as the remote backend is added to your config.
First, get the API token for Scalr by running the following:
terraform login <account-name>.scalr.io
Next, make sure you have Scalr added as the backend for the local workspace:
terraform {
  backend "remote" {
    hostname = "<my-account>.scalr.io"
    organization = "<ID of environment>"
    workspaces {
      name = "<workspace-name>"
    }
  }
}
Next, you can pull the state with terraform state pull> terraform.tfstate
Now that you have the state locally, you can make updates to it and then push it back into Scalr with terraform state push terraform.tfstate
In some scenarios, you must ensure that the serial of the state is one number higher than the previous serial that was in the Scalr workspace. You will know you have an issue if you see the error:cannot overwrite existing state with serial 1 with a different state that has the same serial
This can be fixed by updating the serial in the actual state file before pushing:
{
  "version": 2,
  "terraform_version": "1.0.0",
  "serial": 2,
...
Import Resources
Resources can also be imported into the existing Terraform state in Scalr by running the standard import command: terraform import resource.scalr <resource-id>.
First, get the API token for Scalr by running the following:
terraform login <account-name>.scalr.io
Next, make sure you have Scalr added as the backend for the local workspace:
terraform {
  backend "remote" {
    hostname = "<my-account>.scalr.io"
    organization = "<ID of environment>"
    workspaces {
      name = "<workspace-name>"
    }
  }
}
Lastly, run the import commands and you'll see the resource count and state file in the workspace update:
terraform import resource.scalr <resource-id>
See the official import docs here.
State Backup/Export
For organizations that want to have a copy of the state stored locally, this can be done using the Terraform/OpenTofu CLI or Scalr API to export the state.
If using the Terraform CLI, you can simply run a terraform state pull> terraform.tfstate to pull it down locally.
If using the Scalr API, most users do this in two ways:
- Run a job to do a bulk export on a recurring schedule.
- Export the state using the post-apply custom hook after a successful apply.
In either case, this API can be called to get a state file based on the version ID or this API call can be called to pull the current state for a workspace.
We have also created a script that you can use to do the backup: https://github.com/Scalr/scalr-state-backup
Rollback
Note: This functionality is only available if the Scalr backend is used.
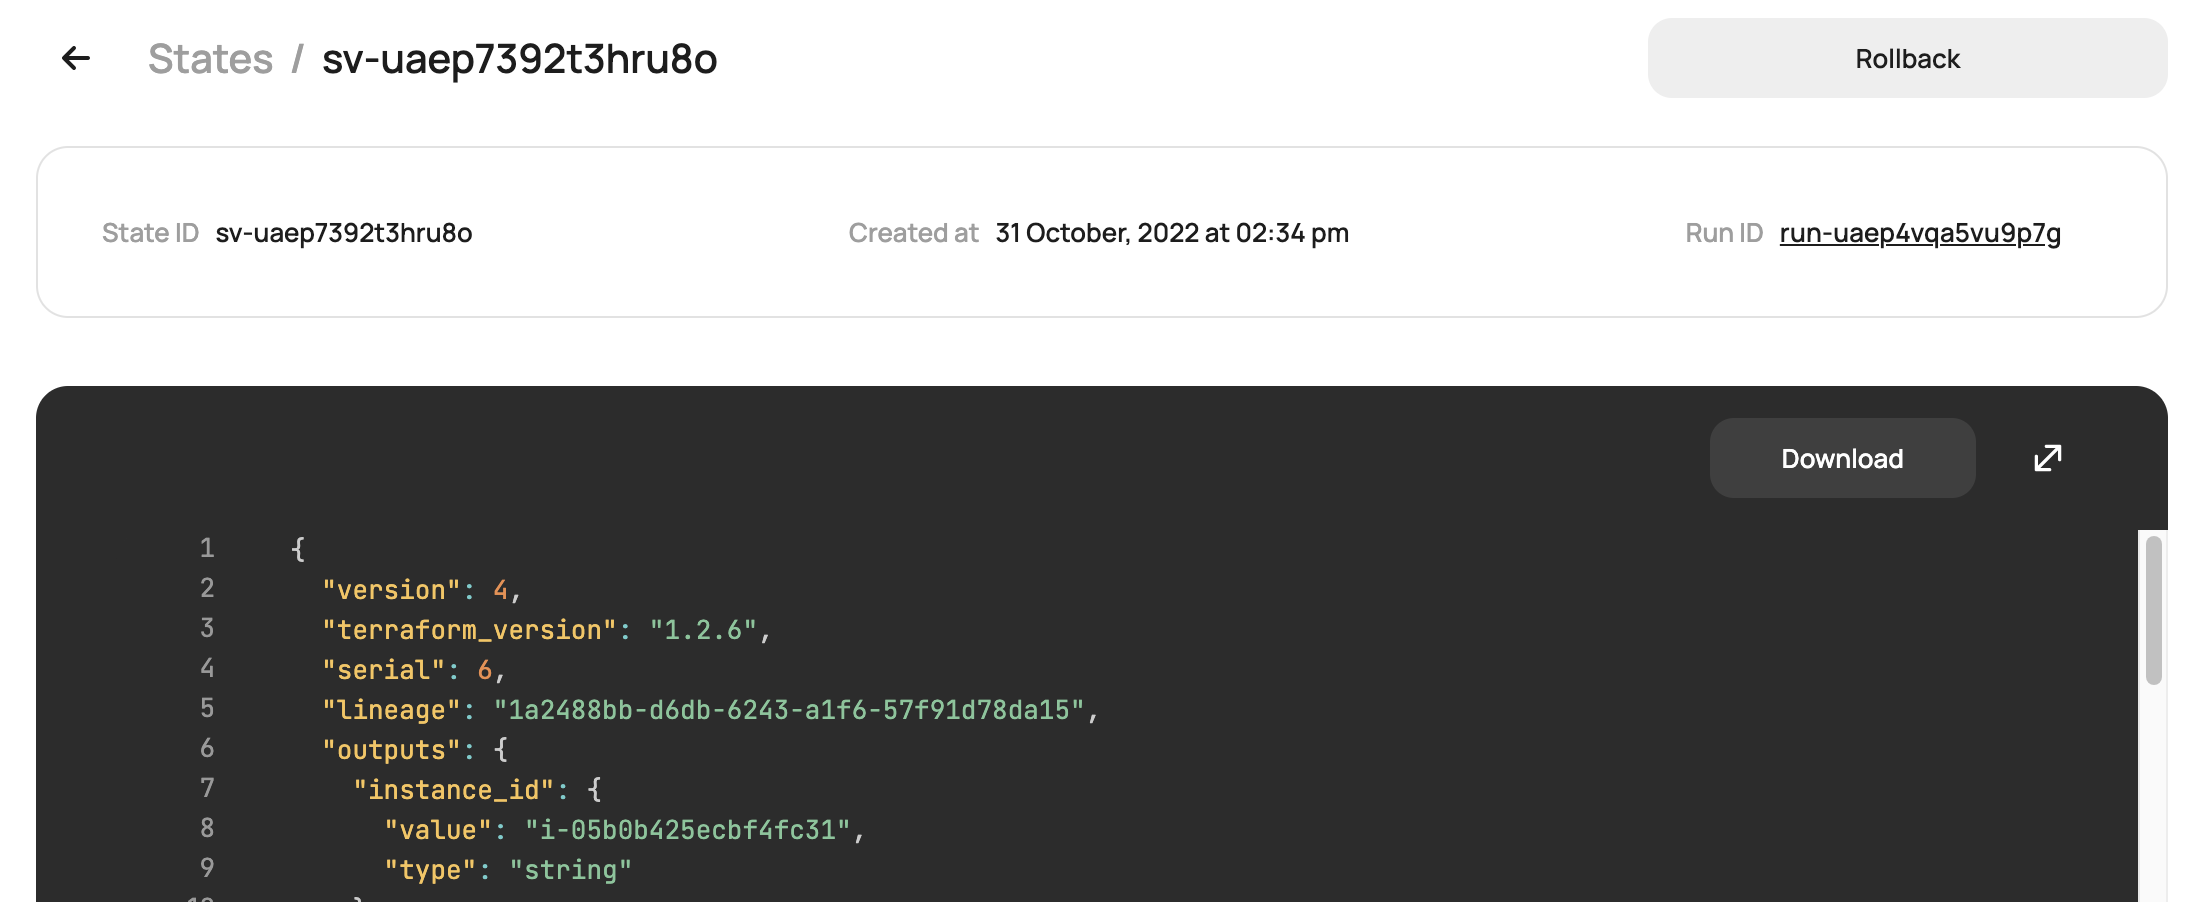
The state rollback feature allows you to easily rollback to a previous state file in the event of an error or corrupt file. This will not update or change your resources unless a new Terraform run is executed and a change is detected. The rollback option can be found on the page of the old state file:
Share State Output
It is common practice to reference outputs from other workspaces so that a Terraform configuration can make use of resources that have been deployed in another workspace. This is done using the terraform_remote_state data source as shown in this example. When using the datasource, it will only read outputs, not the entire state file.
data "terraform_remote_state" "state-1" {
backend = "remote"
config = {
hostname = "<host>"
organization = "<env_id>"
workspaces = {
name = "<workspace name>"
}
}
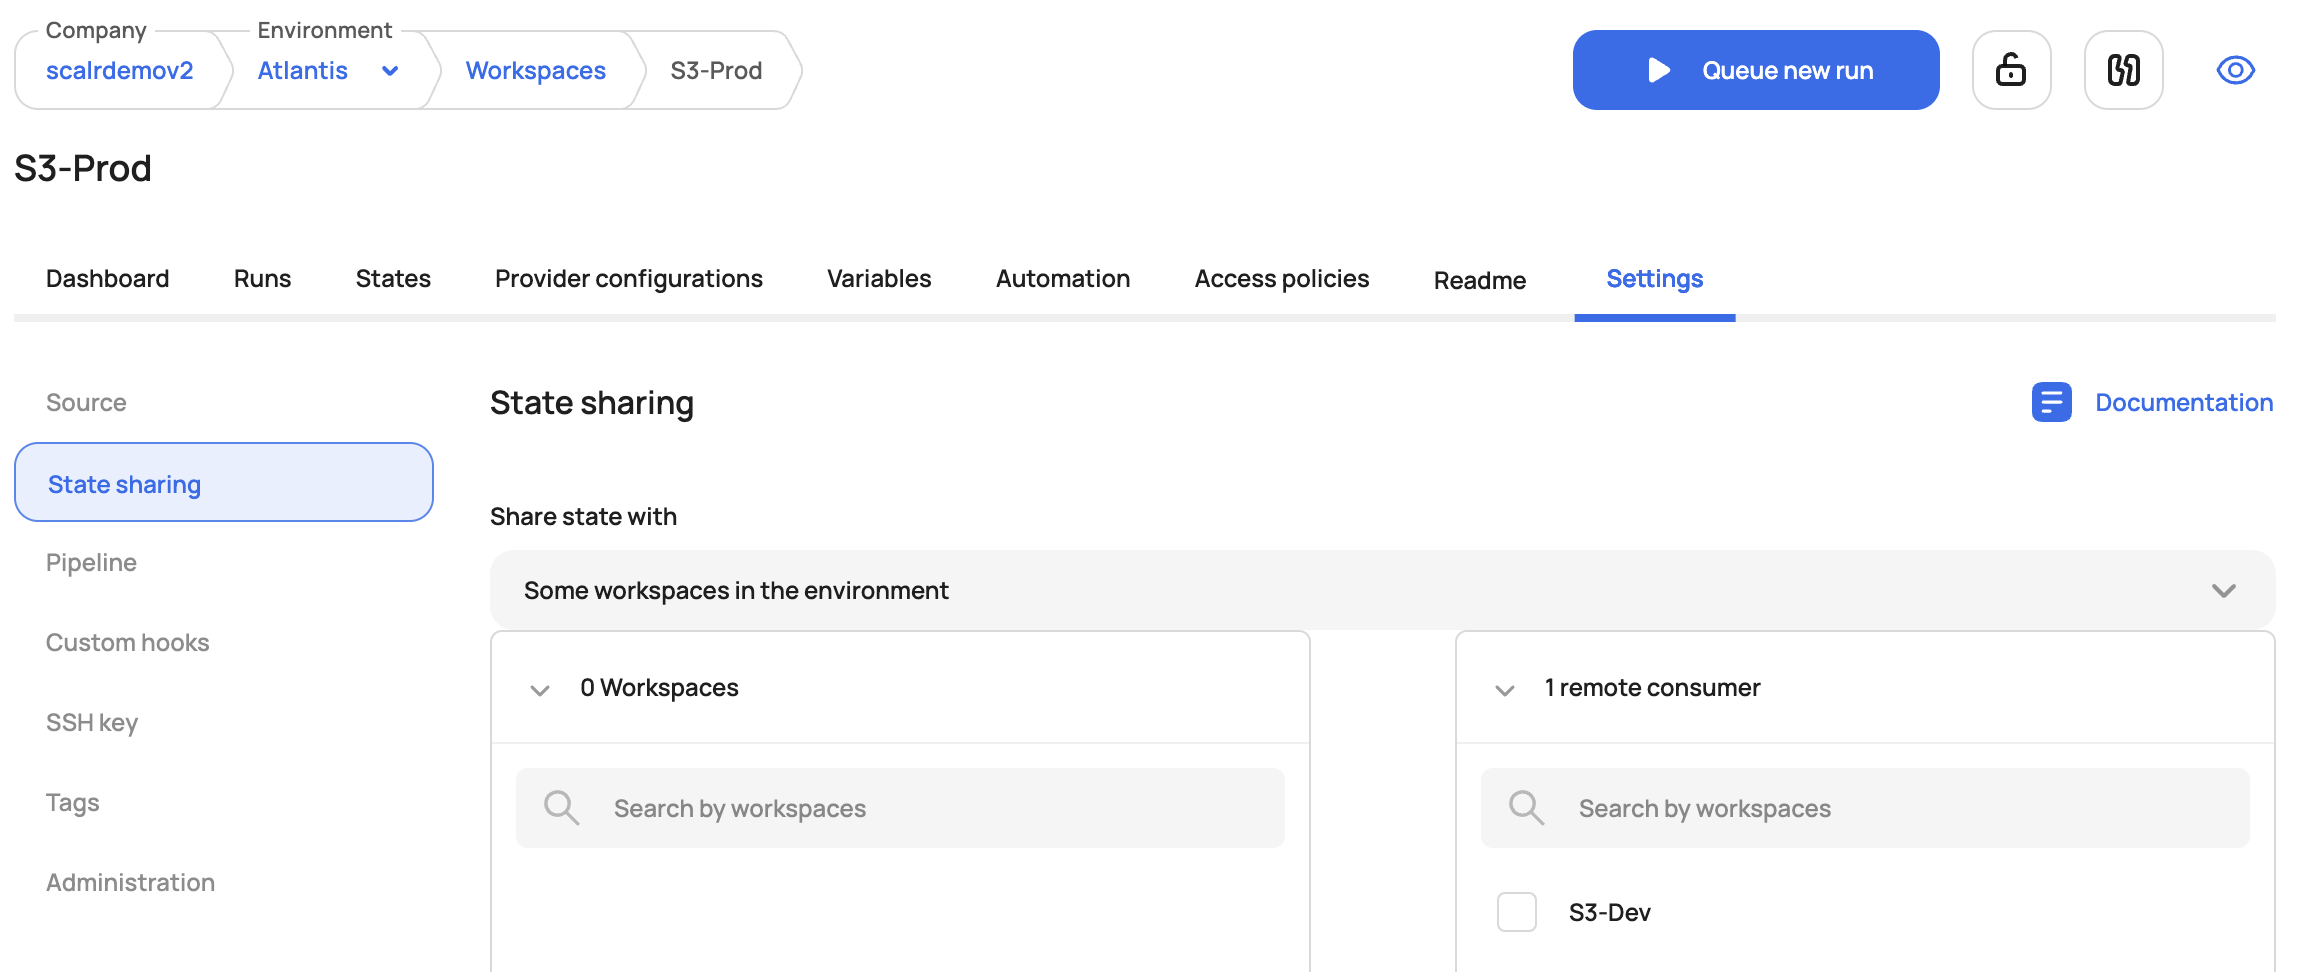
}Sharing Within an Environment
Scalr workspaces have the option to limit which workspaces can access the outputs. Workspace owners can allow the following sharing options:
- All workspaces in an environment
- No workspaces (only accessed by the current workspace)
- Some workspaces
When some workspace is selected, users will be prompted to select the workspaces with which the output can be shared:
Cross-Environment Sharing
Cross-environment state sharing can be done by using the federated environment capability. Federated environment access in Scalr enables users to create dependencies between workspaces across different environments. It facilitates state sharing, where outputs from one workspace can be used as inputs in another. By granting controlled access between environments, federated environments streamline cross-environment workflows while maintaining appropriate security boundaries. Read more about this here.
When access is granted between environments, the list of workspaces from the other environment will appear in the state sharing list.
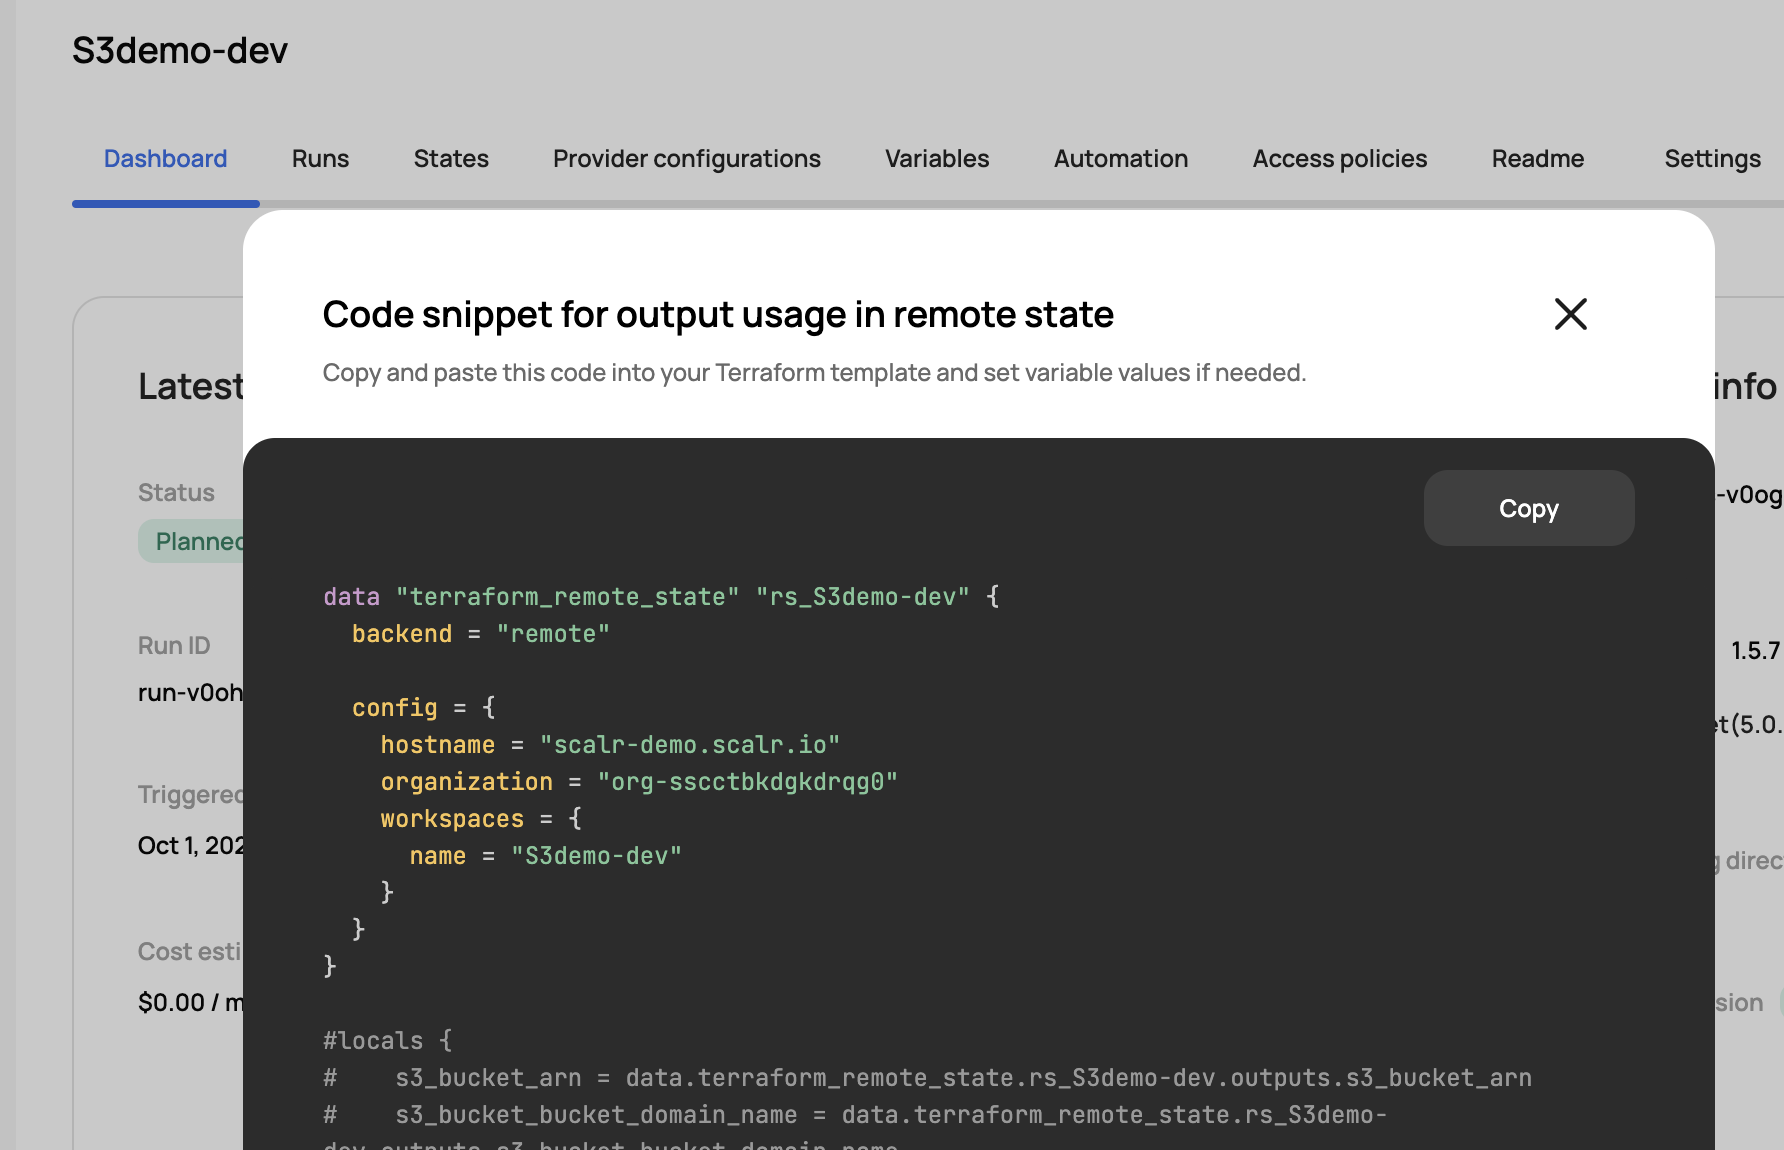
Remote State Code Snippet
Note: This functionality is only available is the Scalr backend is used.
To obtain the remote state code snippet for the outputs, go to the workspace dashboard and click on Remote State Snippet.:
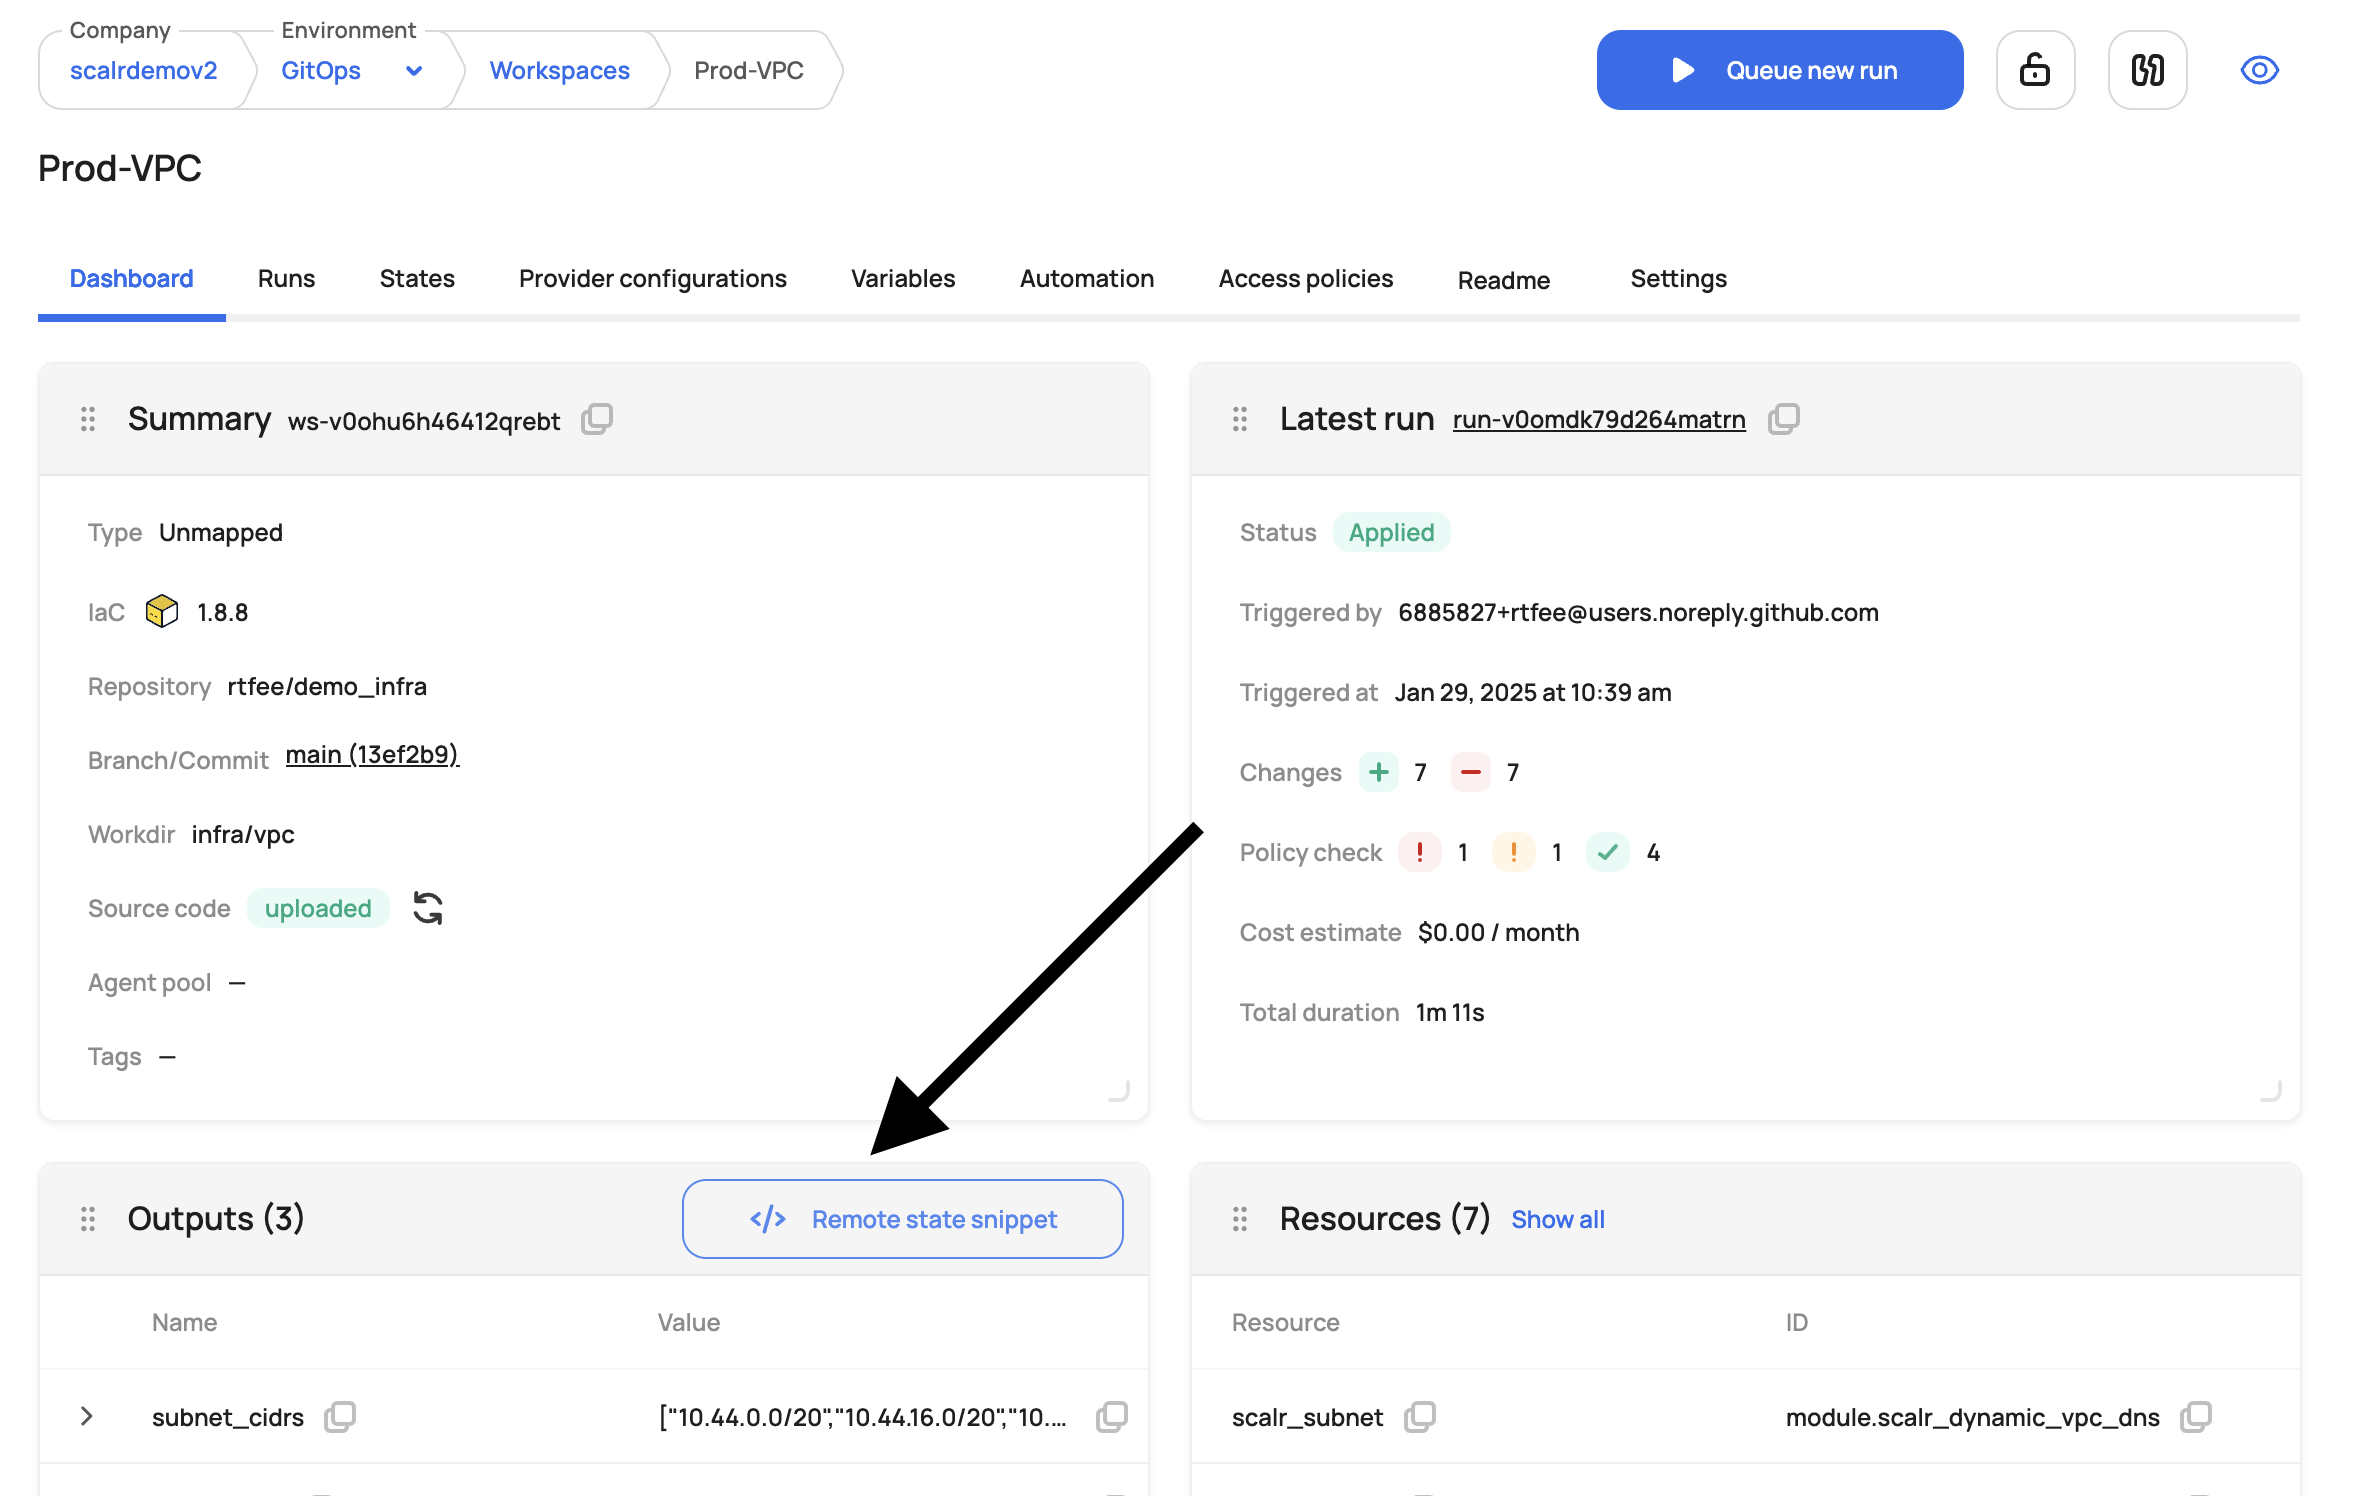
A code snippet similar to the one below will be provided which can then be pasted into your Terraform code.
Updated 9 months ago