Getting Started
Install the VSCode Extension
If you're developing code locally, we encourage you to use our VSCode extension that authenticates to Scalr and will show you a list of your workspaces, the latest run info, and more!
Terminology
Before you get started in Scalr, we wanted to review some of the product terminology to make sure we are all on the same page:
Account: The highest level scope in Scalr. When you signed up for Scalr, the account was created. The account is mainly used for administrative purposes.
Environment: The child of an account. An environment is the parent of a workspace. Environments are a way of logically separating workspaces, teams, credentials, and more.
Workspace: Where you upload Terraform or OpenTofu (OTF) configuration files, execute runs, store state, variables, and more related to a deployment.
Run: The execution of Terraform or OTF plan/apply.
Provider Configurations: The way to authenticate to the providers used in your code.
Agents: A Scalr package installed in the location of your choice, which will execute runs or interact with VCS providers behind a firewall.
Variables: Either shell or Terraform variables, which can be defined at any scope in the Scalr organizational model.
Module: The same concept as a Terraform or OTF module. Sync a Terraform module into the private registry to make it available to users.
Policy: Scalr uses Open Policy Agent to enforce standards and governance on Terraform and OTF deployments.
Roles: A combination of IAM permissions.
Access Policy: The combination of a user or team and a role. Access policies determine who has permissions at which scope.
Create a workspace & execute a run
Interested in just seeing how the pipeline works before adding credentials? In the example below, we’ll just use a null resource module to create a simple configuration file and execute a run in a workspace.
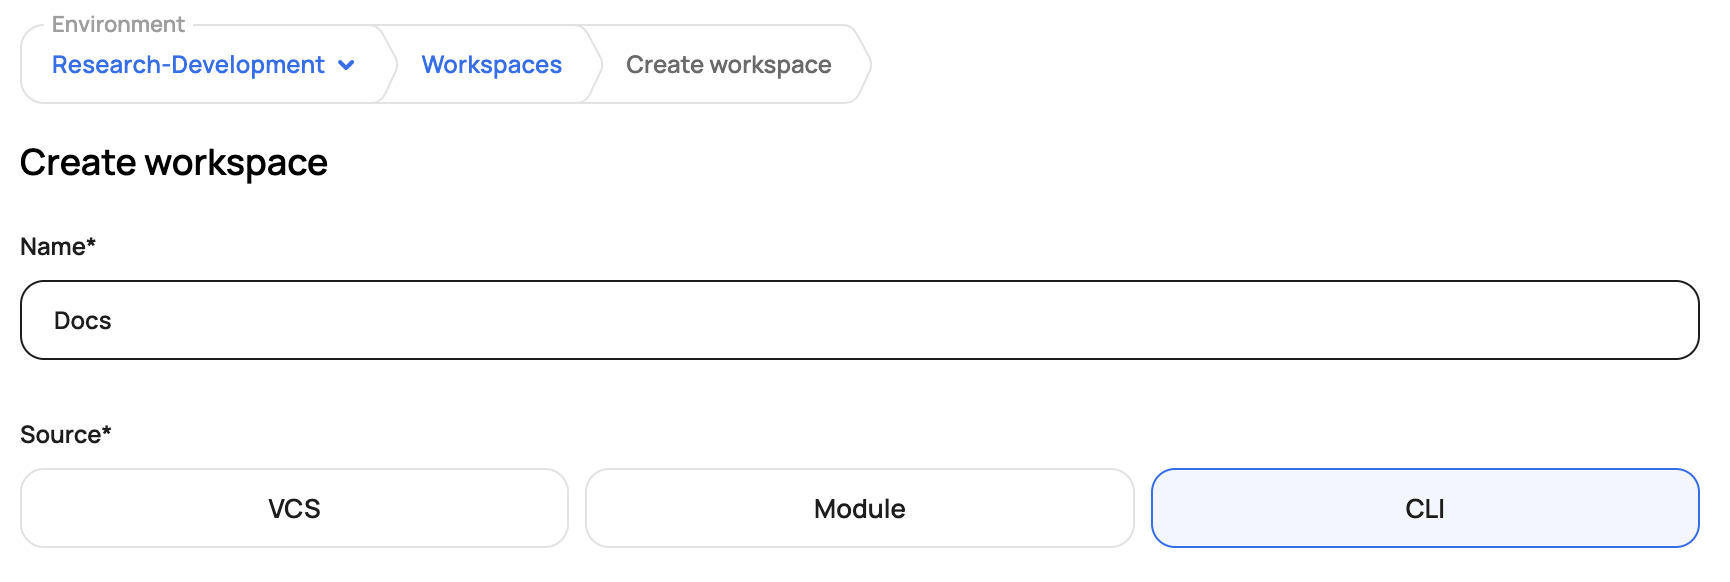
First, click on Create Workspace in the environment scope. Name the workspace and then select the workspace source. For now, we'll just use the CLI in case you don't have a VCS provider connected.

Create workspace:
On the workspace page, click Remote Backend Configuration to get the code snippet to post into your code locally
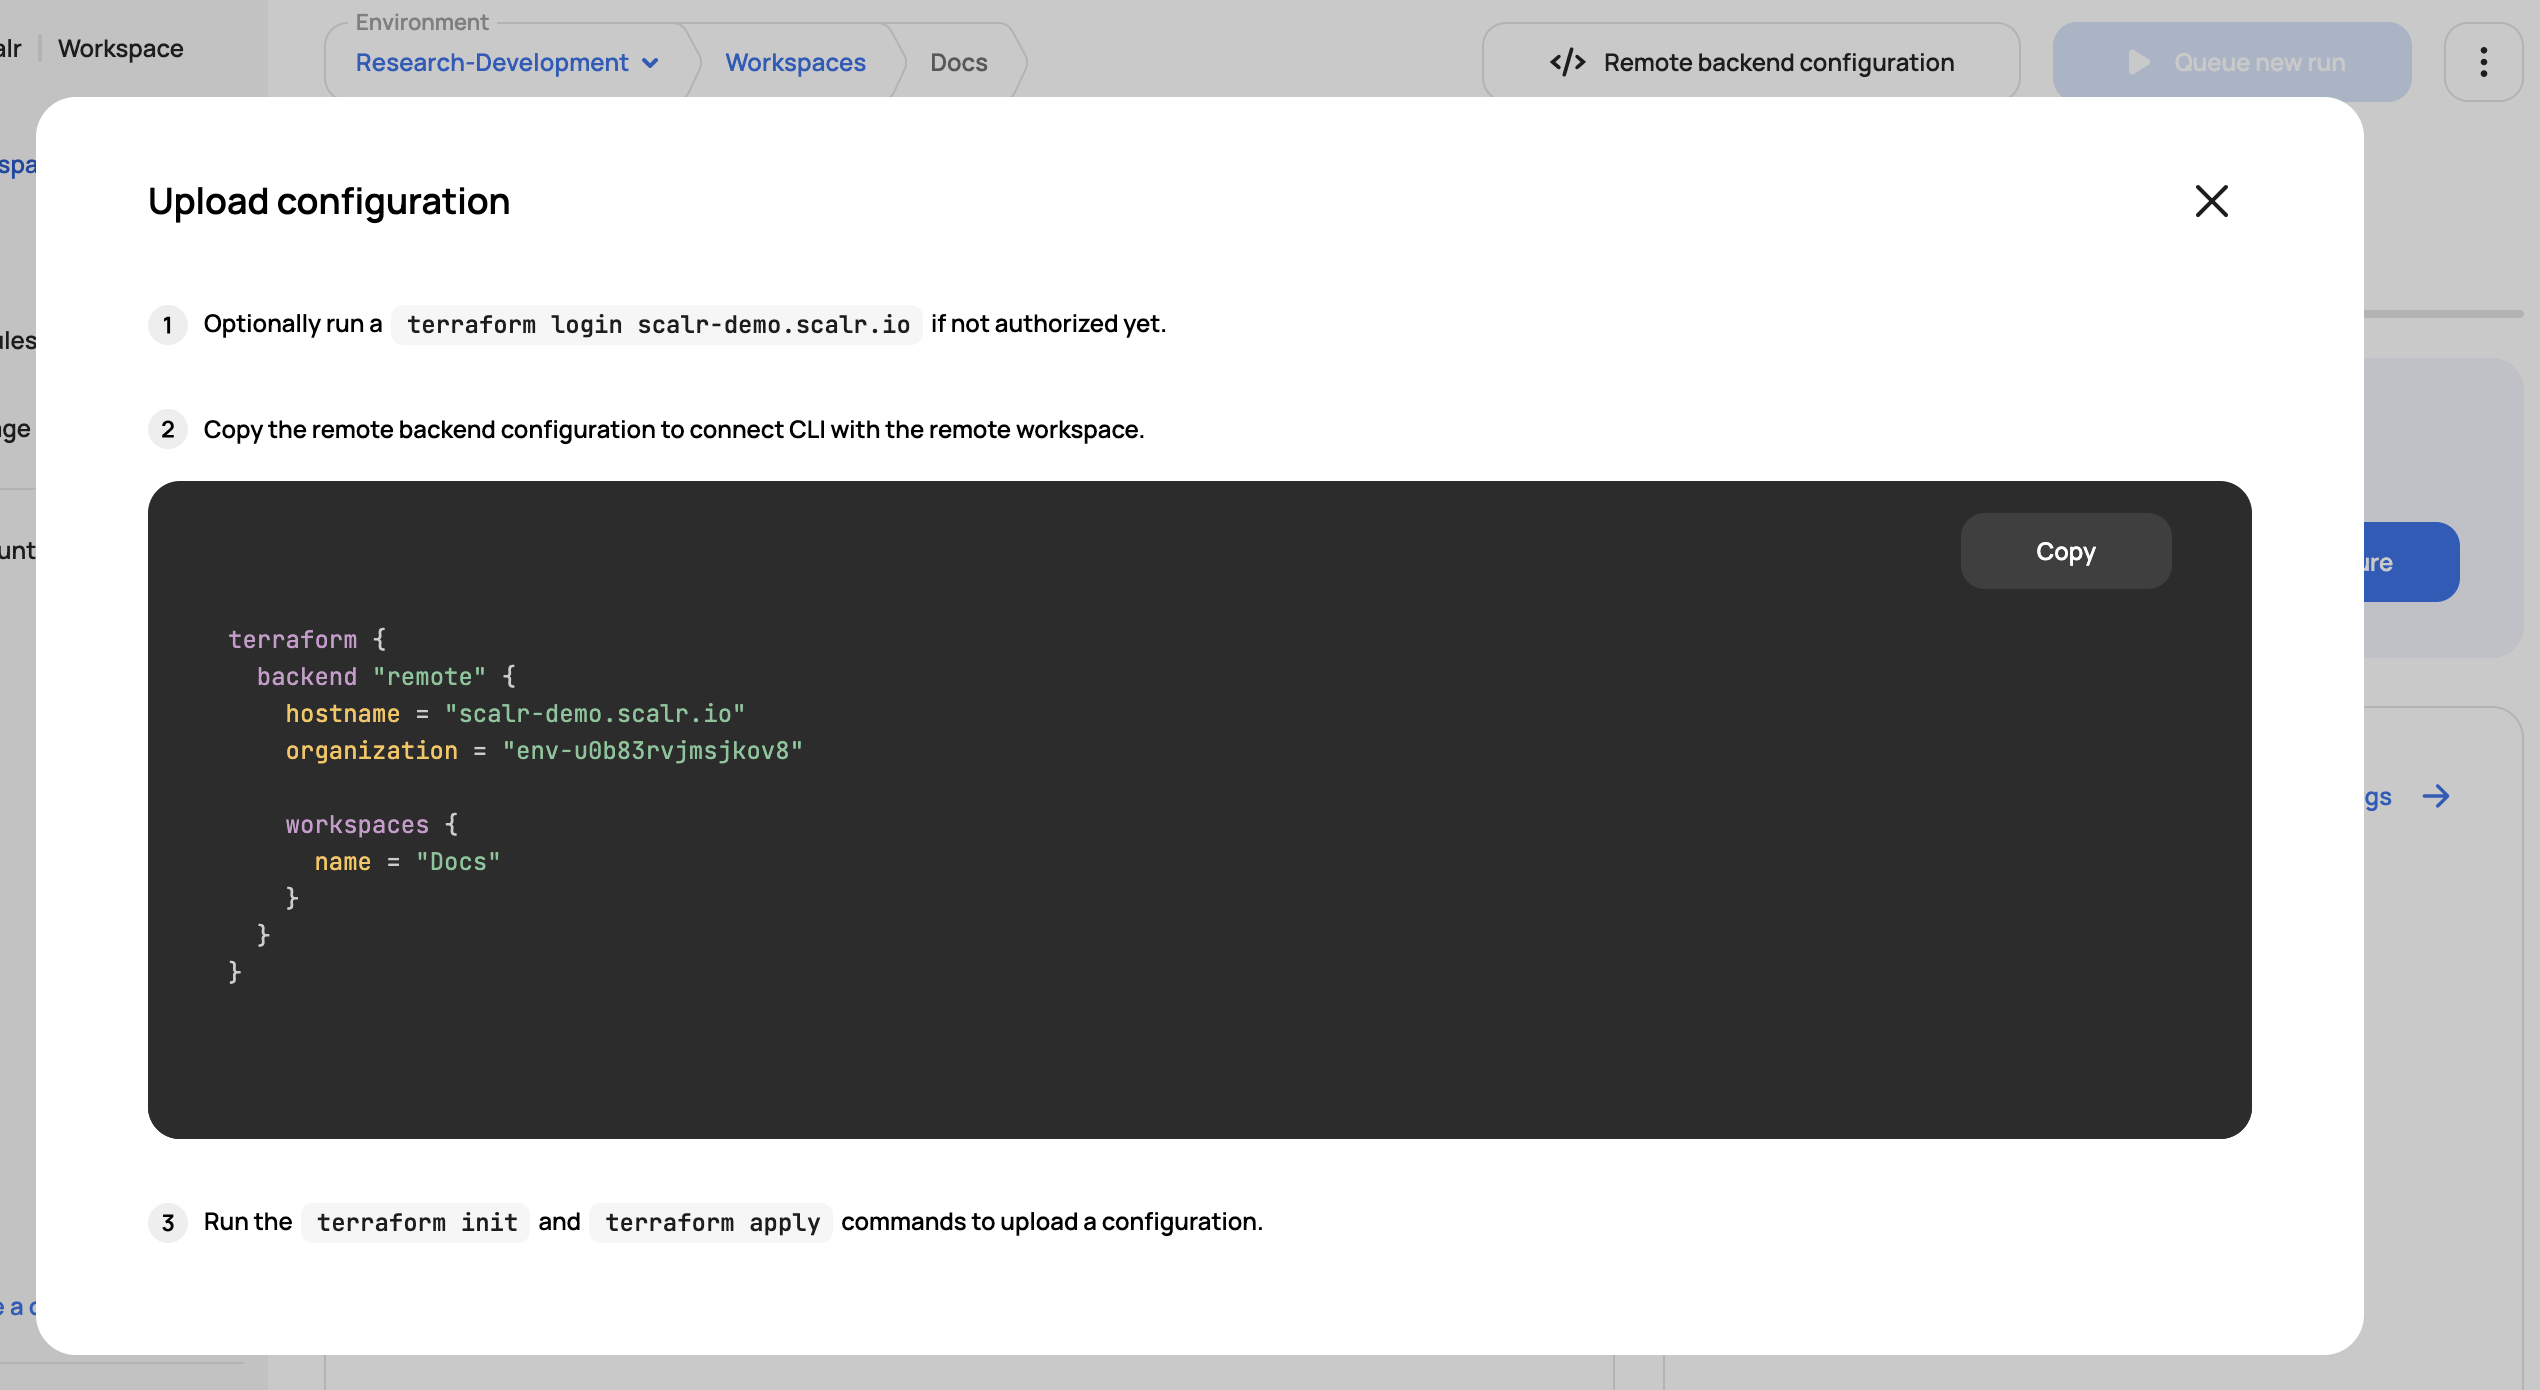
Copy the code below and paste it into your Terraform or OTF code locally. We'll be using the null resource, which does not require credentials to be added to Scalr:
terraform {
  backend "remote" {
    hostname = "<your-scalr-account>.scalr.io"
    organization = "<your-scalr-environment-ID-or-name>"

    workspaces {
      name = "<your-workspace-name>"
    }
  }
}

resource "null_resource" "example" {
  provisioner "local-exec" {
    command = "echo 'Congrats on your first run!'"
   }
}
Now, run a terraform login <your-scalr-account>.scalr.ioto make sure your Scalr token is added locally for authentication into Scalr.
Execute a terraform init to initialize the workspace:
terraform init

Initializing the backend...

Successfully configured the backend "remote"! Terraform will automatically
use this backend unless the backend configuration changes.

Initializing provider plugins...
- Finding latest version of hashicorp/null...
- Installing hashicorp/null v3.2.1...
- Installed hashicorp/null v3.2.1 (signed by HashiCorp)

Terraform has created a lock file .terraform.lock.hcl to record the provider
selections it made above. Include this file in your version control repository
so that Terraform can guarantee to make the same selections by default when
you run "terraform init" in the future.

Terraform has been successfully initialized!

You may now begin working with Terraform. Try running "terraform plan" to see
any changes that are required for your infrastructure. All Terraform commands
should now work.

If you ever set or change modules or backend configuration for Terraform,
rerun this command to reinitialize your working directory. If you forget, other
commands will detect it and remind you to do so if necessary.
Lastly, run a terraform plan or apply to execute the run in the workspace:
terraform apply
Running apply in the remote backend. Output will stream here. Pressing Ctrl-C
will cancel the remote apply if it's still pending. If the apply started it
will stop streaming the logs, but will not stop the apply running remotely.
Preparing the remote apply...
To view this run in a browser, visit:
https://scalr-demo.scalr.io/app/Research-Development/docs/runs/run-v0o34dpdmudprctiq
Waiting for the plan to start...
Terraform v1.5.7
Initializing Terraform configuration...
Configuring remote state backend...
Initializing plugins and modules...
------------------------------------------------------------------------
Terraform used the selected providers to generate the following execution
plan. Resource actions are indicated with the following symbols:
+ create
Terraform will perform the following actions:
# null_resource.example will be created
+ resource "null_resource" "example" {
+ id = (known after apply)
}
Plan: 1 to add, 0 to change, 0 to destroy.
------------------------------------------------------------------------
Cost estimation:
Waiting for cost estimate to complete...
Cost estimation:
Resources: 0 of 1 estimated
$0.000/mo +$0.000
------------------------------------------------------------------------
Do you want to perform these actions in workspace "local-exec"?
Terraform will perform the actions described above.
Only 'yes' will be accepted to approve.
Enter a value: yes
null_resource.example: Creating...
null_resource.example: Provisioning with 'local-exec'...
null_resource.example (local-exec): Executing: ["/bin/sh" "-c" "echo 'Congrats on your first run!'"]
null_resource.example (local-exec): Congrats on your first run!
null_resource.example: Creation complete after 0s [id=7465167868186234993]
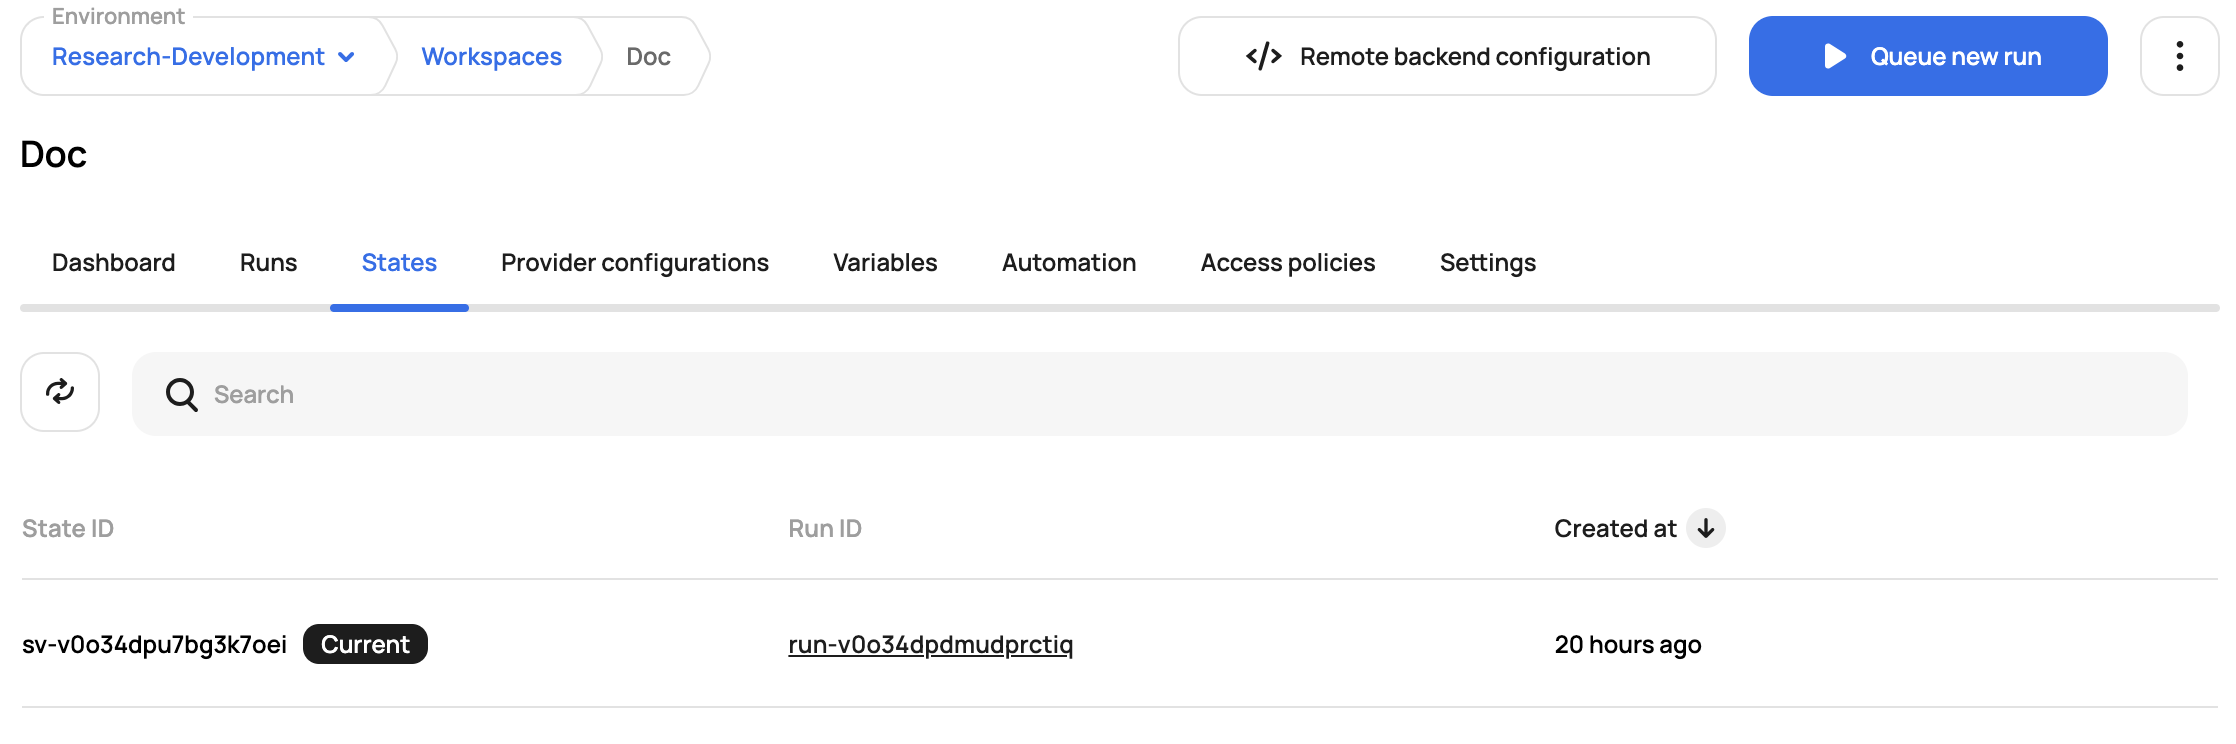
Apply complete! Resources: 1 added, 0 changed, 0 destroyed.In the workspace, you'll now be able to see the state and run history:
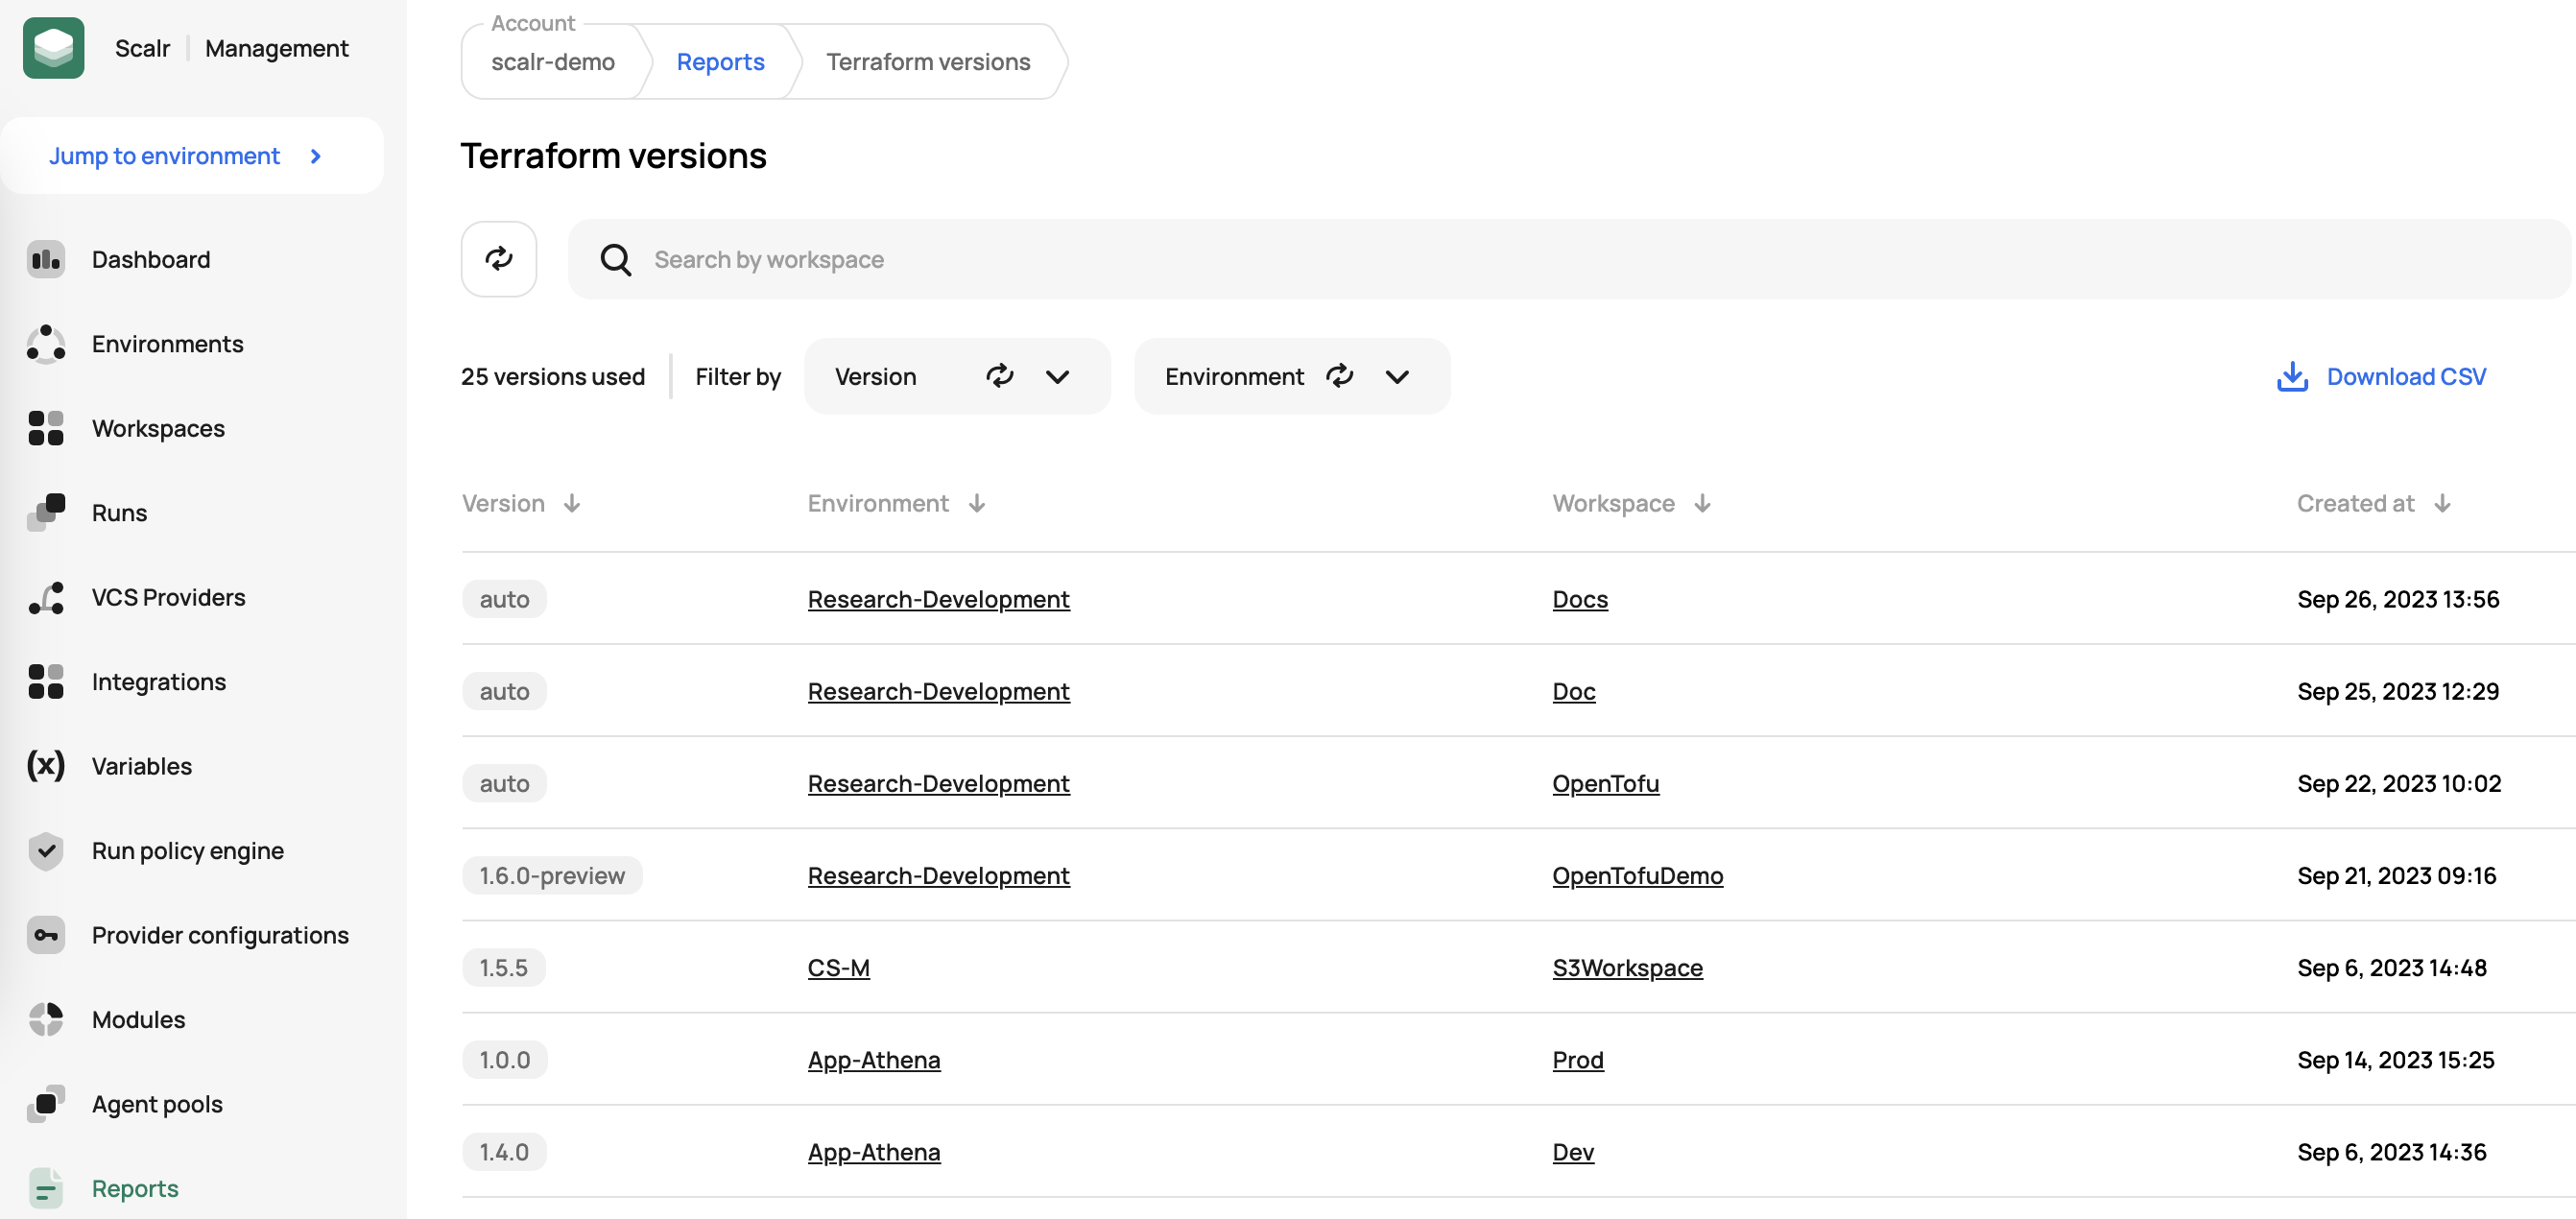
At the account scope, you'll now see data populated in the reports:
Advanced Options
Now that you have the basics down, there is much more you can do with Scalr, whether it is using a custom hook to integrate with another tool, implementing OPA policies, or using one of our native integrations. The following diagram will show you what options are available to you in the run pipelines:
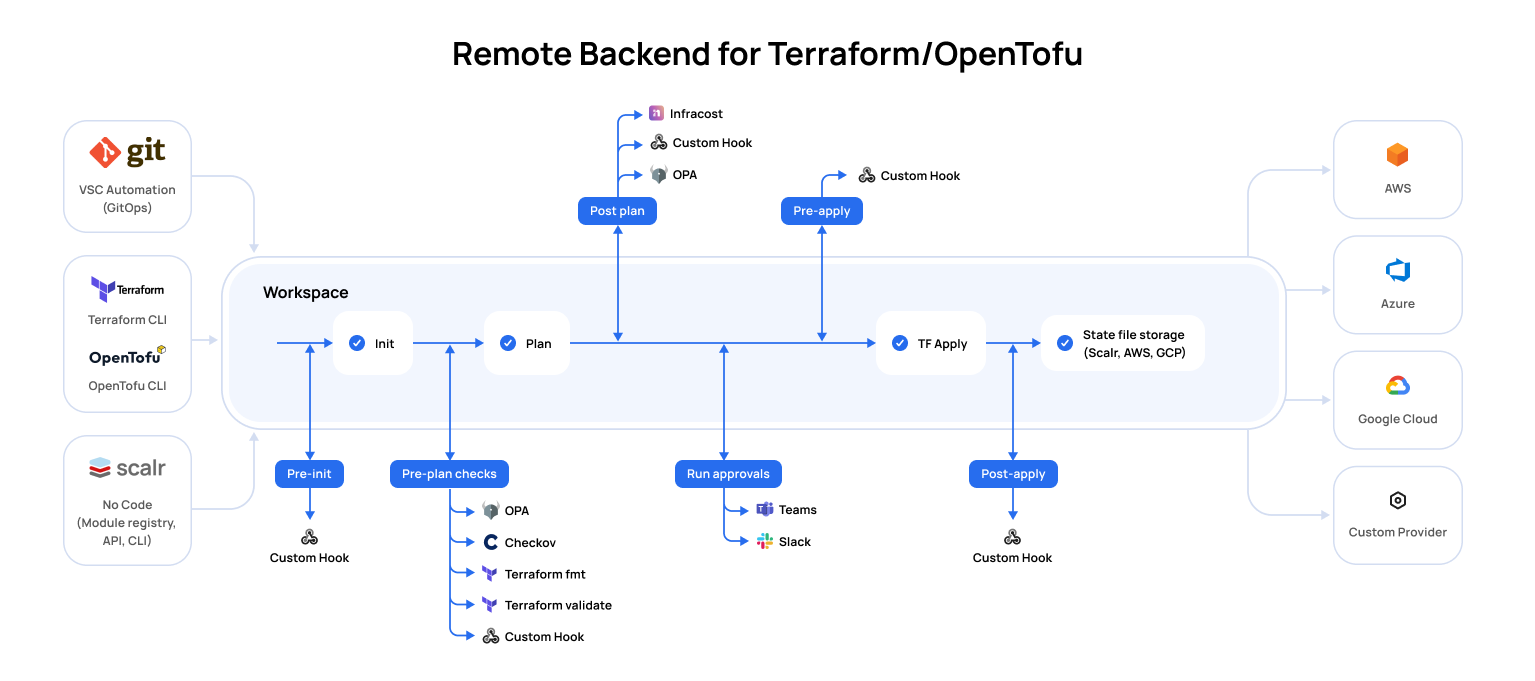
| Run Stage | Description | Required |
|---|---|---|
| Pre-Init | The pre-init stage is often used to install binaries that are needed during the run. A custom hook is the only option during pre-init. | No |
| Terraform/Tofu Init | The init stage initializes providers, modules, plugins, and working directories that will be used during the run. | Yes |
| Pre-Plan | The pre-plan stage can be used to do the following:
| No |
| Terraform/Tofu Plan | The plan stage executes a run that shows you what changes will happen to the resources based on the configuration files. | Yes |
| Post-Plan | The post-plan stage can be used for the following:
| No |
| OPA Approval | If an OPA policy is enforced with the soft-mandtory enforcement level, the run will be stopped for approval if the plan violates the given policy. Users with the policy-checks:overridepermission will be able to approve this stage. | No |
| Apply Approval | If the workspace settings has auto-apply disabled, then all runs for the workspace will wait for an approval before executing an apply. Users with runs:apply will be able to approve this stage. Approvals can also be done through Slack or Microsoft Teams. | No |
| Pre-Apply | The pre-apply stage is often used to install binaries, call an external API, or any other requirements that are needed during the run. A custom hook is the only option during pre-apply. | No |
| Terraform/Tofu Apply | The apply stage creates the resources that were shown in the plan stage. | Yes |
| Post Apply | The post-apply stage is often used to call an external API to notify of the run results, download the state externally, or any other requirement needed after the apply. A custom hook is the only option during pre-apply. | No |
Next Steps
Interested in testing your code with a provider? Add your VCS provider if you haven't done so already and then link a provider configuration.
Updated 6 months ago