Create a Workspace
A workspace can be created through the
- Scalr UI
- Scalr Provider
- Scalr API
- Scalr CLI.
Workspace Options
Once you have figured out which workspace is right for you, there are a number of settings that need to be selected during the creation of a workspace:
VCS Workspace
Set Up
Connect a VCS repository if you haven't already. Set the following options:
-
VCS Provider - Select the provider that contains the Terraform and OpenTofu repositories.
-
Repository - Select the repository where the code resides.
-
Branch - Select the branch that Scalr should trigger a run off of when a PR is opened or merged.
-
Terraform Working Directory - This is where Terraform actually runs. This directory must be a subdirectory of the top level of the repository or of the subdirectory if specified. This comes in handy in the case of a mono repo.
-
Trigger Strategy - The rules in which a run should be triggered based on files or folders being updated.
- Any Changes - Any change in the repository specified will trigger a run.
- Trigger Patterns - Use glob patterns to specify which files/directories should initiate a run. Patterns can be used in combination with a working directory, but not with trigger prefixes. For example, if the following patterns were set a run would execute if there were changes in
my/awesome/workdir/ormodules/core/iam/teams, but changes to any.mdfiles would be ignored.
my/awesome/workdir/ modules/core/iam/teams !*.md- Directories - Use a working directory as well as trigger prefixes to trigger a run based on any files being changed in any of the directory paths. Trigger prefixes cannot be used in combination with trigger patterns.
-
Enable VCS-driven dry runs - This is a control mechanism to avoid unwanted dry runs on every commit.
-
Clone submodules - This allows you to specify whether git submodules should be fetched when cloning a VCS repository.
-
Skipping specific commits - If you would prefer that a run is not started based on a VCS commit or PR, add
[skip ci]in the first line of a head commit message. Users will still be able to queue runs manually if the configuration version is associated with a commit with the skip tag. Use[skip scalr ci]to avoid conflict with other CI tools that use the same message.
There are other optional settings, which can be found in workspace settings.
Execution
A run will execute upon the next commit, pull request, or manual execution of a run. Alternatively, you can set auto-queue run to always, which will automatically start a run upon the workspace being created. Auto queuing of runs is helpful when you automatically create workspaces through the Scalr provider as you can kick off a run in the workspace as soon as it is provisioned via Terraform without manual intervention.
CLI Workspace
OpenTofuThe commands below reference
terraform, but for OpenTofu just inserttofuinstead.
Set Up
Obtain a Scalr token from the UI -> Profile Settings or by running terraform login <account-name>.scalr.io. When executing the login command, Scalr will automatically create the credentials and store them in the credentials.tfrc.json locally.
Set the following options:
- For a CLI-based workspace, you simply have to choose the working directory if one is needed.
- Add Scalr as the remote backend. The environment ID or name can be used as the organization. If the environment name has a space in it, the ID must be used:
terraform {
  backend "remote" {
    hostname = "<account-name>.scalr.io"
    organization = "<scalr-environment-name>"

    workspaces {
      name = "<workspace-name>"
    }
  }
}
There are other optional settings, which can be found in workspace settings
Execution
Once the setup is complete, run terraform init to connect to the workspace in the Scalr remote backend. From this point forward the standard Terraform OSS commands will work as expected.
If there is an existing state file in the local system or state that was previously stored in another remote backend, then the terraform init command will automatically migrate the state to Scalr. See Migrating to Scalr for more details.
Version MismatchIf the workspace is pre-created manually in Scalr and the Terraform version of the workspace does not match the version of the CLI then the following error will be displayed:
Error reading local state: state snapshot was created by Terraform vx.x.x, which is newer than current vx.x.x;.If you see this error, please ensure the Terraform version of the CLI matches the Terraform version of the workspace.
No-Code (Module Sourced)
A no-code workspace can be deployed directly from the module registry, which will pre-define the module and version when you get to the workspace creation page or by going to the create workspace page and setting the source to "module".
Set Up
Add a module to the module registry if you haven't already. Set the following options:
- Module - Select the module which should be deployed into the workspace.
- Module Version - The version of the module that will be deployed. The module versions can be controlled.
There are other optional settings, which can be found in workspace settings
Execution
Upon creating the workspace you will be redirected to the workspace dashboard. If variables require input you will be prompted to fill in the variables. If not, you can manually queue a run. Alternatively, you can set auto-queue run to always, which will automatically start a run upon the workspace being created.
API-Driven
Set Up
To successfully use the API driven flow, you'll need the following:
- API token
- URL for your Scalr account
- Workspace name
- Environment ID
- Configuration files that are in a tar.gz file
Once you have the above objects, you are ready to call the API to create a workspace, upload the configuration, and execute a run.
Execution
The below is a sample script that can be modified to your liking, but it will give you the basic steps to get started with. Make sure to update the token, base_url, env_id, ws_id, and upload_archive_path with values specific to your Scalr account. The upload_archive_path is the location of the tar.gz file which contains the Terraform or OpenTofu files. You can also update the is_dry_run flag based on the type of run you want to execute.
import requests

token = "<secret>"
base_url = 'https://example.scalr.io/'
headers = {
    'Prefer': 'profile=preview',
    'accept': 'application/vnd.api+json',
    'content-type': 'application/vnd.api+json',
    'Authorization': f'Bearer {token}'
}

env_id = "<env-123>"
ws_id = "<ws-123>"
is_dry_run = True
upload_archive_path = '<example.tar.gz>'


## create CV
url = f'{base_url}/api/iacp/v3/configuration-versions'
data = {
    'data': {
        'attributes': {
            "auto-queue-runs": False,
        },
        'relationships': {
            'workspace': {
                'data': {
                    'type': 'workspaces',
                    'id': ws_id
                }
            }
        },
        'type': 'configuration-versions'
    }
}

response = requests.post(url, headers=headers, json=data)

cv_id = None
if response.status_code == 201:
    # Successful request
    result = response.json()
    # Process the response data
    print(result)
    cv_id = result['data']['id']
else:
    # Request failed
    raise Exception(f"Error: {response.status_code} - {response.text}")


upload_url = result['data']['links']['upload']
print(upload_url)


upload = requests.put(upload_url, headers={'Content-Type': 'application/octet-stream'}, data=open(upload_archive_path, 'rb'))
print(upload.status_code)


## create run
url = f'{base_url}/api/iacp/v3/runs'
data = {
    'data': {
        'attributes': {
            "is-dry": is_dry_run,
        },
        'relationships': {
            'configuration-version': {
                'data': {
                    'type': 'configuration-versions',
                    'id': cv_id
                }
            },
            'workspace': {
                'data': {
                    'type': 'workspaces',
                    'id': ws_id
                }
            }
        },
        'type': 'runs'
    }
}

response = requests.post(url, headers=headers, json=data)
if response.status_code == 201:
    # Successful request
    result = response.json()
    # Process the response data
    print(result)
else:
    # Request failed
    raise Exception(f"Error: {response.status_code} - {response.text}")
Set Terraform and OpenTofu Variables
It is best practice to create Terraform and OpenTofu code in a reusable manner, which is where variable files help. Scalr will automatically pull in the Terraform variables files for VCS and CLI workspaces by entering the path to the file in the workspace settings. The variable file location is absolute to the repository root and is not relative to a working directory of a workspace.
If the local workspace contains any *.auto.tfvars files these will provide default variable values that Terraform will automatically use.
If variables in the *.auto.tfvars files have the same names as variables specified in the workspace, the predefined workspace values will be used. For map variables, the values in *.auto.tfvars are merged with values in the same named variable in the workspace.
Set Shell Variables
Shell variables can also be set if the Terraform configuration utilizes variables (export var=value) for things like setting parallelism (TF_CLI_ARGS_plan="-parallelism=N"), log levels (TF_LOG=TRACE), and more.
Shell variables can be set at all levels in Scalr and are inherited by lower levels. Use environment or account level for shell variables that are needed in multiple workspaces or environments. Use workspace level for shell variables that are specific to individual Terraform configurations.
It is also possible to use the Scalr provider to pull output from one workspace and post it as an environment or account shell variable to make it easily available to all other workspaces.
Authenticate to Git with SSH Keys
There are many ways to authenticate to VCS providers to be able to pull down Terraform modules. Scalr has its own module registry, but we understand the need to have the path of least disturbance during a migration. Sourcing modules from Git is fully supported by Scalr out of the box when HTTPs method is used, but some customers prefer to use SSH keys. In this case there are only a few extra steps to achieve using SSH keys.
In this tutorial we’ll talk about how to pull down Git sourced modules using the SSH authentication method during your Terraform runs.
There are ways to add the key to a Scalr agent as a way of doing the authentication, but we prefer the following method as the key is stored as an encrypted shell variable and the key file is added to the .gitignore file to ensure users do not accidentally leak it anywhere.
Equally important, this method will work for any workflow, VCS based or through the Terraform CLI.
Prerequisites
- An account on scalr.io
- Access to custom hooks
- VCS provider connected to Scalr or the Terraform CLI locally
- Access to a VCS repository to pull the Terraform code from
Steps
First, you’ll need to create a Terraform module that is in a repository that requires authentication, specifically SSH authentication. You can use existing code, or simply copy the following into a main.tf :
resource "null_resource" "example" {
  provisioner "local-exec" {
    command = "echo 'Congrats on your first run!'"
   }
}
Now, create a new repository, which will store the code that will be used in the workspace. First, we’ll create a main.tf to call the repository:
module "null_resource" {
       source  = "[email protected]:<your-repo>/null_resource_module.git"
}
Be sure to update <your-repo> above to point to your repository.
Now lets create a pre-init.sh which will be used as part of a custom hook to add the SSH key to the Scalr runner. The Scalr runners only last the lifetime of the run.
#!/bin/bash

printenv GIT_SSH_KEY > git-ssh.pem
chmod 400 git-ssh.pem
export GIT_SSH_COMMAND="ssh -o StrictHostKeyChecking=no -i $(pwd)/git-ssh.pem"
The last thing that needs to be done is adding the git-ssh.pem file to a .terraformignore file to ensure it is not accidentally leaked:
git-ssh.pemThere should now be three files in your working directory/repository: main.tf, pre-init.sh, .terraformignore .
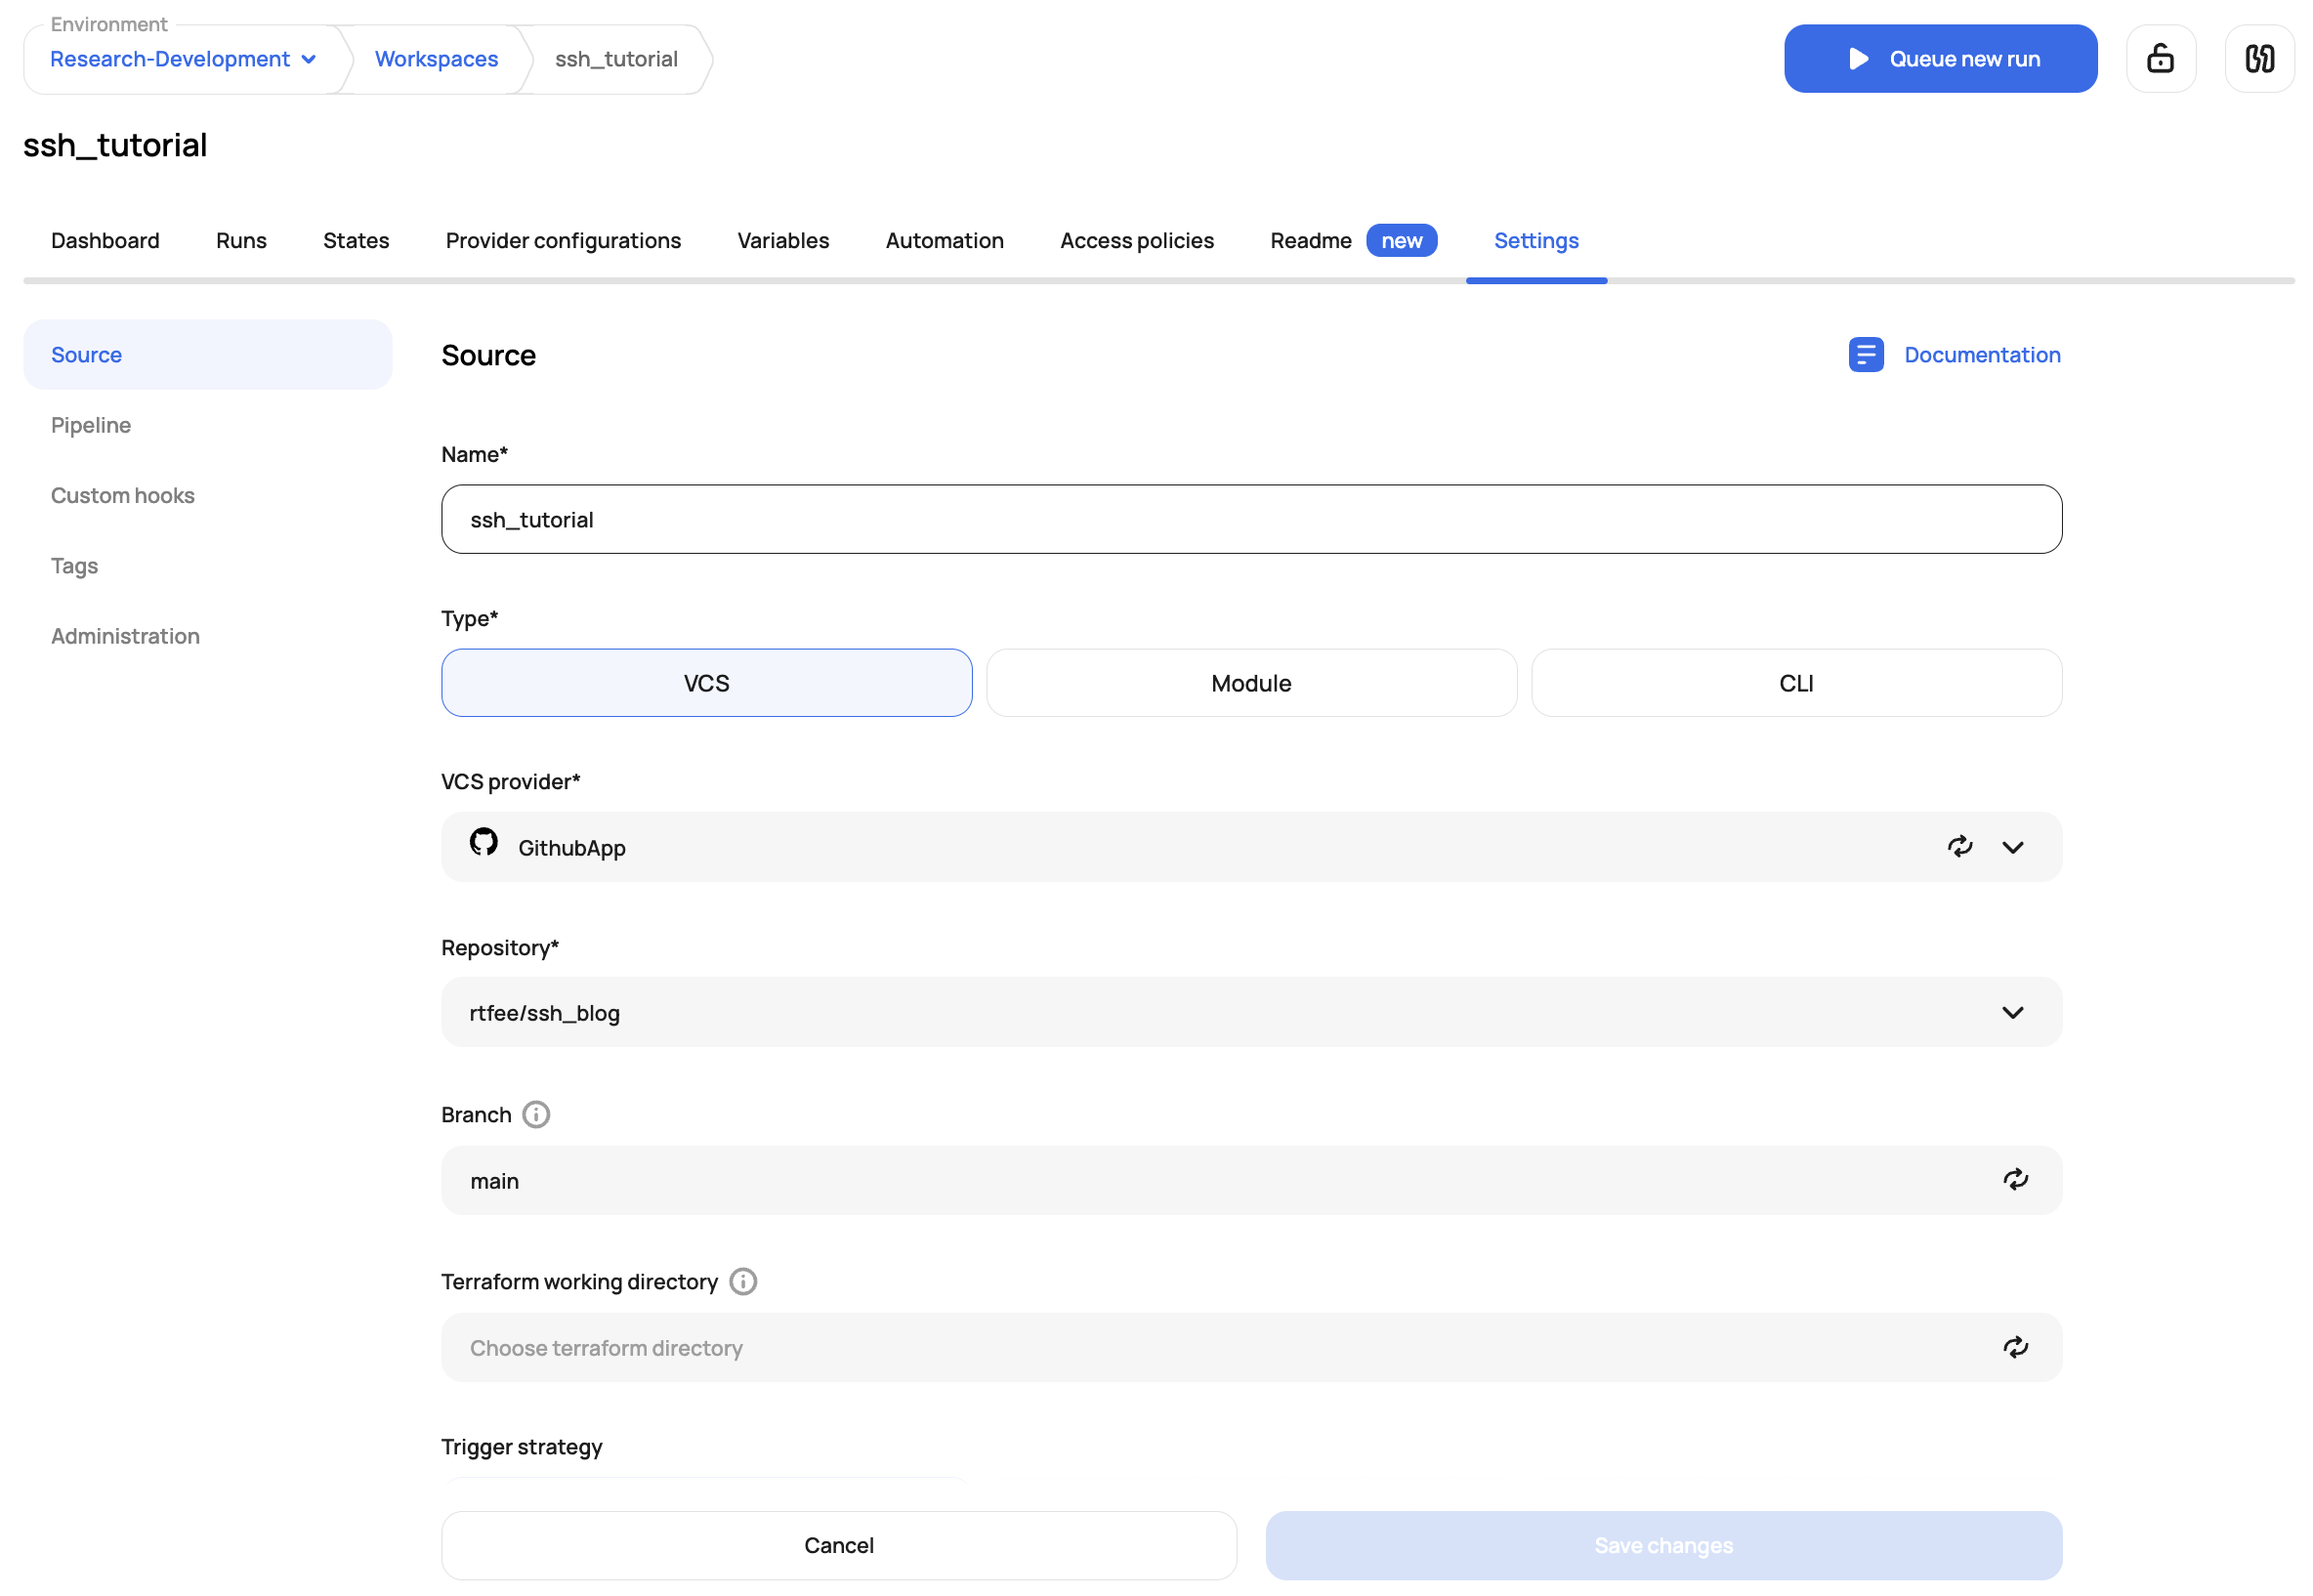
Now, lets flip over to the UI to configure the workspace. Create the workspace and point to the repo which references the module:
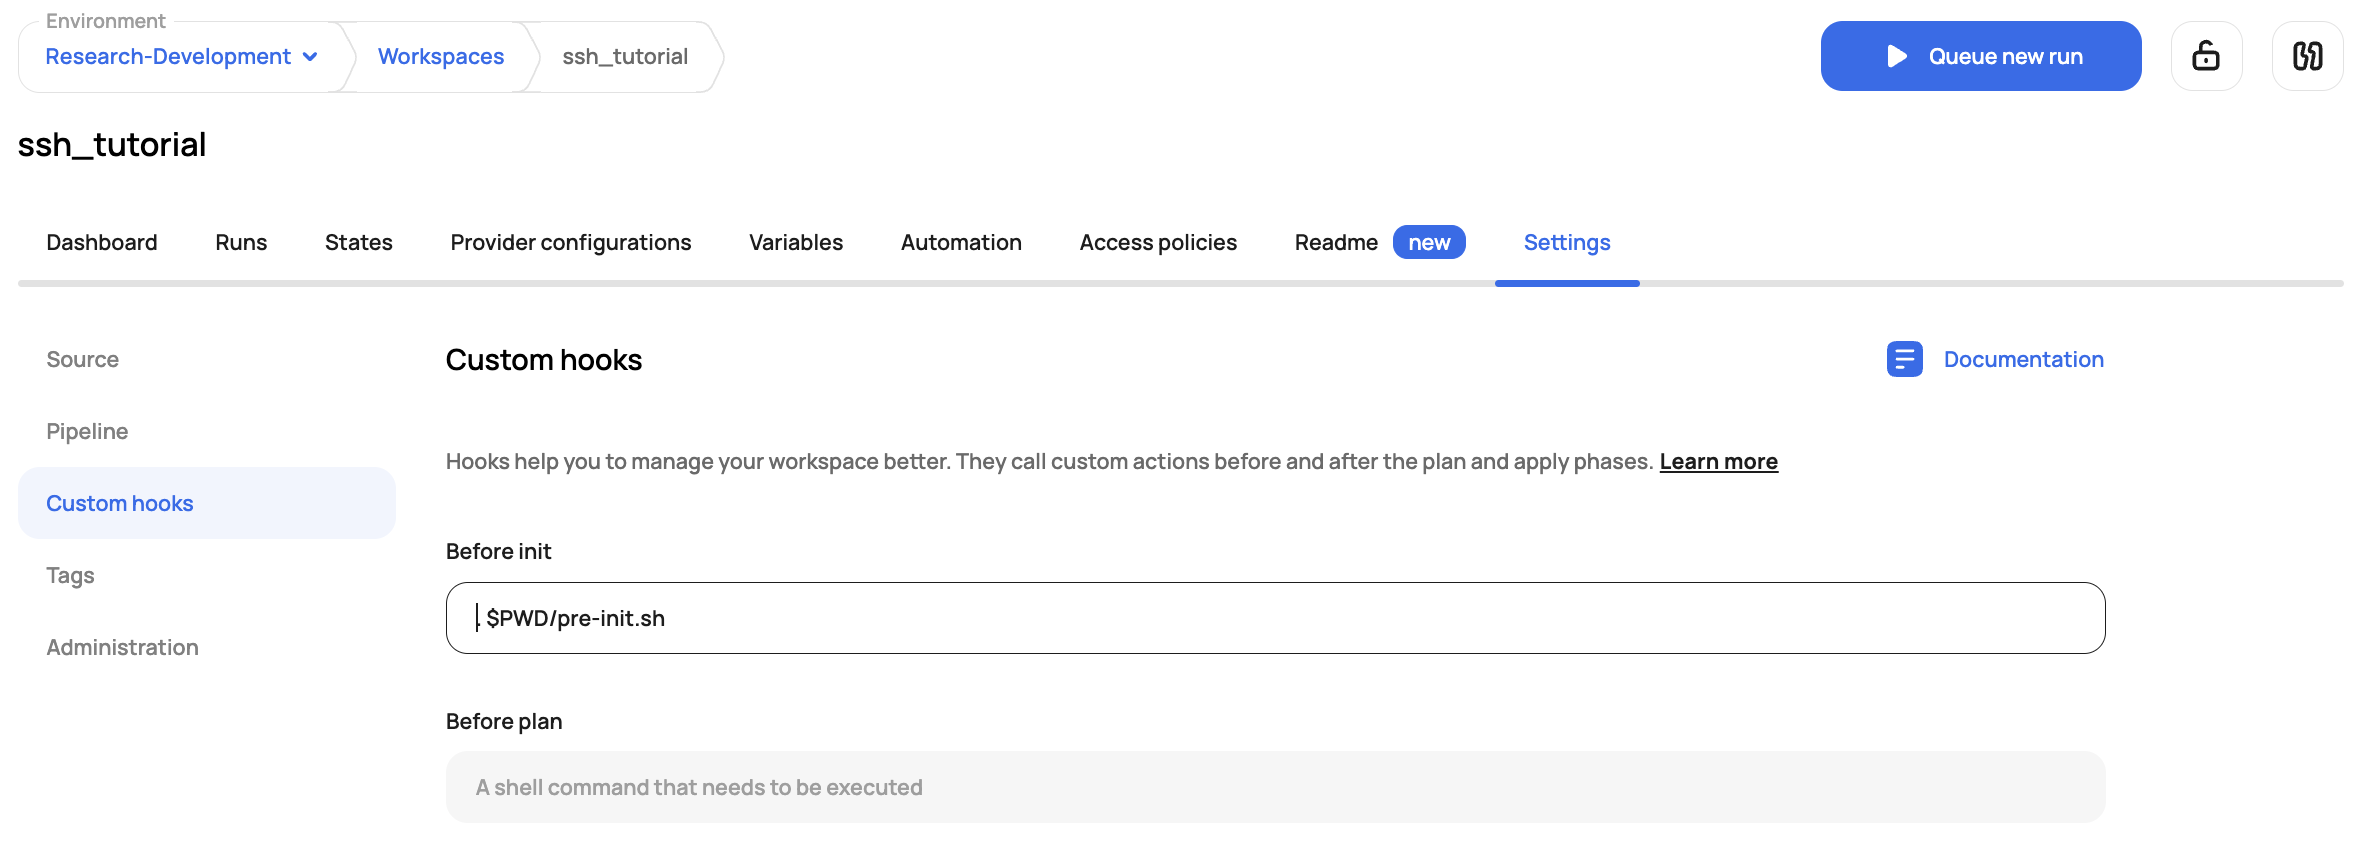
Click on the custom hooks section and add the pre-init.sh (. $PWD/pre-init.sh) :
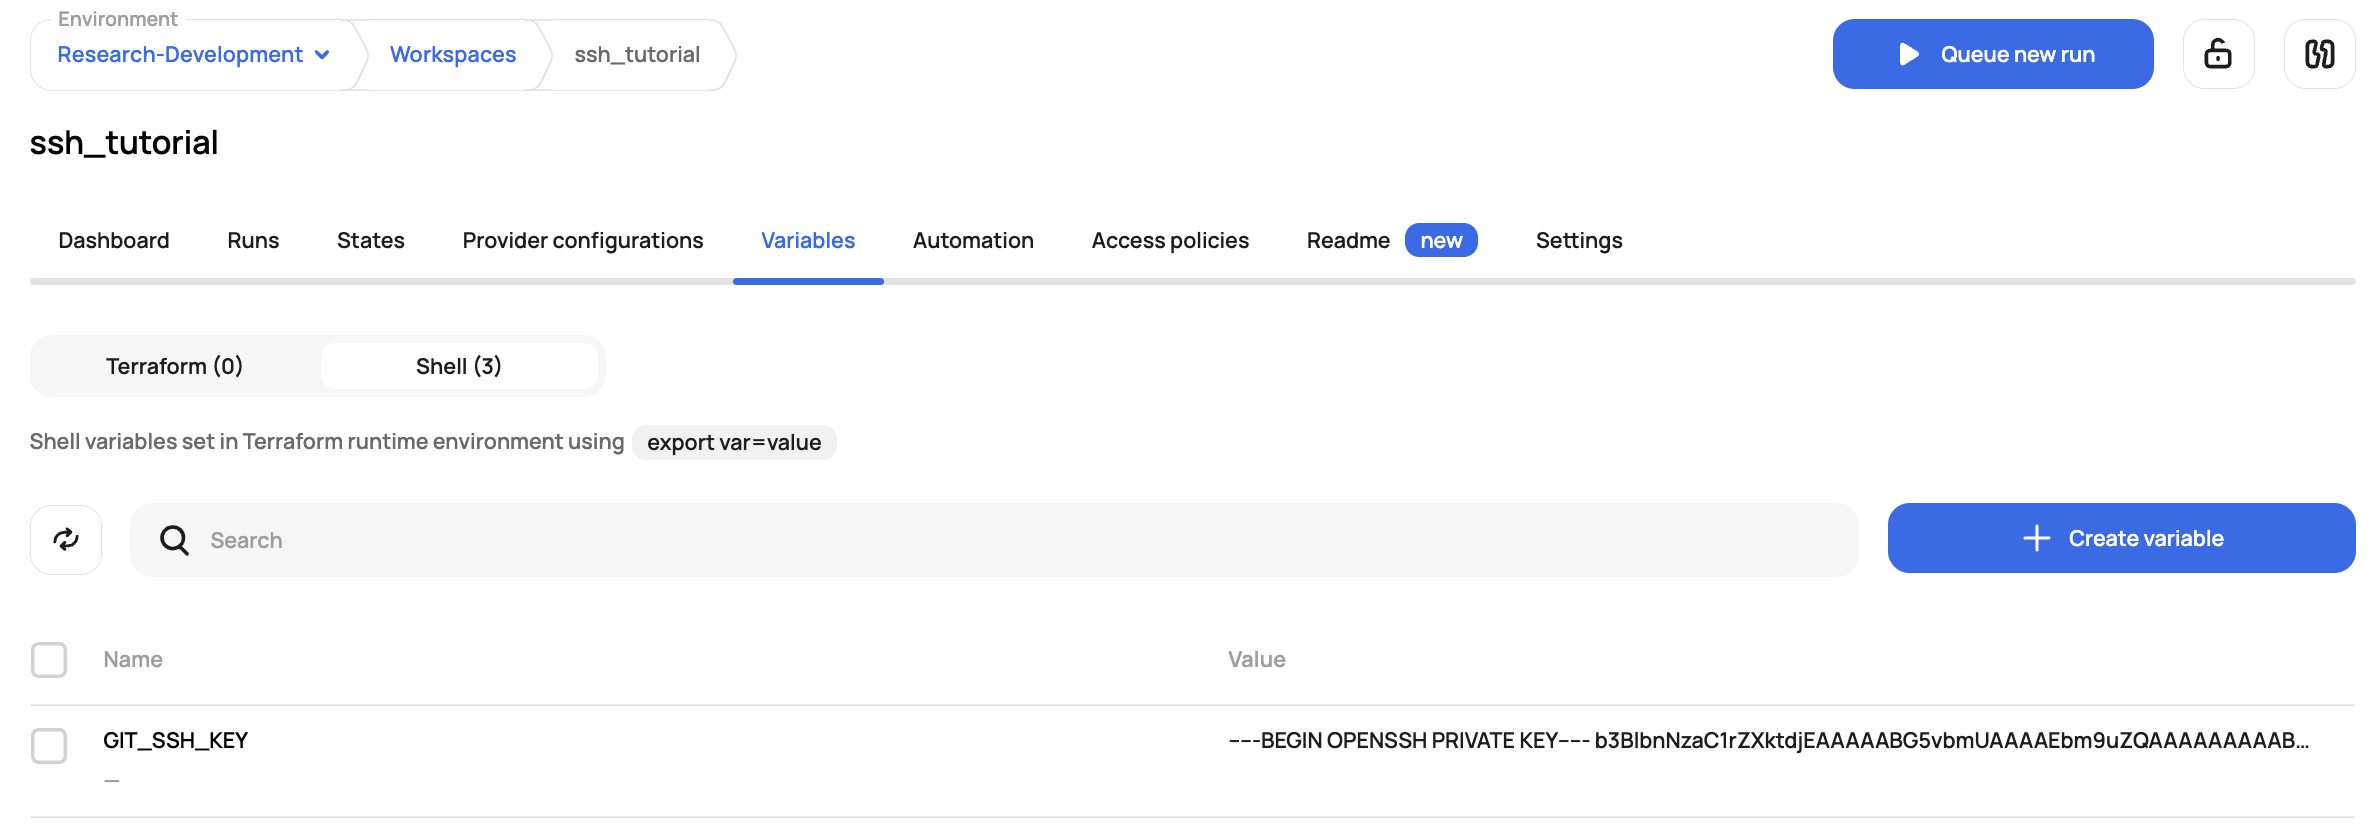
Lastly, add the SSH key as a shell variable with the name GIT_SSH_KEY:
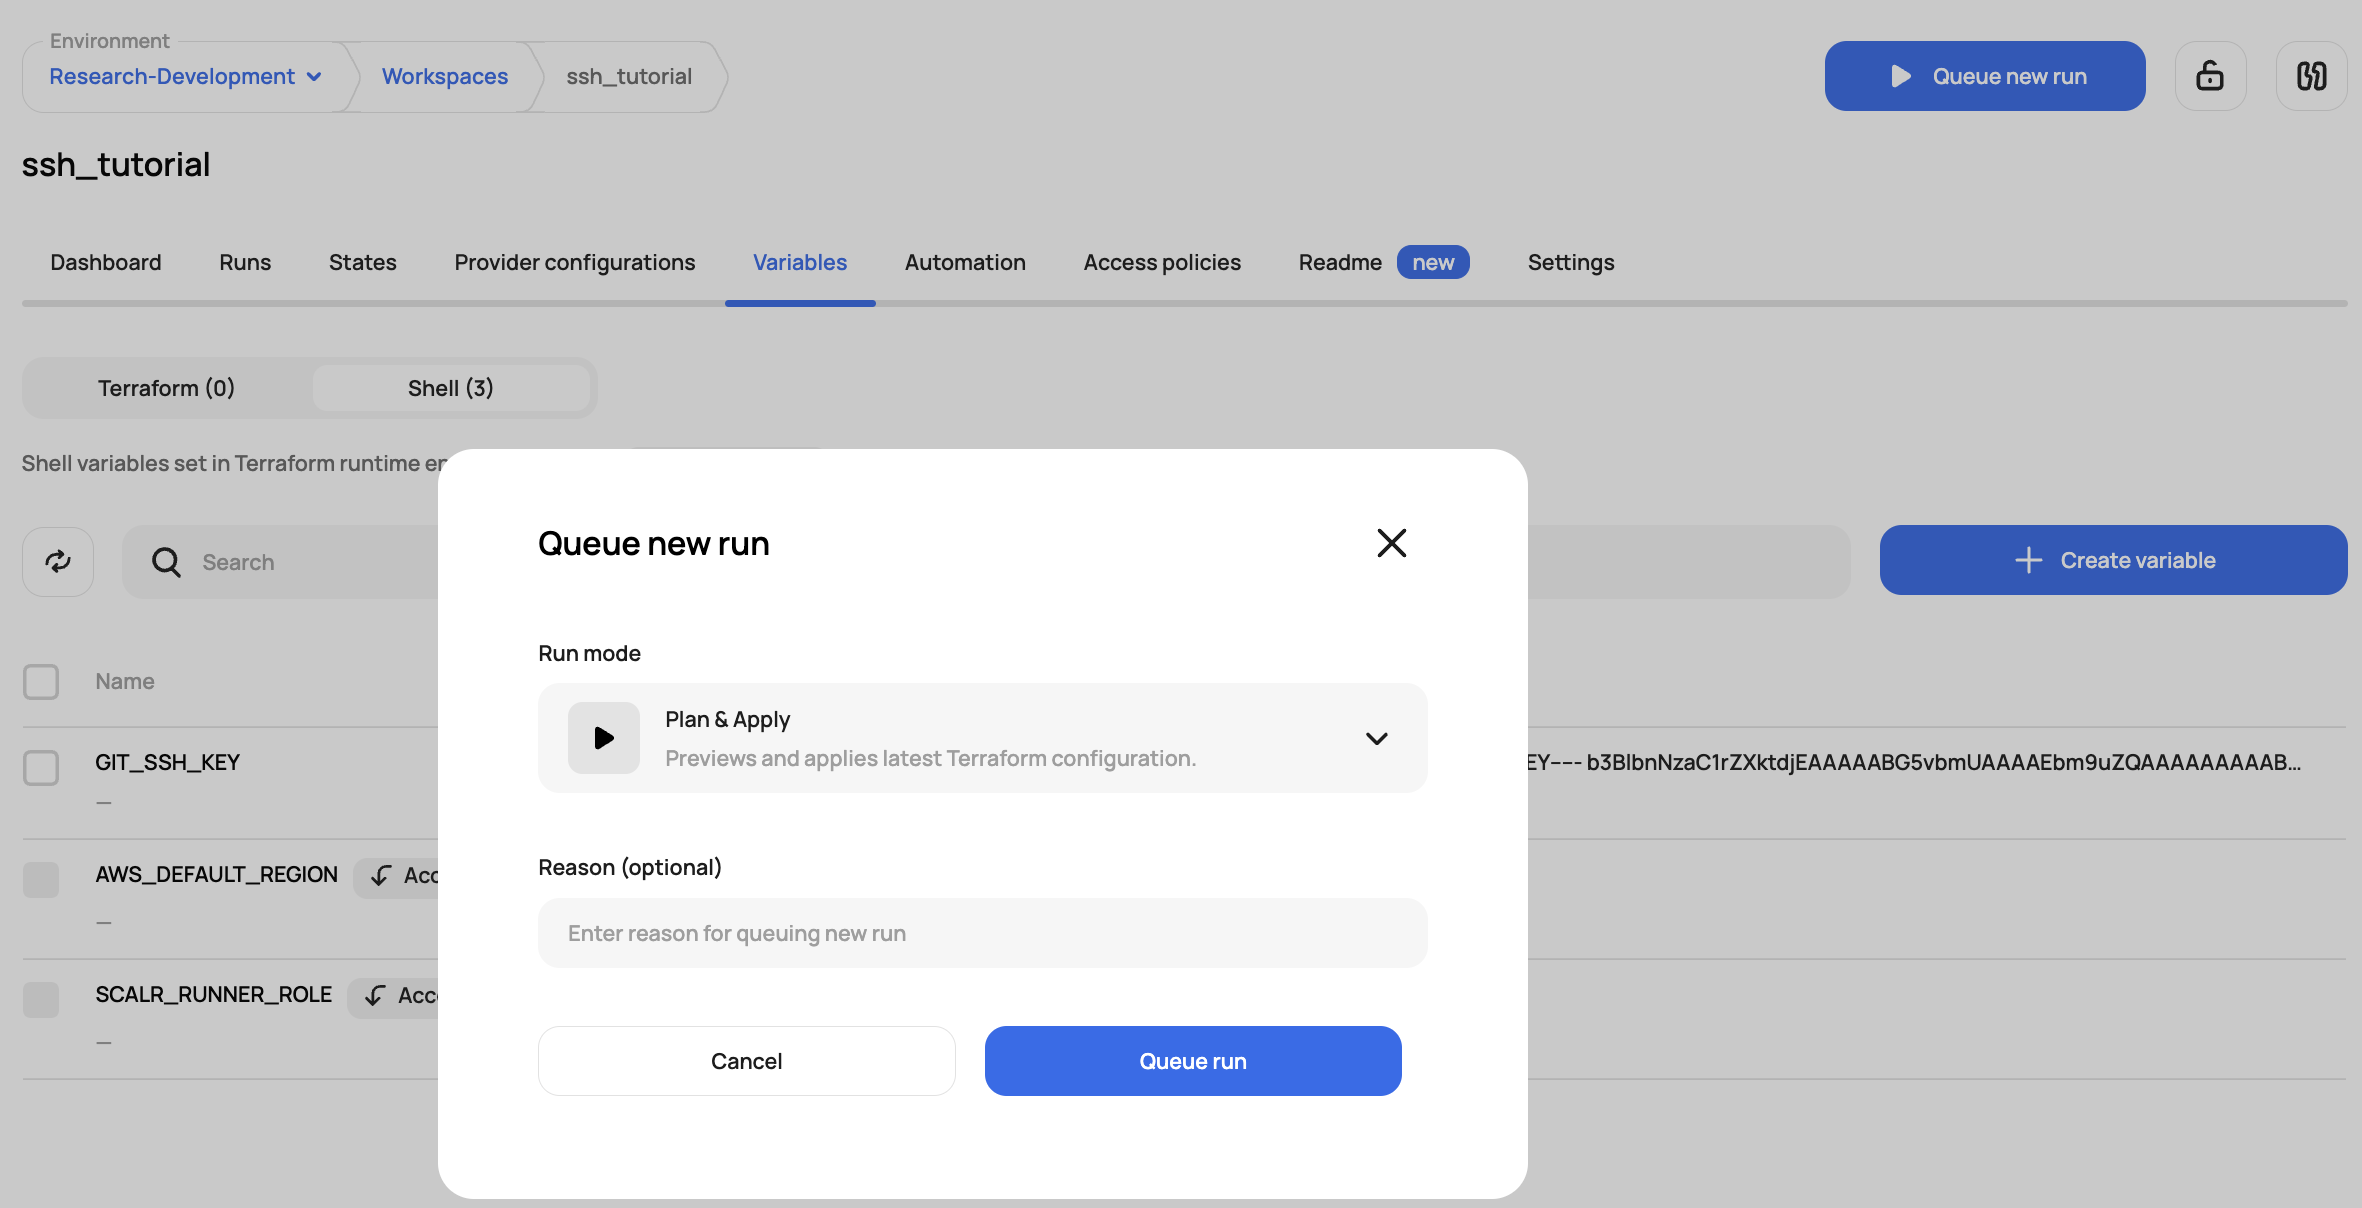
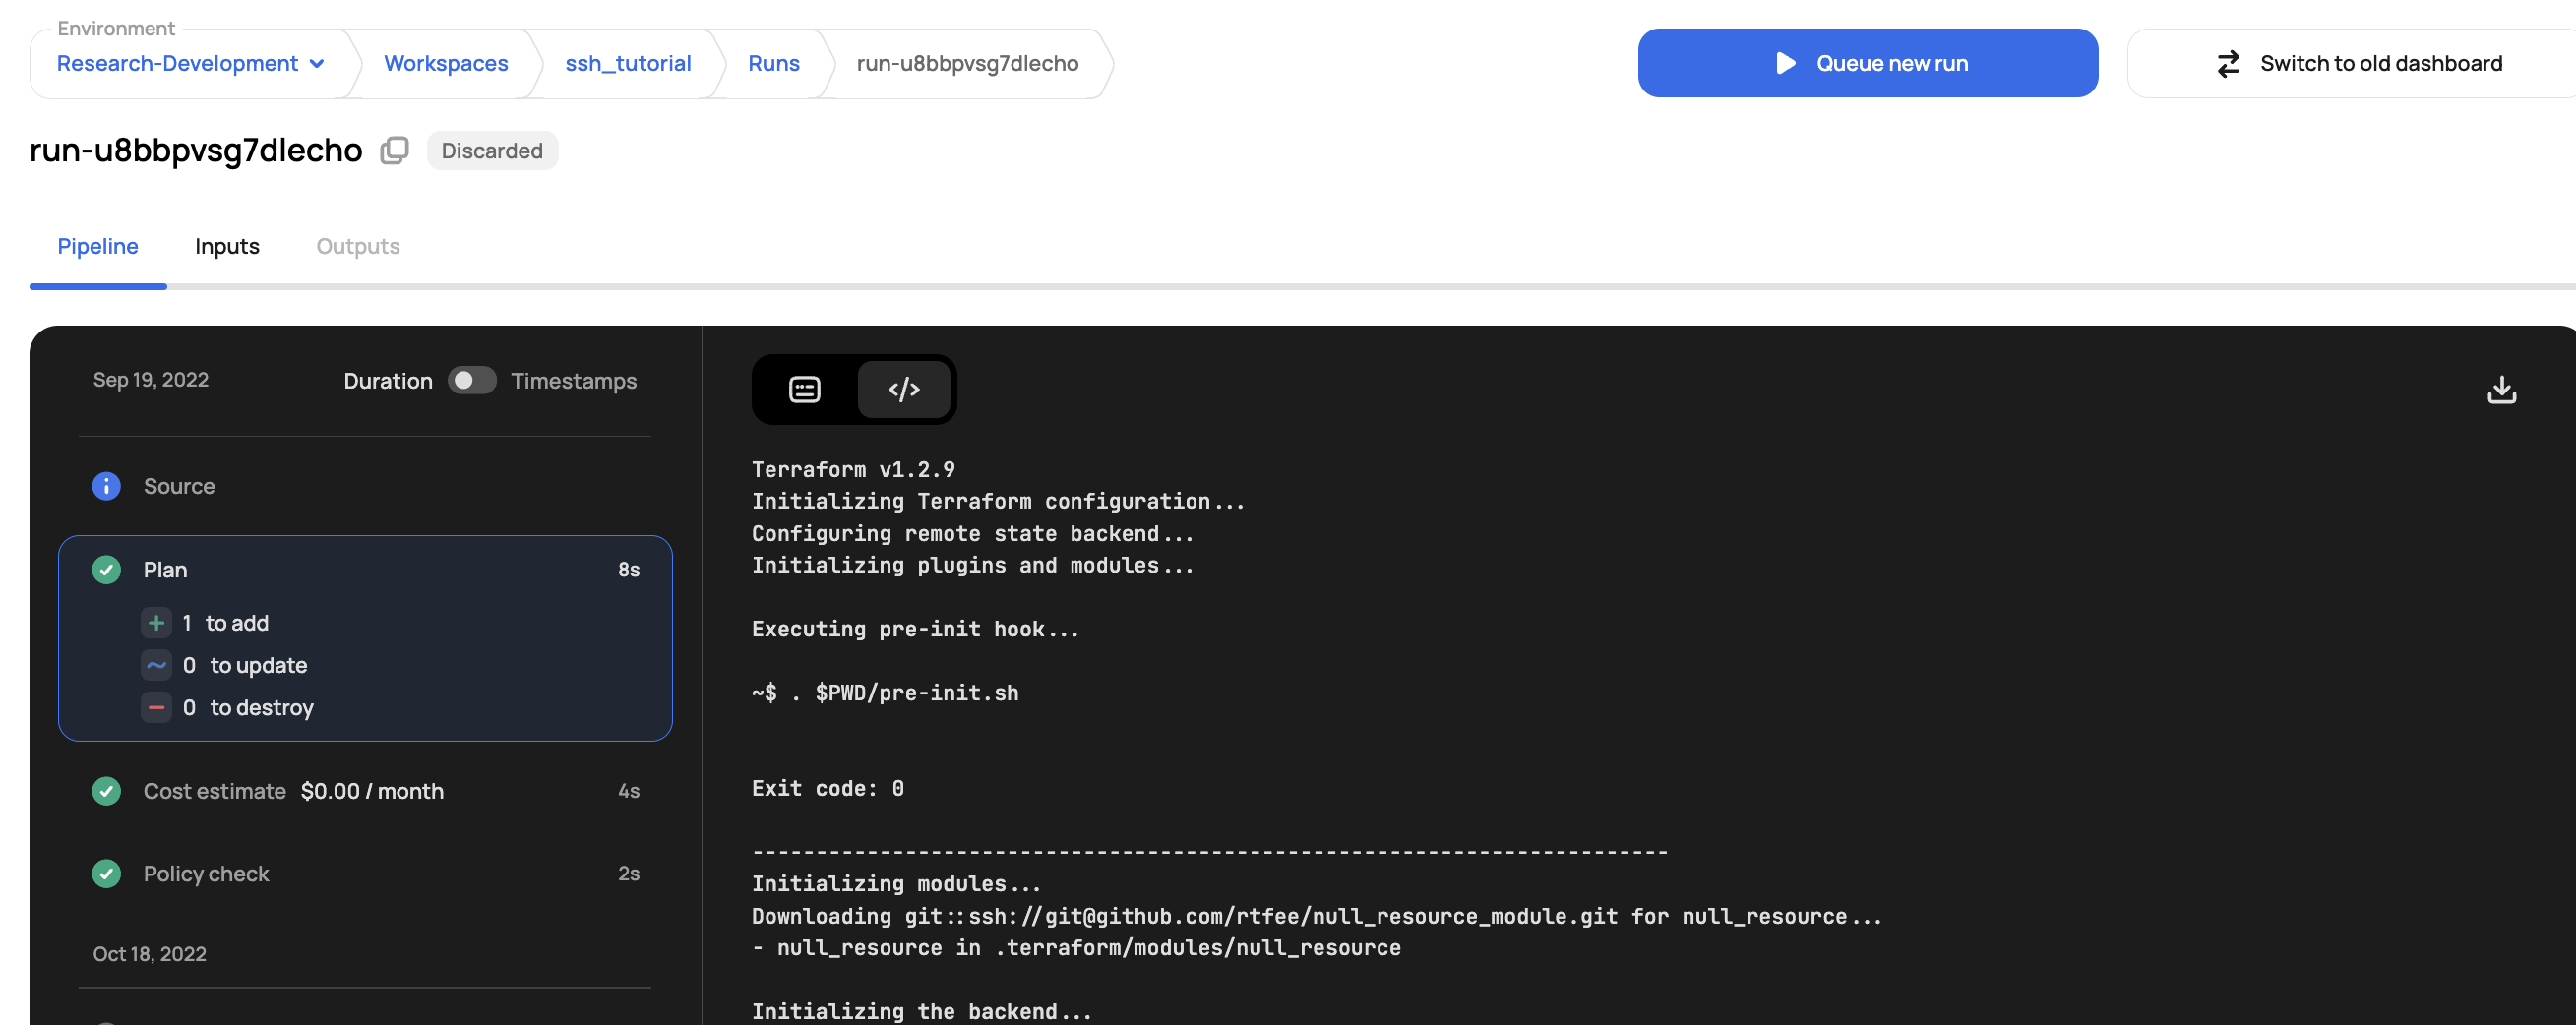
And now execute the run:
Scalr successfully pulls down the module using the SSH protocol you can see in the plan output:
Updated 12 months ago